

- Jeep Cherokee Push Button Start Not Working: Troubleshooting Tips To Get You Back on the Road Fast! - 11 November 2023
- Haval H2 Problems: The Complete Troubleshooting Guide - 11 November 2023
- Gwm P Series Problems: Troubleshooting Guide for Common Issues - 11 November 2023
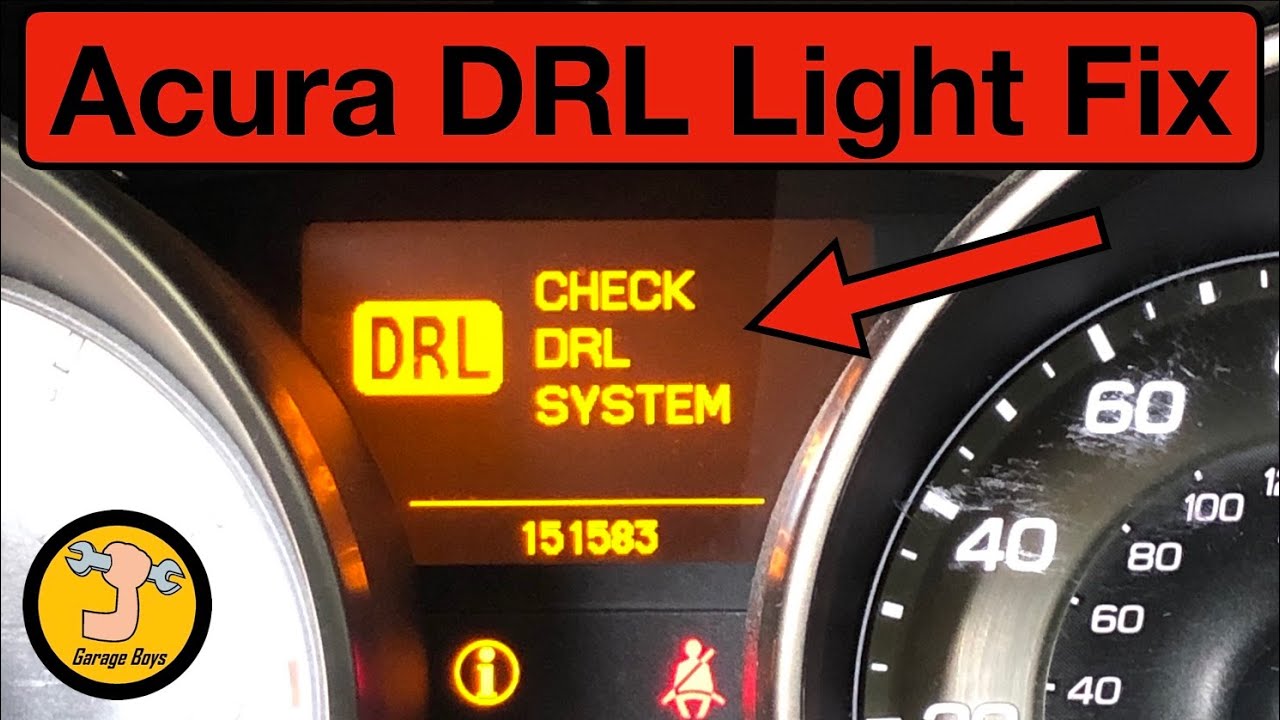
The “Check DRL System” alert in an Acura MDX is typically caused by a malfunction in the Daytime Running Lights (DRL) system. When the DRL system encounters an issue, such as a faulty bulb or wiring problem, the alert is triggered.
Faulty Wiring Or Connectors
When it comes to the Acura MDX’s “Check DRL System” alert, one of the potential causes is faulty wiring or connectors. These electrical components play a crucial role in the proper functioning of the Daytime Running Lights (DRL) system in your Acura MDX. In this section, we will explore two common issues related to faulty wiring or connectors that can trigger the “Check DRL System” alert.
Loose Connections
A common culprit for the “Check DRL System” alert in your Acura MDX is loose connections. Over time, the wiring connections for the DRL system can become loose due to regular wear and tear, improper installation, or vibrations on the road. When the connections are loose, a break in the electrical circuit occurs, disrupting the flow of current to the DRL system. As a result, your Acura MDX’s onboard computer detects the issue and triggers the “Check DRL System” alert.
Damaged Or Frayed Wires
Another potential cause of the “Check DRL System” alert is damaged or frayed wires. Environmental factors, such as extreme temperatures or moisture, can cause the wires to deteriorate over time. Additionally, rodents or other factors can chew or damage the wires, leading to improper electrical conductivity. When the wires are damaged or frayed, it interrupts the proper flow of electricity to the DRL system, triggering the alert in your Acura MDX.
If you come across the “Check DRL System” alert in your Acura MDX, examining the wiring connections and the condition of the wires is a prudent first step. Look for any signs of loose connections, such as disconnected or loosely connected wires. Additionally, inspect the wires for any visible damage or fraying, paying close attention to areas that may be susceptible to wear and tear or exposed to external elements.
- Tighten any loose connections by securely reconnecting the wires.
- If you find damaged or frayed wires, it is advisable to consult a professional technician who can assess the extent of the issue and perform the necessary repairs.
- Remember that faulty wiring or connectors can impair the functionality of your Acura MDX’s DRL system, affecting your safety on the road. Therefore, prompt action is crucial to address these issues and restore the proper operation of the DRL system.
In case you are unsure about identifying or fixing faulty wiring or connectors, it is advisable to seek assistance from a qualified automotive technician. They have the necessary expertise and equipment to diagnose and resolve electrical issues effectively, ensuring the optimal performance of your Acura MDX’s DRL system.
Credit: m.youtube.com
Malfunctioning Headlight Bulbs
One of the common causes behind the “Check DRL System” alert in an Acura MDX is malfunctioning headlight bulbs. Your vehicle’s Daytime Running Lights (DRL) system relies on properly functioning bulbs to provide adequate illumination during the day. When the bulbs start to fail or encounter other issues, it can trigger the alert and indicate a problem with the DRL system. There are two primary reasons why malfunctioning headlight bulbs can lead to this alert: burned-out bulbs and incorrectly installed bulbs.
Burned-out Bulbs
Burned-out bulbs are a common culprit behind the “Check DRL System” alert. Over time, the filaments inside the bulbs can wear out and eventually break, resulting in a complete loss of light output. This can trigger the alert as the DRL system detects the absence of illumination from the bulbs. It’s important to regularly inspect and replace any burned-out bulbs to prevent this issue and maintain optimal visibility on the road.
Incorrectly Installed Bulbs
Another possible cause of the “Check DRL System” alert is incorrectly installed bulbs. If the headlight bulbs are not properly secured or aligned within their sockets, it can disrupt the electrical connection and interfere with the functioning of the DRL system. This can lead to an error detection and prompt the alert. When replacing or installing new bulbs, it’s crucial to follow the manufacturer’s guidelines and ensure they are correctly positioned and fastened to avoid this potential issue.
Defective Light Control Module
The “Check DRL System” alert in your Acura MDX can be triggered by various issues. One of the common culprits behind this warning is a defective light control module. The light control module is an essential component responsible for managing the lighting system in your car.
Faulty Relay
A faulty relay within the light control module can often be the reason behind the “Check DRL System” alert in your Acura MDX. Relays are electrical switches that control the flow of power to different components. When the relay within the light control module becomes faulty, it can disrupt the proper functioning of your DRL system.
Internal Wiring Issues
Another potential cause of the “Check DRL System” alert is internal wiring issues within the light control module. Over time, the wiring connections inside the module can become loose, frayed, or corroded. These issues can lead to irregular power supply to the DRL system and trigger the alert.
Checking The Headlight Bulbs
One of the common causes of the “Check DRL System” alert in Acura MDX is a faulty headlight bulb. When the headlight bulb malfunctions, it can trigger the alert and indicate that there is an issue with the Daytime Running Lights (DRL) system. In this section, we will discuss how to check the headlight bulbs to determine if they are the cause of the alert.
Visual Inspection For Burn Marks Or Damage
Performing a visual inspection is the first step in checking the headlight bulbs. You need to examine the bulbs for any burn marks or physical damage that may indicate a problem. Follow these steps:
- Start by turning off the engine of your Acura MDX and engaging the parking brake.
- Locate the headlight assembly that corresponds to the side displaying the alert.
- Using a clean cloth, carefully remove any dirt or debris that may be present on the lens of the headlight assembly.
- Inspect the bulb for burn marks, discoloration, or any signs of physical damage.
- If you notice any burn marks or damage, the headlight bulb is likely the culprit behind the “Check DRL System” alert and should be replaced.
Testing With A Multimeter For Continuity
If the headlight bulb appears to be visually intact, further testing can be done to ensure continuity. This can be done using a multimeter to check if there is a continuous flow of electricity through the bulb. Here’s how:
- Switch the multimeter to the continuity or resistance setting.
- Remove the headlight bulb from its socket.
- Connect the multimeter leads to the respective terminals of the bulb socket.
- If the multimeter shows zero continuity or a high resistance reading, it indicates that the headlight bulb is faulty and needs to be replaced.
In conclusion, the “Check DRL System” alert in your Acura MDX can often be caused by a problem with the headlight bulbs. By visually inspecting the bulbs for burn marks or damage and testing their continuity with a multimeter, you can identify if the bulbs are the source of the alert. If both visual inspection and continuity testing do not reveal any issues, it is advisable to seek professional help to diagnose and resolve the problem.
Examining The Wiring And Connectors
When it comes to the Acura MDX’s “Check DRL System” alert, one possible cause is faulty wiring and connectors. It is important to examine these components thoroughly to identify any issues that may be triggering the alert. By inspecting the wiring and connectors, you can ensure proper functionality of the Daytime Running Lights (DRL) system and potentially resolve the alert.
Inspecting For Loose Connections Or Corrosion
Loose connections or corrosion in the wiring and connectors can often lead to the activation of the “Check DRL System” alert. To address this, follow these steps:
- Start by visually inspecting the wiring harnesses and connectors for any signs of damage or wear.
- Check for any loose connections by gently tugging on the wires and connectors. If you notice any give or movement, tighten the connections or secure them properly.
- Corrosion can impede the flow of electricity and cause issues with the DRL system. Therefore, carefully examine the connectors for any signs of corrosion, such as greenish deposits or rust. If corrosion is present, it is crucial to clean the affected area using an electrical contact cleaner and a soft brush.
Using A Multimeter To Test For Voltage And Resistance
Another approach to diagnose the “Check DRL System” alert is to employ a multimeter to test the voltage and resistance of the wiring and connectors.
- Set the multimeter to the voltage or resistance setting, depending on what you are testing.
- Connect the red probe to the positive terminal and the black probe to the negative terminal of the wiring or connector.
- Measure the voltage or resistance indicated on the multimeter. Compare the readings to the specifications provided by the manufacturer to determine if they are within the acceptable range.
- If the readings are outside the recommended range, there may be an issue with the wiring or connectors. In such cases, further inspection or repair may be necessary.
Regularly examining the wiring and connectors of the Acura MDX’s DRL system can help you detect and resolve the “Check DRL System” alert. By inspecting for loose connections, corrosion, and utilizing a multimeter for testing voltage and resistance, you can effectively troubleshoot and address the issue at hand.
Assessing The Light Control Module
When it comes to your Acura MDX, it’s essential to understand the different warning lights on your dashboard. One of the warnings you might encounter is the “Check DRL System” alert. This warning indicates an issue with the Daytime Running Lights (DRL) system, which are an important safety feature of your vehicle.
The first step in diagnosing the cause of the “Check DRL System” alert is to assess the light control module. The light control module is responsible for controlling the operation of the DRL system. If there is a malfunction or a fault with this module, it can trigger the warning light on your dashboard.
Testing The Relay Functionality
When inspecting the light control module, it’s crucial to test the relay functionality. The relay is a device that controls the flow of electrical current to the DRL system. If the relay is defective or damaged, it can cause the “Check DRL System” alert. To test the relay, follow these steps:
- Locate the relay in your Acura MDX.
- Carefully remove the relay from its socket, ensuring not to damage the surrounding components.
- Inspect the relay for any signs of corrosion, physical damage, or burnt contacts.
- If the relay appears to be in good condition, use a multimeter to test its functionality. Place the multimeter probes on the appropriate relay pins and measure the resistance or voltage.
- If the resistance or voltage readings are outside the specified range, it indicates a faulty relay that needs replacement.
Inspecting Internal Wiring For Damage Or Loose Connections
In addition to testing the relay, it’s crucial to inspect the internal wiring of the DRL system. Damage or loose connections within the wiring can also trigger the “Check DRL System” alert. To inspect the internal wiring, follow these steps:
- Identify the wiring harness connected to the light control module.
- Carefully examine the wiring harness for any visible signs of damage, such as frayed wires or burned insulation.
- Check that all connections are secure and properly seated. Tighten any loose connections if necessary.
- Ensure that there are no signs of water intrusion or corrosion on the wiring or connectors.
- If any damage or loose connections are found, repair or replace the affected wiring to resolve the “Check DRL System” alert.
By following these steps to assess the light control module, test the relay functionality, and inspect the internal wiring, you can effectively diagnose the cause of the “Check DRL System” alert in your Acura MDX. If you are unsure or uncomfortable performing these steps yourself, it’s recommended to consult a professional automotive technician for assistance.
Testing The Fuse For The Headlights
To diagnose the cause of the “Check DRL System” alert in your Acura MDX, start by testing the fuse for the headlights. This simple step can help identify any issues with the lighting system and possibly resolve the alert.
When the “Check DRL System” alert appears on your Acura MDX, it can be quite concerning. One potential cause of this alert is a faulty fuse in the headlight circuit. To determine if the fuse is to blame, you can test it using a fuse tester or a multimeter. This will help you identify whether the fuse has blown and needs replacement. Read on to learn how to locate the headlight fuse and use a fuse tester or multimeter to check for continuity.
Locating The Headlight Fuse
Before you can test the headlight fuse, you need to locate it in your Acura MDX. The fuse box is often situated in the engine compartment or under the dashboard. Here’s a step-by-step guide to finding the headlight fuse:
- Refer to your vehicle’s owner’s manual to find the exact location of the fuse box.
- If the fuse box is in the engine compartment, open the hood and look for a rectangular or square box with a lid.
- If the fuse box is under the dashboard, check below the steering wheel or near the driver’s side footwell.
- Open the fuse box’s lid by either pressing the tabs or undoing the clips, depending on the design.
- Look for a diagram on the inside of the lid or in the owner’s manual to locate the headlight fuse.
- Identify the specific fuse corresponding to the headlights.
Once you have located the headlight fuse, you can proceed to test it for continuity.
Using A Fuse Tester Or Multimeter To Check For Continuity
To test the headlight fuse, you can use a fuse tester or a multimeter. Both tools will allow you to determine if the fuse is functioning properly. Follow these steps:
- Turn off the ignition and make sure all electrical components related to the headlights are switched off.
- Remove the headlight fuse from its socket by pulling it out gently.
- Insert the fuse tester into the fuse socket or set your multimeter to the continuity setting.
- Touch the two probes of the fuse tester against the metal contacts on the fuse or place the multimeter probes on either end of the fuse.
- If the fuse tester lights up or the multimeter indicates continuity, it means the fuse is in good condition.
- If there is no response from the fuse tester or the multimeter shows no continuity, the fuse has blown and needs to be replaced.
Now that you know how to locate the headlight fuse and test it using a fuse tester or multimeter, you can easily determine if a faulty fuse is causing the “Check DRL System” alert in your Acura MDX. If the fuse is indeed the culprit, replacing it should resolve the issue and ensure your headlights function properly again. However, if the alert persists even after replacing the fuse, it may be wise to consult a professional technician to further diagnose the problem.
Checking The Headlight Switch
When it comes to the Acura MDX, the “Check DRL System” alert can be a cause for concern. This warning message indicates that there may be an issue with the Daytime Running Lights (DRL) system of your vehicle. One of the components that you should check when this alert appears is the headlight switch. The headlight switch plays a crucial role in controlling the lighting mechanisms of your Acura MDX. Testing and inspecting the headlight switch can help determine if it is the cause of the “Check DRL System” alert.
Testing For Proper Functionality
To test the functionality of the headlight switch, follow these steps:
- Start by turning on the ignition of your Acura MDX and ensure that the engine is running.
- Activate the headlights by turning the headlight switch to the “On” position.
- Check if all the exterior lights are functioning properly, including the daytime running lights. Ensure that they are emitting the correct brightness and that there are no flickering or dimming issues.
- If any of the lights are not working as expected or if there are any inconsistencies, it is likely that the headlight switch is faulty and may need to be replaced.
Inspecting for any physical damage or signs of wear
Physical damage or signs of wear on the headlight switch can also cause the “Check DRL System” alert. Here’s how you can inspect for any issues:
- Visually examine the headlight switch for any visible damage, such as cracks, breakages, or loose connections.
- Pay attention to the switch’s buttons or knobs. Ensure they are intact and not loose or falling off.
- Inspect the wiring connected to the headlight switch for any signs of fraying, corrosion, or loose connections.
- If you notice any physical damage or signs of wear, it is recommended to have a professional technician inspect and potentially replace the headlight switch to resolve the “Check DRL System” alert.
By checking the headlight switch for proper functionality and inspecting it for any physical damage or signs of wear, you can narrow down the potential causes of the “Check DRL System” alert on your Acura MDX. However, it’s essential to bear in mind that this alert could also be triggered by other factors, and it’s always best to consult a qualified technician to accurately diagnose and address the issue.
Consulting A Professional Mechanic
In the case of the Acura MDX’s “Check DRL System” alert, it is vital to consult a professional mechanic to properly diagnose and resolve the issue. While troubleshooting the problem on your own can be helpful to a certain extent, seeking expert advice is essential for comprehensive diagnosis and repair options. With their expertise and specialized diagnostic tools, professional mechanics are well-equipped to explain the issue’s underlying causes and potentially resolve it efficiently. Let’s delve into the importance of consulting a professional mechanic and the steps taken prior to seeking expert advice.
Explaining The Issue And Previous Troubleshooting Steps Taken
Before consulting a professional mechanic, it is crucial to understand the issue and the steps you have taken to address it. The “Check DRL System” alert primarily indicates a malfunction in the MDX’s Daytime Running Lights system. This system plays a crucial role in enhancing visibility during daylight hours, increasing safety on the road.
If you have encountered this alert, you may have already attempted some troubleshooting steps to rectify the issue. Commonly, drivers would check the DRL fuse, inspect the wiring for any visible damage or loose connections, and ensuring proper bulb functionality. While these basic troubleshooting steps can resolve simple issues, there are instances where a deeper problem could be at play, necessitating consultation with a professional mechanic.
Seeking Expert Advice For Further Diagnosis And Repair Options
When the basic troubleshooting steps fail to resolve the “Check DRL System” alert, it is best to consult a professional mechanic for further diagnosis and accurate repair options. A professional mechanic possesses an in-depth understanding of the Acura MDX’s electrical and lighting systems, allowing them to delve into more advanced diagnostic procedures.
During the consultation, the professional mechanic will thoroughly examine your MDX, utilizing specialized diagnostic tools to identify the exact cause of the issue. They will inspect the wiring harness, connectors, control module, and any other components related to the Daytime Running Lights system. By doing so, they can pinpoint the root cause of the alert and propose the most effective repair options.
Once the issue is fully diagnosed, the professional mechanic will discuss the repair options with you. They may recommend replacing faulty wiring, repairing the control module, or replacing damaged components. They will also provide an estimated cost for the repairs and advise you on the urgency of the issue to help you make an informed decision.
Overall, consulting a professional mechanic not only ensures a thorough diagnosis and accurate repair options for your Acura MDX’s “Check DRL System” alert but also saves you time and potentially prevents further damage. With their expertise and access to advanced tools, they can efficiently resolve the issue and get you back on the road safely.
Frequently Asked Questions Of What Causes Acura Mdx’s “check Drl System” Alert?
Q: What Does The “check Drl System” Alert Mean In An Acura Mdx?
A: The “Check DRL system” alert indicates a problem with the Daytime Running Lights system in your Acura MDX.
Q: Why Is The “check Drl System” Alert Coming On In My Acura Mdx?
A: The “Check DRL system” alert can come on due to a faulty light bulb, a wiring issue, or a malfunctioning sensor.
Q: Can I Continue Driving With The “check Drl System” Alert On?
A: While you can still drive with the alert on, it’s important to get it checked as soon as possible to ensure your safety on the road.
Q: How Can I Fix The “check Drl System” Alert In My Acura Mdx?
A: To fix the “Check DRL system” alert, you may need to replace a faulty light bulb, repair any wiring issues, or have a professional diagnose and fix the problem.
Q: Is It Possible To Prevent The “check Drl System” Alert From Appearing?
A: While some issues are unavoidable, regular maintenance and inspections can help prevent the “Check DRL system” alert from appearing.
Conclusion
To sum up, the “Check DRL System” alert in the Acura MDX can be triggered by various factors. From a burnt-out bulb to a faulty control module, it’s crucial to address the issue promptly to avoid compromised safety. By understanding the potential causes and seeking professional assistance, MDX owners can ensure their vehicle continues to operate smoothly and securely.
Stay proactive and stay safe on the road!
