

- Jeep Cherokee Push Button Start Not Working: Troubleshooting Tips To Get You Back on the Road Fast! - 11 November 2023
- Haval H2 Problems: The Complete Troubleshooting Guide - 11 November 2023
- Gwm P Series Problems: Troubleshooting Guide for Common Issues - 11 November 2023
Diy car repair tips can help you save money and maintain your vehicle’s performance. With simple steps and tools, you can tackle common car issues at home.
Introducing DIY car repair tips, an essential guide to saving money and keeping your vehicle running smoothly. Whether you’re a novice or an experienced car owner, these tips will equip you with the knowledge and confidence to handle common car issues on your own.
Not only will you save money on expensive repair bills, but you’ll also enjoy the satisfaction of fixing your car yourself. From changing a flat tire to troubleshooting engine problems, this comprehensive guide will walk you through each step with clear instructions and helpful illustrations. So, grab your toolbox, put on your gloves, and get ready to become a DIY car repair expert.

Credit: www.pcmag.com
1. Essential Tools For Diy Car Repairs
When it comes to DIY car repairs, having the right tools is crucial. You don’t want to find yourself stranded in the middle of a repair job without the necessary equipment. In this section, we will cover the essential tools that every DIYer should have in their arsenal. From basic toolkits to specialized diagnostic devices, we’ve got you covered.
H3basic Toolkit/h3
A basic toolkit is the foundation of any DIY car repair project. It includes a range of essential tools that you will use for various tasks. Here are some items that should be a part of your basic toolkit:
- A set of screwdrivers, including both flathead and Phillips-head screwdrivers, to tackle different types of screws
- A set of wrenches, including both open-end and adjustable wrenches, for loosening and tightening bolts and nuts
- A socket set with different sizes, along with a ratchet, for removing and installing fasteners
- Pliers, including regular pliers and needle-nose pliers, for gripping, bending, and cutting wires
- A rubber mallet or a hammer, for knocking components into place
- A flashlight, for illuminating hard-to-reach areas during repairs
H3jack And Jack Stands/h3
When it comes to working underneath your car, safety should be a top priority. A reliable jack and jack stands will ensure stability and prevent accidents. Here’s why you need them:
- A hydraulic floor jack, capable of lifting your vehicle, is essential for tasks like changing tires or inspecting the undercarriage
- Jack stands are used to support the elevated vehicle and provide stability, allowing you to work safely
- Always consult your vehicle’s manual for the proper jacking points and ensure the jack stands are positioned correctly
H3multimeter/h3
A multimeter is a versatile tool that measures multiple electrical properties. It is essential for diagnosing and troubleshooting electrical issues in your vehicle. Here’s why a multimeter is an indispensable tool for DIY car repairs:
- It can measure voltage, current, and resistance, allowing you to test the electrical systems and components in your car
- You can use it to check the battery voltage, test fuses, analyze wiring problems, and much more
- Make sure to select the appropriate settings on the multimeter for accurate readings
H3obd-ii Scanner/h3
Modern vehicles are equipped with an onboard diagnostics system that monitors various aspects of the car’s performance. An OBD-II scanner is a diagnostic device that can read these codes and provide valuable information about any issues present. Here’s why an OBD-II scanner is a must-have tool:
- It can read diagnostic trouble codes (DTCs) stored in your vehicle’s computer, helping you identify the root cause of a problem
- You can use it to reset certain codes, clear the check engine light, and perform other diagnostics
- Ensure that the OBD-II scanner is compatible with your vehicle’s make, model, and year
H3oil Filter Wrench/h3
Changing the oil filter is a routine maintenance task that every car owner should be familiar with. An oil filter wrench makes this job much easier. Here’s why you should have one in your toolkit:
- It allows you to remove and install oil filters with ease, saving you time and effort
- Oil filter wrenches come in various sizes and types, so make sure to choose one that fits your specific filter
- Remember to follow the manufacturer’s instructions for proper oil filter replacement
2. Diagnosing Common Car Problems
Knowing how to diagnose common car problems can save you a lot of time, effort, and money. By identifying the root cause of any issues, you can determine whether it’s something you can handle yourself or if it requires professional help. In this section, we will explore some of the most common car problems and provide you with DIY tips for diagnosing them.
Identifying Strange Noises
If your car is making strange noises, it’s crucial to identify the source as it could be an early indication of a more significant problem. Here are some common strange noises you may encounter:
- Rattling: This could indicate loose components in your exhaust system.
- Squealing: Often caused by worn-out belts or brakes.
- Knocking: Could be a sign of engine problems such as a worn-out connecting rod.
- Hissing: Usually related to issues with your cooling system or air conditioning.
To identify the source of these strange noises, it’s essential to pay attention to when the noises occur, whether they are constant or intermittent, and where they seem to be coming from. Once you have identified the specific noise, you can research DIY solutions or consult a repair manual for guidance.
Troubleshooting Engine Issues
When your car experiences engine issues, it can be frustrating and worrisome. However, with some basic knowledge, you can troubleshoot and diagnose certain problems on your own. Here are a few common engine issues and their possible causes:
| Issue | Cause |
|---|---|
| Engine misfire | Problems with spark plugs, fuel injectors, or ignition system. |
| Overheating | Low coolant levels, faulty radiator, or broken water pump. |
| Loss of power | Clogged air filter, fuel delivery issues, or exhaust system problems. |
If you are experiencing any of these issues, you can start by visually inspecting the affected components, checking for loose connections, or examining for signs of damage. If the problem persists, it might be necessary to consult a mechanic.
Diagnosing Electrical Problems
Electrical problems can cause a variety of issues in your car, including malfunctioning lights, power window failure, or even starting problems. Here are a few steps to help diagnose electrical problems:
- Check the fuses: A blown fuse can be a common cause of electrical issues. Inspect the fuse box and replace any blown fuses.
- Inspect the battery: Ensure that the battery terminals are clean and securely attached. Use a multimeter to test the battery’s voltage.
- Investigate wiring connections: Loose or faulty wiring connections can disrupt electrical flow. Examine wiring harnesses and connectors for any signs of damage or loose connections.
If these steps do not resolve the electrical issue, it may be best to seek professional assistance from an auto electrician.
Understanding Warning Lights
Modern cars are equipped with warning lights on the dashboard to alert you of potential problems. It’s essential to understand what these warning lights mean to take appropriate action. Here are a few common warning lights and their indications:
- Check Engine Light: This light can indicate a wide range of issues, from a loose gas cap to more serious engine problems.
- Battery Light: Usually indicates a problem with the charging system or a weak battery.
- ABS Light: Alerts you to potential issues with the Anti-lock Braking System.
- Oil Pressure Light: Indicates low oil pressure, which can lead to engine damage if left unaddressed.
When a warning light illuminates, it’s essential to consult your car’s manual to understand the specific problem. In some cases, a simple fix like tightening the gas cap or adding oil may resolve the issue. However, if the problem persists, it’s best to seek professional help.
Checking For Fluid Leaks
Fluid leaks can be indicative of various car problems and should never be ignored. Here are a few common fluids that might leak and their possible causes:
- Engine Oil: Leaks can occur due to a loose oil filter or a faulty gasket.
- Transmission Fluid: Leaking transmission fluid may indicate a damaged seal or a faulty transmission pan.
- Coolant: A coolant leak could be a sign of a damaged radiator or a malfunctioning hose.
- Brake Fluid: Brake fluid leaks are often caused by worn-out brake lines or a damaged master cylinder.
When checking for fluid leaks, it’s important to visually inspect the affected areas, such as the engine compartment, underneath the car, or near the wheels. If you notice any leaks, it’s advisable to consult a mechanic for proper diagnosis and repair.
3. Diy Car Maintenance
As a car owner, it’s important to take the necessary steps to properly maintain your vehicle. By investing a little time and effort in DIY car maintenance, you can save money on expensive repairs and ensure that your vehicle runs smoothly for years to come. In this section, we will explore a few essential DIY car maintenance tasks that every car owner should know.
Changing Engine Oil And Filters
Regularly changing your engine oil and filters is crucial for maintaining the performance and longevity of your vehicle. Over time, engine oil becomes contaminated with dirt and debris, which can decrease its effectiveness in lubricating moving parts. To change the engine oil and filters:
- Start by locating the oil drain plug underneath your car and place an oil pan beneath it.
- Remove the drain plug and allow the old oil to drain completely.
- Once the oil has drained, locate the oil filter and use an oil filter wrench to remove it.
- Apply a thin layer of fresh oil to the rubber gasket of the new oil filter, then install the new filter.
- Tighten the filter by hand, ensuring it is sealed properly.
- Replace the drain plug and pour in the recommended amount of new oil.
- After completing these steps, start your engine and check for any leaks.
Replacing Air Filters
Air filters play a crucial role in keeping your car’s engine clean and preventing dirt and debris from entering. Over time, air filters can become clogged, reducing airflow and diminishing engine performance. To replace the air filters:
- Start by locating the air filter housing, usually located near the engine.
- Remove the cover of the air filter housing, taking note of any clips or screws.
- Take out the old air filter and inspect it for dirt and debris.
- If necessary, use a vacuum or compressed air to remove any excess dirt.
- Insert a new air filter into the housing, ensuring it fits properly.
- Replace the cover and secure it with the clips or screws.
Inspecting And Replacing Spark Plugs
Spark plugs are essential for the ignition of fuel and air mixture in your car’s engine. Over time, spark plugs can become worn or dirty, leading to misfires and decreased fuel efficiency. To inspect and replace spark plugs:
- Locate the spark plug wires or coils, usually attached to the top of the engine.
- Remove one wire or coil at a time by firmly pulling it straight out.
- Use a spark plug socket and ratchet to remove the old spark plug.
- Inspect the spark plug for any signs of wear, such as fouling or erosion.
- If necessary, replace the old spark plug with a new one of the same type and gap.
- Hand-tighten the new spark plug, then use the socket and ratchet to secure it.
- Reattach the spark plug wire or coil, ensuring it snaps into place.
Checking And Topping Up Fluids
Regularly checking and topping up fluids is essential for the proper functioning of your car’s various systems. The most important fluids to check include:
- Engine oil
- Coolant
- Transmission fluid
- Brake fluid
- Power steering fluid
- Windshield washer fluid
- Locate the respective fluid reservoirs under your car’s hood.
- Refer to your car’s owner manual to identify the correct fluid levels.
- If a fluid is low, remove the cap and add the appropriate fluid, ensuring not to overfill.
- Use a dipstick or fluid level indicator to verify the correct level, if applicable.
- Securely replace the cap and check for any leaks.
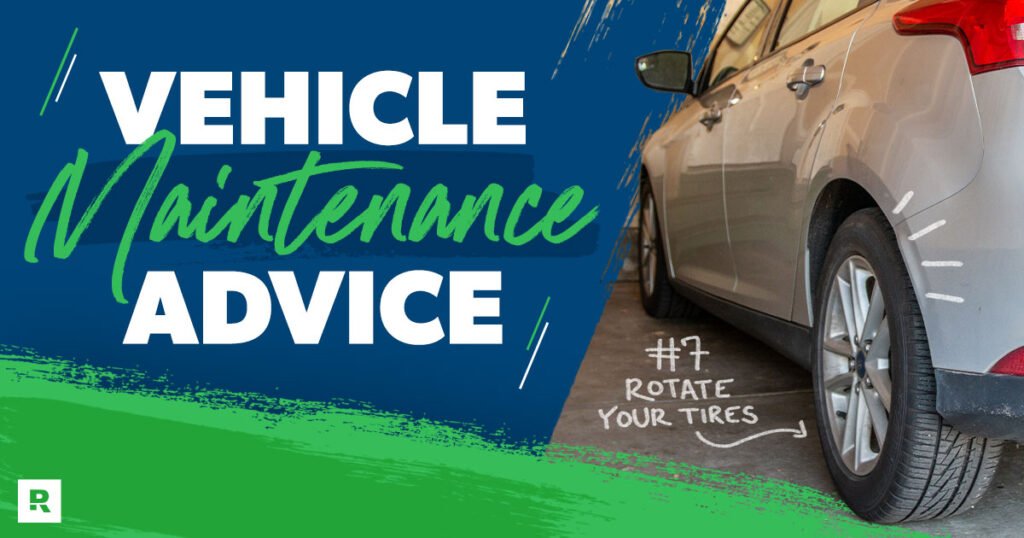
Rotating Tires And Checking Tire Pressure
Regularly rotating your tires can help promote even wear and extend their lifespan. Additionally, maintaining the correct tire pressure is crucial for safety and fuel efficiency. To rotate tires and check tire pressure:
- Using a jack, lift one side of the vehicle at a time.
- Remove the wheels and rotate them according to the recommended pattern.
- Tighten the wheel lug nuts to the manufacturer’s specifications.
- Using a tire pressure gauge, check the pressure of each tire.
- If the pressure is too low, add air until it reaches the recommended level.
- After rotating and adjusting the pressure, lower the vehicle and repeat the process for the other side.
4. Easy Diy Car Repairs
As a car owner, knowing some basic DIY car repairs can save you time and money. While major repairs may require professional help, there are a few easy fixes that you can handle on your own. Here are four common car repairs that you can easily tackle without needing extensive mechanical knowledge or expensive tools.
Changing A Flat Tire
Flat tires can happen at any time, and being able to change it yourself can be a lifesaver. Follow these simple steps to change a flat tire:
- Find a safe, level spot to park your car and engage the parking brake.
- Locate the spare tire, jack, and lug wrench in your trunk.
- Loosen the lug nuts with the lug wrench, but don’t remove them yet.
- Position the jack beneath your car’s frame and raise the vehicle until the flat tire is off the ground.
- Finish removing the lug nuts and take off the flat tire.
- Mount the spare tire onto the wheel studs and hand-tighten the lug nuts.
- Lower the car to the ground and tighten the lug nuts using the lug wrench.
- Double-check that all lug nuts are properly tightened.
Replacing A Dead Battery
If your car won’t start due to a dead battery, you can easily replace it with these steps:
- Turn off the ignition and put on safety gloves and goggles.
- Locate the battery and identify the positive and negative terminals.
- Loosen the negative terminal clamp first, then the positive terminal clamp, and remove them from the battery.
- Remove the old battery and place the new one in the same position.
- Attach the positive terminal clamp to the positive battery post and tighten it securely.
- Attach the negative terminal clamp to the negative battery post and tighten it securely.
- Double-check that both terminal clamps are tight and secure.
Changing Brake Pads
Worn brake pads need to be replaced to ensure your car’s safety. Follow these steps to change the brake pads:
- Loosen the lug nuts on the wheel with the flat tire using a lug wrench.
- Jack up the car and remove the wheel.
- Locate the brake caliper and remove the bolts or clips holding it in place.
- Take off the old brake pads and insert the new ones in the same position.
- Reinstall the brake caliper and secure it with the bolts or clips.
- Put the wheel back on and hand-tighten the lug nuts.
- Lower the car to the ground and tighten the lug nuts with the lug wrench.
- Double-check that all lug nuts are properly tightened.
Replacing A Broken Headlight Or Taillight
A broken headlight or taillight not only impairs visibility but also poses a safety hazard. Here’s how you can replace it:
- Identify the location of the broken headlight or taillight.
- Access the bulb socket behind the light assembly.
- Twist the socket counterclockwise to remove it from the assembly.
- Remove the old bulb from the socket and insert the new one.
- Insert the socket back into the assembly and twist it clockwise to secure it.
- Test the new headlight or taillight to ensure it is working correctly.
5. Advanced Diy Car Repairs
When it comes to taking care of your car, sometimes it’s necessary to go beyond the basics and tackle more advanced repairs on your own. With a little knowledge and the right tools, you can save money and gain a sense of accomplishment by successfully completing these advanced DIY car repairs. In this section, we will walk you through the step-by-step process of replacing the alternator, changing the serpentine belt, replacing the radiator, repairing a faulty starter motor, and fixing a damaged exhaust system.
Replacing The Alternator
The alternator is a vital component of your car’s electrical system. It charges the battery while the engine is running and powers the electrical devices in your vehicle. If your alternator fails, it’s important to replace it as soon as possible to avoid a dead battery and other electrical issues.
- Disconnect the negative battery cable.
- Remove the serpentine belt.
- Disconnect the electrical connections from the alternator.
- Remove the mounting bolts and extract the old alternator.
- Install the new alternator and reconnect the electrical connections.
- Reinstall the serpentine belt and reconnect the negative battery cable.
Changing The Serpentine Belt
The serpentine belt powers many of your car’s essential components, such as the alternator, power steering pump, and air conditioning compressor. Over time, the belt may wear out or become damaged, leading to poor performance or even complete failure. Knowing how to change the serpentine belt can save you a trip to the mechanic.
- Locate the belt tensioner and release the tension by using a wrench or a specialized tool.
- Slip the belt off the pulleys, making note of the routing.
- Install the new belt, following the correct routing.
- Use the tensioner tool to apply tension to the belt and verify proper alignment.
Replacing The Radiator
The radiator is crucial for keeping your engine cool by dissipating heat from the coolant. If your radiator becomes damaged or develops leaks, it’s crucial to replace it promptly to prevent engine overheating and potential damage.
- Drain the coolant by opening the radiator drain valve.
- Disconnect the hoses and electrical connections from the radiator.
- Remove the mounting bolts and carefully extract the old radiator.
- Install the new radiator and reconnect the hoses and electrical connections.
- Refill the coolant and check for any leaks.
Repairing A Faulty Starter Motor
The starter motor is responsible for initiating the engine’s combustion process. Over time, the starter motor can wear out or become faulty, resulting in difficulties starting your car. Learning how to repair a faulty starter motor can save you time and money.
- Disconnect the negative battery cable.
- Locate the starter motor and remove it from the vehicle.
- Disassemble the starter motor and inspect the components for any damage or wear.
- Replace any faulty or worn parts.
- Reassemble the starter motor and reinstall it in the vehicle.
- Reconnect the negative battery cable.
Fixing A Damaged Exhaust System
A damaged exhaust system can result in decreased performance, loud noises, and potential safety hazards. While it may seem daunting, fixing a damaged exhaust system is manageable with the right tools and a systematic approach.
- Safely elevate the vehicle using jack stands.
- Inspect the exhaust system for any visible damage, such as cracks or holes.
- If necessary, remove the damaged section of the exhaust pipe or muffler.
- Replace the damaged component with a new one.
- Secure the new component in place using clamps or welding, ensuring a proper seal.
- Lower the vehicle and test the exhaust system for leaks or abnormal noises.
Frequently Asked Questions On Diy Car Repair Tips
How Can I Repair My Car’s Dents Myself?
You can repair small dents by using boiling water or a hair dryer to pop them out. Sand and repaint larger dents.
What Are Some Common Diy Car Repairs?
Common DIY car repairs include changing the oil, replacing spark plugs, changing the air filter, and replacing a broken tail light.
How Can I Fix A Car Scratch At Home?
You can fix a small car scratch by using toothpaste or a DIY paint touch-up kit. For larger scratches, professional repairs may be necessary.
How Do I Change A Flat Tire On My Car?
To change a flat tire, park on a flat surface, loosen the lug nuts, jack up the car, remove the flat tire, and replace it with a spare tire.
What Tools Do I Need For Basic Car Repairs?
Basic car repair tools include a wrench set, socket set, screwdrivers, pliers, jack stands, and a tire iron.
Conclusion
To wrap it up, these DIY car repair tips offer a cost-effective and convenient solution for maintaining and fixing your vehicle. By following these simple steps, you can save time and money, while also improving your car’s performance and longevity.
Remember to prioritize safety, use the right tools, and consult professional help when needed. With DIY car repairs, you’ll gain valuable knowledge and enhance your mechanical skills, empowering you to take control of your vehicle’s maintenance. Happy repairing!
