carinsiderhub.com

Car Wheels & Tire Care

Difference between a 60 And 65 Series Tire

Unraveling the Mystery: 60 vs 65 Series Tires

A 60 series tire has a sidewall height that is 60% of its width, while a 65 series tire has a sidewall height that is 65% of its width. The difference between a 60 and 65 series tire lies in their sidewall heights relative to the tire width. Tire sizes can be confusing, especially with the various numbers and letters involved. Understanding the difference between tire series can help you make informed decisions when it comes to choosing the right tires for your vehicle. We will explain the distinction between a 60 and 65 series tire, shedding light on their sidewall heights and how it affects your driving experience. By the end, you will have a clearer understanding of these tire measurements and their implications for your vehicle’s performance. Understanding Tire Sizes Different Types Of Tire Sizes Tire sizes can be complex and confusing if you don’t know what all the numbers and letters mean. There are different systems used to measure and categorize tire sizes, such as the metric sizing system, numeric sizing system, and alpha-numeric sizing system. Let’s take a closer look at each. Metric Sizing System In the metric sizing system, tire sizes are expressed in millimeters for both width and height of the tire. The width is the measurement from one sidewall to the other, while the height is the measurement from the edge of the rim to the top of the tire. For example, if you see a tire size of 225/50R17, it means that the tire has a width of 225 millimeters, a height that is 50% of the width, and is designed to fit a 17-inch rim. Numeric Sizing System The numeric sizing system uses a series of numbers to indicate the width and diameter of the tire. The width is expressed in millimeters, while the diameter is given in inches. For instance, if you come across a tire size of 235/45-18, it means that the tire is 235 millimeters wide, has a sidewall that is 45% of the width, and is designed to fit an 18-inch rim. Alpha-numeric Sizing System The alpha-numeric sizing system uses a combination of letters and numbers to convey various measurements of the tire. The first letter represents the tire’s section width, while the following numbers denote the aspect ratio. The final letter indicates the tire’s construction and maximum speed rating. For example, a tire size of P215/60R16 means that it is a passenger vehicle tire with a section width of 215 millimeters, an aspect ratio of 60%, and designed for a 16-inch rim. It’s important to note that the different sizing systems can make it difficult to determine the exact size comparison between a 60 and 65 series tire. However, understanding the basics of these sizing systems will help you make an informed decision about which tire size is right for your vehicle. Exploring The 60 Series Tires When it comes to choosing the right tire for your vehicle, understanding the differences between various tire sizes is essential. In this article, we will be exploring the 60 series tires, focusing on their characteristics, aspect ratio, benefits, drawbacks, and popular uses. Whether you are driving a performance-oriented vehicle or using it for everyday driving, the 60 series tires have unique features that set them apart. Characteristics Of 60 Series Tires The 60 series tires are a popular choice among drivers who prefer a balance between performance and comfort. These tires have an aspect ratio of 60, which means that the sidewall height is 60% of the tire’s width. This aspect ratio gives the tire a relatively taller sidewall compared to low-profile tires, offering a smoother ride and better absorption of impact from road irregularities. Additionally, 60 series tires provide excellent traction on various road surfaces due to their wider and more flexible tread pattern. This allows for better grip and stability, especially in wet and snowy conditions. The softer sidewalls of these tires also contribute to improved cornering ability, making them a suitable choice for drivers who enjoy spirited driving. Aspect Ratio And Its Impact On Tire Performance The aspect ratio of a tire plays a crucial role in its performance and overall driving experience. In the case of 60 series tires, the higher aspect ratio results in a taller sidewall, enhancing ride comfort by absorbing more shocks and reducing road noise. This makes these tires an ideal option for everyday driving, providing a smoother and more cushioned ride. However, it’s important to note that the higher aspect ratio also leads to a slightly reduced responsiveness during quick maneuvers or aggressive driving. The increased sidewall flex can cause the tire to feel less precise in its handling compared to lower aspect ratio tires. Nevertheless, for most drivers, the benefits of comfort outweigh the minor trade-off in responsiveness. Benefits And Drawbacks Of 60 Series Tires The 60 series tires offer several benefits that make them a popular choice among different types of drivers. These benefits include: Superior ride comfort and reduced road noise Enhanced traction and stability in various weather conditions Improved cornering ability and grip However, it’s important to consider the drawbacks as well: Slightly reduced handling precision and responsiveness during aggressive driving Potentially increased fuel consumption due to higher rolling resistance Despite these drawbacks, the 60 series tires offer a balance of performance and comfort that make them a suitable option for many drivers. Popular Uses For 60 Series Tires Below are some of the popular uses for 60 series tires: Usage Vehicle Type Everyday Driving Sedans, SUVs, and hatchbacks Family Vehicles Crossovers and minivans Grand Tourers Luxury and performance-oriented sedans These tire sizes provide the perfect balance between comfort and performance, making them versatile for various vehicle types and driving styles. Performance-oriented Vehicles For drivers of performance-oriented vehicles who prioritize handling and responsiveness, a lower aspect ratio tire, such as a 65 series tire, may be a more suitable choice. The lower sidewall height improves cornering abilities and offers enhanced precision during aggressive driving maneuvers.

Unraveling the Mystery: 60 vs 65 Series Tires Read More »

Quick Fix: How to Fix a Metal or Plastic Bumper With Hot Water!

To fix a metal or plastic bumper with hot water, carefully pour the water over the dent to heat up the metal and allow it to flex back into its original shape. If the bumper is plastic, push the dent out from behind after pouring the hot water over it, avoiding pressing the dent out of metal like you would for a plastic bumper. Introduction To Using Hot Water For Bumper Repair When it comes to fixing dents on metal or plastic bumpers, using hot water might not be the first method that comes to mind. However, this simple and effective technique has gained popularity among do-it-yourself enthusiasts and professionals alike. By utilizing the power of hot water, you can effectively reshape and remove dents from your bumper, restoring it to its original condition. In this section, we will explore the explanation of the method’s effectiveness and the benefits of using hot water for bumper repair. Explanation Of The Method’s Effectiveness The method of fixing a metal or plastic bumper with hot water relies on the principle of thermal expansion. Metal and plastic are both materials that expand when exposed to heat. By pouring hot water over the surface of the dent, the heat causes the molecules in the material to move faster, leading to expansion. This expansion allows the metal bumper to flex and return to its original shape, while in the case of a plastic bumper, it provides the opportunity to push the dent out from behind. It’s important to note that for metal bumpers, avoid pressing the dent out like you would for a plastic bumper. Benefits Of Using Hot Water For Bumper Repair Using hot water for bumper repair offers several advantages: Cost-effective: Using hot water is an inexpensive method for fixing dents on metal or plastic bumpers, eliminating the need for costly repairs or professional services. Time-saving: Compared to other repair methods, using hot water allows you to fix minor dents quickly and easily. Non-invasive: Unlike traditional repair techniques that may involve drilling, sanding, or using chemicals, hot water repair is non-invasive and does not damage the surface of the bumper. User-friendly: This DIY method is accessible to anyone, even those without experience in car repairs. All you need is hot water and a few basic tools. Overall, using hot water for bumper repair offers a simple and effective solution for removing dents from metal or plastic bumpers. With its cost-saving and time-saving advantages, it’s no wonder why this method has become increasingly popular among car enthusiasts. Step 1: Preparing The Bumper For Hot Water Treatment To fix a metal or plastic bumper using hot water, pour the water over the dent to heat up the metal. If the bumper is plastic, push the dent out from behind after pouring the hot water. Avoid pressing the dent out of metal like you would for a plastic bumper. Before you begin the hot water treatment to fix a metal or plastic bumper, it is important to properly prepare the bumper. This step involves assessing the damage and cleaning the bumper before proceeding with the repair. Assessing The Damage Start by carefully examining the bumper to determine the extent of the damage. Look for any visible dents, scratches, or cracks that need to be addressed. Take note of the size and location of the dent, as this will help you determine the amount of hot water needed and the best technique to use. Cleaning The Bumper Before Repair Once you have assessed the damage, it is crucial to clean the bumper thoroughly before proceeding with the repair process. Use a mild soap or automotive cleaner and a soft cloth or sponge to clean the surface of the bumper. Make sure to remove any dirt, debris, or wax residue that may be present. TIP: If the bumper is particularly dirty or has stubborn stains, you can use a plastic-safe degreaser or adhesive remover to ensure a clean surface for the repair. After cleaning the bumper, rinse it with water to remove any cleaning residue. Allow the bumper to dry completely before moving on to the next step. TIP: To expedite the drying process, you can use a microfiber cloth or towel to gently dry the surface, ensuring that there is no moisture left behind. IMPORTANT: Before proceeding with the repair, make sure that the bumper is completely dry. Any moisture on the surface can interfere with the hot water treatment and compromise the effectiveness of the repair process. By properly assessing the damage and cleaning the bumper, you are now ready to move on to the next step of the hot water treatment process. Stay tuned for the next section to learn how to apply hot water to fix the dent in your metal or plastic bumper. Step 2: Applying Hot Water To The Metal Bumper To fix a metal or plastic bumper using hot water, carefully pour the water over the dent to heat up the metal or plastic. Then, allow the material to flex and return to its original shape. For plastic bumpers, also push the dent out from behind after pouring the hot water. Avoid pressing the dent out of a metal bumper like you would for a plastic one. This method is effective in restoring the shape of the bumper. Step 2: Applying Hot Water to the Metal Bumper Now that you have heated up the water, it’s time to proceed with fixing the metal bumper. Applying hot water to the dent will allow the metal to flex and return to its original shape. This technique is especially effective for soft dents without sharp creases or edges. Follow these steps to properly heat up the metal and restore your bumper: 1. Carefully pour the hot water over the surface of the dent, ensuring that it covers the entire affected area. Use caution to avoid any burns or splashing. 2. Start from the center of the dent and gradually move outward, making sure the

Quick Fix: How to Fix a Metal or Plastic Bumper With Hot Water! Read More »

How To Remove a Broken Bolt

How To Remove a Broken Bolt: An Expert Guide to Extracting Stubborn Bolts

To remove a broken bolt, first drill a hole in the center of it and use a bolt extractor to unscrew it or apply heat around the bolt hole. This method helps to loosen and remove the broken bolt effectively. Overview Of Broken Bolt Removal Methods When it comes to removing broken bolts, it is important to prioritize safety and efficiency. Leaving a broken bolt in place can cause further damage or lead to costly repairs. Additionally, removing a broken bolt in a safe and efficient manner ensures that you can proceed with your project without unnecessary delays or setbacks. There are several methods that can be employed to remove a broken bolt, depending on the specific circumstances and accessibility. Each method has its own advantages and considerations, allowing you to choose the most suitable approach for your situation. The Drilling And Bolt Extractor Method If the broken bolt is accessible, one common method is to drill a hole in the center of it and use a bolt extractor. The bolt extractor, resembling a reverse drill bit, is placed in the drilled hole to grip and remove the broken bolt. This method provides a reliable way to extract the broken bolt without damaging the surrounding material. Applying some heat around the bolt hole can also help loosen the bolt, making it easier to remove. The Hammer And Chisel Approach Sometimes, a hammer and a chisel can be sufficient to remove a broken bolt. By carefully positioning the chisel on the broken edge of the bolt and applying force with a hammer, you can attempt to turn the bolt and loosen it. This method requires tenacity and precision, but can be effective for certain situations where the bolt is not too tightly stuck. Drilling Out The Broken Bolt For stubborn and deeply embedded broken bolts, drilling them out using a left-hand drill bit and a reversible drill is often the preferred method. The left-hand drill bit, when rotated counterclockwise, has the capability to catch within the bolt and extract it as the drill continues turning. This approach is a champion for removing stubborn broken bolts without causing additional damage. Using An Easy Out If you don’t have a bolt extractor available, another method is to use a specialized tool called an easy out. To utilize this method, you need to drill a hole into the shaft of the bolt and then insert the easy out. The easy out has different sections for various bolt sizes and is turned counterclockwise to grip and remove the broken bolt effectively. Welding Method For particularly challenging situations, a reliable approach is to weld a nut of the same size onto the broken bolt and then turn it counterclockwise to remove the bolt. This method requires proper welding equipment and expertise to ensure a secure bond between the nut and the broken bolt. By understanding the different methods available for broken bolt removal, you can choose the most appropriate approach based on the accessibility, severity, and specific requirements of your broken bolt situation. Remember to prioritize safety and efficiency throughout the process to ensure successful bolt extraction without causing further damage to your project. Credit: www.youtube.com Using A Bolt Extractor: A Step-by-step Guide Removing a broken bolt can be a challenging task, but with the right tools and techniques, it can be done effectively. In this step-by-step guide, we will focus on using a bolt extractor to remove a broken bolt. Bolt extractors are specialized tools designed specifically for this purpose, and they can make the extraction process much easier and efficient. Step 1: Drilling A Centered Hole In The Broken Bolt The first step in using a bolt extractor is to drill a centered hole in the broken bolt. This hole will serve as a guide for the extractor and allow it to grip the bolt securely. To do this, you will need a drill and a suitable drill bit. Make sure to choose a drill bit that is slightly smaller than the size of the bolt. Start drilling slowly and steadily, applying enough pressure to create a centered hole without causing any damage to the surrounding area. Step 2: Selecting And Attaching The Appropriate Bolt Extractor Once you have drilled a centered hole in the broken bolt, it’s time to select the appropriate bolt extractor. Bolt extractors come in various sizes and designs, so it’s important to choose one that matches the size and type of the broken bolt. The extractor should fit securely into the hole you drilled earlier. Insert the extractor into the hole and make sure it is firmly seated. Step 3: Applying Torque To Remove The Broken Bolt With the bolt extractor securely attached, it’s time to apply torque to remove the broken bolt. Using a wrench or a ratchet, turn the extractor counterclockwise. The extractor will grip the broken bolt, allowing you to slowly and steadily rotate it out. It’s important to apply gradual and consistent pressure to avoid damaging the surrounding area or breaking the extractor itself. If necessary, you can use penetrating oil or heat to loosen any rust or debris that may be causing the bolt to stick. Step 4: Troubleshooting Common Challenges During Extraction During the extraction process, you may encounter some common challenges that can make the task more difficult. It’s important to be prepared and know how to troubleshoot these issues. Some common challenges include a stuck or stubborn bolt, a broken extractor, or stripped threads. If the bolt is not budging, you can try applying more penetrating oil or heat to loosen it further. If the extractor breaks or strips, you may need to start over with a new extractor. It’s always a good idea to have spare extractors on hand in case of such situations. Removing a broken bolt using a bolt extractor can be a precise and efficient process. By following these step-by-step instructions and troubleshooting any challenges along the way, you can successfully remove a broken bolt and

How To Remove a Broken Bolt: An Expert Guide to Extracting Stubborn Bolts Read More »

Best Fuel Stabilizers to Keep Your Fuel Fresh

Best Fuel Stabilizers to Keep Your Fuel Fresh: Power Solutions

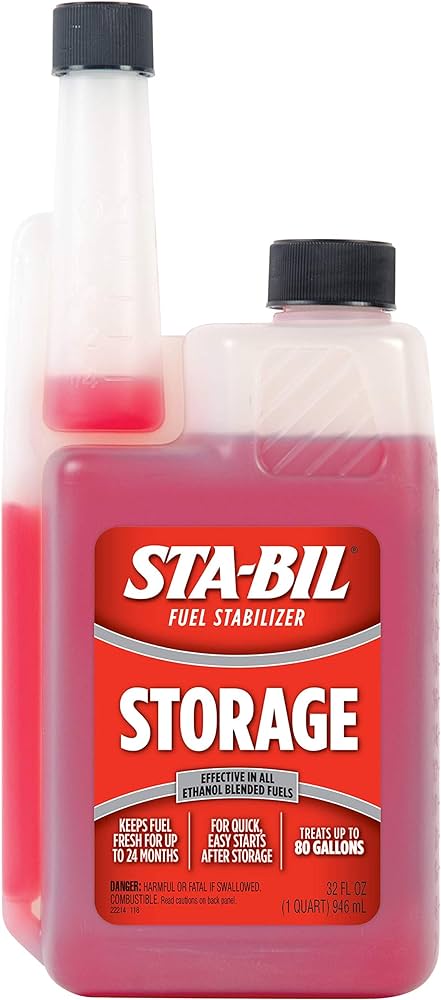
The best fuel stabilizers to keep your fuel fresh are Star Tron’s Enzyme Fuel Treatment, Sta-Bil Storage Fuel Stabilizer, and Heet Fuel Additives. STA-BIL is a chemically engineered blend of additives that will prevent fuel from degrading and oxidizing during storage, ensuring your engine is protected from stale fuel-related issues. Fuel stabilizers like these are essential for maintaining the quality of your fuel and preventing damage to your engine. Whether you need a stabilizer for your car, boat, motorcycle, or lawn mower, using a high-quality fuel stabilizer like these will help extend the shelf life of your fuel and keep it fresh for longer. The Importance Of Fuel Stabilizers Keep your fuel fresh with the best fuel stabilizers on the market. From Star Tron’s Enzyme Fuel Treatment to Sta-Bil Storage Fuel Stabilizer, these additives will protect your fuel from degradation and oxidation during storage, ensuring your engine stays in optimal condition. Say goodbye to stale fuel-related issues! Ensuring Fuel Freshness For Optimum Engine Performance Fuel stabilizers play a crucial role in maintaining the quality and freshness of your fuel, which directly impacts the performance and efficiency of your engine. Over time, fuel can degrade and oxidize, leading to the formation of gum, varnish, and corrosion within your fuel system. This can result in poor engine performance, starting issues, and even costly repairs. By using a high-quality fuel stabilizer, you can prevent these issues and ensure that your fuel remains fresh and ready to be used whenever you need it. Fuel stabilizers work by inhibiting the oxidation process and preventing the fuel from breaking down, thus extending its shelf life and preserving its quality. Ensuring Each H3 Heading Adheres To Html Syntax While discussing the importance of fuel stabilizers, let’s also make sure that the HTML syntax for each H3 heading is correct. This ensures proper formatting and structure of the content, making it more accessible and user-friendly. For example, consider the heading “Ensuring fuel freshness for optimum engine performance”. In HTML, we can represent this heading as: Ensuring fuel freshness for optimum engine performance By using proper HTML syntax for each heading, we create a structured hierarchy for the content, making it easier for search engines to understand the organization of the information. Now that we understand the importance of fuel stabilizers and the correct syntax for H3 headings, let’s dive into the different factors to consider when choosing the best fuel stabilizer for your needs. Best Overall: Star Tron’s Enzyme Fuel Treatment When it comes to fuel stabilizers, Star Tron’s Enzyme Fuel Treatment stands out as the best overall option. This powerful additive not only keeps your fuel fresh but also enhances fuel efficiency and engine performance, making it a top choice for both daily use and long-term storage. Powerful Additive That Enhances Fuel Efficiency And Engine Performance With Star Tron’s Enzyme Fuel Treatment, you can expect improved fuel efficiency and smoother engine performance. Its unique enzyme formula breaks down and disperses harmful deposits that accumulate in the fuel system, ensuring optimal fuel flow and combustion. By maximizing the fuel’s potential, this stabilizer helps you get the most out of every drop, resulting in enhanced mileage and increased power. Combats Ethanol-related Issues, Such As Water Accumulation And Fuel Breakdown Ethanol-blended fuels are known to cause a range of issues, including water accumulation and fuel breakdown. Star Tron’s Enzyme Fuel Treatment is designed to combat these problems effectively. Its enzyme formula helps eliminate water molecules by dispersing them into tiny particles that can be safely burned away. Additionally, it prevents fuel breakdown by neutralizing the harmful effects of ethanol, ensuring your engine runs smoothly without any adverse effects. Long-term Storage Benefits For Boats, Motorcycles, And Lawn Mowers For those looking to store their boats, motorcycles, or lawn mowers for an extended period, Star Tron’s Enzyme Fuel Treatment offers long-term storage benefits. It prevents fuel oxidation and degradation, ensuring that your fuel remains fresh and stable throughout the storage period. This eliminates the need for costly repairs and maintenance caused by stale or degraded fuel, saving you time and money in the long run. Benefits of Star Tron’s Enzyme Fuel Treatment: Enhances fuel efficiency and engine performance Combats ethanol-related issues Prevents fuel breakdown Eliminates water accumulation Long-term storage benefits Overall, Star Tron’s Enzyme Fuel Treatment is the best overall fuel stabilizer on the market. Its powerful additive enhances fuel efficiency and engine performance while combating ethanol-related issues. Additionally, it offers long-term storage benefits for boats, motorcycles, and lawn mowers, ensuring that your fuel remains fresh and stable. With Star Tron’s Enzyme Fuel Treatment, you can trust that your engine will always perform at its best. Best For Protection: Sta-bil Storage Fuel Stabilizer The best fuel stabilizer for keeping your fuel fresh and protected is the Sta-Bil Storage Fuel Stabilizer. Its chemically engineered blend of additives prevents fuel from degrading and oxidizing during storage, ensuring your engine is safeguarded from any issues related to stale fuel. Superior Protection Against Fuel Oxidation And Degradation During Storage The Sta-Bil Storage Fuel Stabilizer is highly regarded for its exceptional ability to protect fuel from oxidation and degradation during storage. When fuel is left unused for an extended period, it can undergo chemical changes that result in the formation of harmful contaminants. With Sta-Bil Storage Fuel Stabilizer, you can prevent such issues and ensure that your fuel remains fresh and reliable. Prevents Varnish And Gum Build-up In The Fuel System One of the key benefits of using Sta-Bil Storage Fuel Stabilizer is its ability to prevent varnish and gum build-up in the fuel system. These substances can clog fuel lines, carburetors, and other fuel system components, leading to decreased engine performance and even costly repairs. By using Sta-Bil Storage Fuel Stabilizer, you can keep your fuel system clean and free from these harmful deposits, ensuring optimal engine performance. Suitable For Both Gasoline And Diesel Engines Unlike some fuel stabilizers that are only designed for specific fuel types, the Sta-Bil Storage Fuel Stabilizer is suitable for

Best Fuel Stabilizers to Keep Your Fuel Fresh: Power Solutions Read More »

How Long Can Car Tires Be Stored: Expert Tips for Maximum Lifespan

Car tires can be stored for up to six years if they are properly maintained and stored under the right conditions. However, it is important to visually inspect tires for signs of aging, regardless of their age. Environmental conditions and how the tires are used also play a role in their lifespan. Storing tires in a cool, dry, and dark location can help extend their service life. If tires are over ten years old, it is not recommended to use them at all. With the right storage and maintenance, tires can last up to six years before needing to be replaced. Proper storage methods, such as using hooks through the rim, can help reduce the risk of damage to the tires while in storage. Factors Affecting The Lifespan Of Stored Car Tires Proper storage conditions can extend the service life of car tires up to six years. However, if tires are not stored correctly, their characteristics can change, shortening their lifespan and even causing them to deteriorate to the point of needing replacement. It is important to visually inspect tires for signs of aging and to consider environmental conditions and usage when determining their lifespan. Properly storing car tires is crucial for maintaining their longevity. If tires are not stored correctly, their characteristics can change, shortening their lifespan and even necessitating replacement. Several factors can influence the lifespan of stored car tires, including proper storage conditions, environmental factors, and tire usage. Understanding these factors is essential for ensuring that tires remain in optimal condition during periods of storage. Proper Storage Conditions For Long-lasting Tires Storing car tires in the right conditions plays a significant role in extending their lifespan. When it comes to tire storage, it’s important to consider the following: Temperature: Tires should be stored in a cool and dry environment to prevent premature aging and deterioration. Extreme temperatures, both hot and cold, can cause the rubber to become brittle or break down, leading to reduced tire life. Humidity: Excess moisture can damage tires by promoting the growth of mold and mildew. Therefore, it is essential to store tires in a low-humidity environment to prevent these issues. Light: Exposure to UV rays can accelerate tire aging and deterioration. To protect tires from sunlight, they should be stored in a dark or dimly lit area. Positioning: Tires should be stacked vertically and not horizontally to avoid deformation or improper weight distribution. Cleanliness: Prior to storage, tires should be thoroughly cleaned to remove any dirt, debris, or chemicals that could potentially damage the rubber. Effects Of Environmental Conditions On Tire Lifespan Environmental conditions greatly impact the lifespan of stored car tires. External factors such as sunlight, heat, cold, and moisture can significantly accelerate tire aging and reduce their overall lifespan. For example: Excessive heat can cause the rubber to dry out and become brittle, leading to cracking and potential blowouts. Cold temperatures can cause the rubber to harden, reducing traction and increasing the risk of tire damage. Moisture from high humidity or exposure to water can lead to corrosion of the tire components and weaken the rubber over time. UV rays from sunlight can cause the rubber to degrade, resulting in cracking, discoloration, and reduced tire performance. Understanding The Impact Of Tire Usage On Storage Life Tire usage also has a significant impact on their lifespan during storage. Factors to consider include: Mileage: Tires with higher mileage tend to have more wear and may have a shorter storage life compared to tires with lower mileage. Driving Habits: Aggressive driving, frequent braking, and rough road conditions can accelerate tire wear and reduce their storage life. Tire Maintenance: Regular tire maintenance, such as proper inflation, rotation, and alignment, can help prolong tire lifespan, both during use and while in storage. Age: Tires have a maximum shelf life regardless of usage. If a tire is more than six years old from the date of production, it is recommended to replace it, even if it has been stored under ideal conditions. By considering these factors and implementing proper tire storage practices, car owners can ensure that their tires remain in optimal condition during periods of storage, ultimately extending their lifespan and maximizing their value. Signs Of Aging In Stored Car Tires Proper tire storage is crucial to maintaining their quality and longevity. Over time, even unused car tires can experience aging and deterioration, affecting their performance and safety on the road. It’s essential to be aware of the signs of aging in stored car tires to ensure their reliability when it’s time to use them. Identifying Visual Indications Of Tire Deterioration One of the primary ways to assess the condition of stored car tires is through visual inspection. Here are some common visual indications of tire deterioration: Cracking or splitting: Look out for cracks or splits in the tire’s sidewall or tread. These can indicate dry rotting or aging of the rubber. Bulges or deformities: Any bulges or deformities on the tire surface may suggest internal damage or weakening, compromising the tire’s strength. Fading or discoloration: A tire that has significantly faded or changed color may have been exposed to excessive sunlight or other environmental factors, leading to aging. Uneven wear patterns: Uneven tread wear can be a sign of tire aging or improper storage conditions. Check for excessive wear on one side or in the middle of the tire. How To Check For Tire Dry Rotting Dry rot is a common issue in stored car tires, caused by the breakdown of rubber due to exposure to heat, direct sunlight, or extreme temperatures. To check for dry rotting: Inspect the tire sidewalls and tread carefully for small cracks or fissures. Use your fingers to gently press the rubber. If it feels brittle or crumbles, it may indicate dry rot. Look for a powdery residue on the tire’s surface, as this can be a sign of rubber deterioration. If you discover dry rotting in your stored car tires, it’s essential to replace them immediately to

How Long Can Car Tires Be Stored: Expert Tips for Maximum Lifespan Read More »

Can I Put Different Brand Tires on My Car? Get the Facts!

Yes, you can put different brand tires on your car, but it is generally recommended to avoid mixing different tire brands and tread patterns. Manufacturers do not recommend tire mixing, except for rare approved mixed-tire fittings. 1. The Importance Of Tire Compatibility Mixing different brand tires on your car is generally not recommended by manufacturers. While there may be rare exceptions for approved mixed-tire fittings, it is best to avoid mixing different tire brands and tread patterns. It is important to ensure that the tires are compatible to maintain proper traction and handling on the road. 1. Mixing Different Tire Brands And Tread Patterns Can Impact Traction And Handling Mixing different tire brands and tread patterns on your car may seem like a cost-effective solution, but it can have a significant impact on your vehicle’s traction and handling. Each tire has its own unique characteristics, including rubber compound, tread design, and sidewall construction. When you mix different brands and patterns, you risk compromising the overall performance and safety of your vehicle. Having tires with different traction capabilities and handling characteristics on your car can result in an uneven grip on the road. This can lead to unpredictable handling, reduced braking performance, and compromised stability. Additionally, mixing tires can also affect the vehicle’s suspension system and cause uneven wear on the tires, leading to decreased tread life. 2. Manufacturers Generally Do Not Recommend Tire Mixing While mixing tire brands and tread patterns might seem tempting, manufacturers generally discourage it. Tire manufacturers invest substantial resources in research and development to ensure that their tires are optimized for specific vehicles and driving conditions. Mixing different tire brands can compromise the integrity of these tire-specific designs. Furthermore, vehicle manufacturers often recommend specific tire brand and model combinations for their vehicles. These recommendations are based on rigorous tests and evaluations conducted during the vehicle’s development process. By deviating from these recommendations and mixing tire brands, you might unknowingly compromise your vehicle’s performance, handling, and safety. 3. Rare Exceptions Exist For Approved Mixed-tire Fittings While it is generally recommended to stick with the same tire brand and model for your car, there are some rare exceptions where approved mixed-tire fittings are permissible. In these cases, the vehicle and tire manufacturers have tested and approved specific combinations of tires for compatibility and performance. If you are considering mixing tire brands, it is essential to consult your vehicle’s owner’s manual or reach out to a trusted tire professional. They can provide guidance on whether approved mixed-tire fittings exist for your specific car and recommend suitable combinations that will not compromise your safety. Remember, tire compatibility is crucial for maintaining optimal traction, handling, and overall vehicle performance. While mixing tire brands may seem convenient, it is crucial to prioritize safety and follow the recommendations provided by both the vehicle and tire manufacturers. 2. Advantages And Disadvantages Of Mixing Tire Brands When it comes to the question of whether you can put different brand tires on your car, there are both advantages and disadvantages to consider. Let’s take a closer look at each: H3improves Traction And Handling In Some Cases/h3 In certain situations, mixing tire brands can actually improve traction and handling on your car. This is especially true if the tires being mixed have different tread patterns that complement each other. For example, a tire with a more aggressive tread pattern can provide better grip in wet or snowy conditions, while a tire with a smoother tread pattern can enhance fuel efficiency and ride comfort on dry roads. However, it’s important to note that the improvement in traction and handling is not guaranteed and may vary depending on the specific tire brands and models being mixed. Additionally, it’s crucial to ensure that the tires being mixed are compatible in terms of size and load rating. H3compatibility And Performance Concerns/h3 One of the main concerns when mixing tire brands is compatibility and performance. Different tire brands may have variations in the rubber compound, construction, and design, which can affect how they perform when used together on the same vehicle. For instance, tire A may have a softer rubber compound that provides better grip, while tire B may have a harder compound for longer wear. Mixing these two tires can result in uneven wear, decreased performance, and potentially compromise safety. Additionally, mixing tire brands can also lead to differences in handling characteristics, such as responsiveness, cornering stability, and braking performance. This can be particularly noticeable in emergency situations or when driving at high speeds. H3potential For Unbalance And Adverse Effects On Car’s Handling/h3 Another disadvantage of mixing tire brands is the potential for unbalance and adverse effects on the car’s handling. Each tire brand and model is engineered to work in harmony with the suspension system, chassis, and overall design of the vehicle. When different tire brands with varying tread patterns, sizes, or performance characteristics are mixed, it can disrupt the balance and evenness of the tire contact patch. This can result in a decrease in stability, precision, and overall control of the vehicle. Furthermore, the differences in tire wear rates can lead to imbalances in weight distribution, which can further impact the car’s handling and potentially cause premature wear on the tires. It’s always recommended to consult with a professional tire technician or refer to your vehicle’s manufacturer guidelines regarding tire mixing. 3. Best Practices For Mixing Tire Brands Mixing different tire brands and tread patterns is generally not recommended by manufacturers. While there are rare exceptions for approved mixed-tire fittings, it is best to avoid this practice. However, if you do decide to mix tire brands, make sure they are the same size and compatible for improved traction and handling. If you find yourself in a situation where you have to mix tire brands on your car, it’s important to follow some best practices to ensure optimal performance. While it’s generally recommended to use identical tires on one axle, there are a few exceptions to this rule. Use

Can I Put Different Brand Tires on My Car? Get the Facts! Read More »