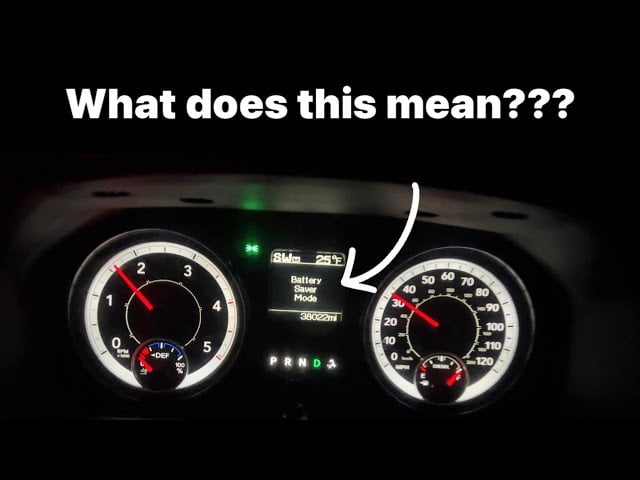
Boost Your Battery Life: Activate Battery Saver Mode on Your Dodge Journey
Battery Saver Mode in a Dodge Journey helps conserve battery power by limiting certain electrical features and functions, extending the battery’s lifespan. The Battery Saver Mode in a Dodge Journey is a feature designed to save battery power and extend its lifespan by limiting certain electrical functions and features. Whether you are taking a short trip or leaving your vehicle parked for an extended period, Battery Saver Mode automatically shuts off nonessential electrical components to conserve battery energy. This includes things like interior lights, exterior lights, and other electrical systems that may drain the battery when not in use. By activating Battery Saver Mode, you can ensure that your battery lasts longer and prevents unnecessary power drain, ultimately saving you from unexpected dead batteries. Understanding Battery Saver Mode Battery Saver Mode in the Dodge Journey helps conserve battery life by optimizing power usage, allowing for longer journeys without worrying about running out of juice. Enjoy extended drives with this energy-saving feature. How Battery Saver Mode Works Battery Saver Mode is an essential feature found in the Dodge Journey that optimizes battery usage while maintaining the functionality of various systems. Understanding how Battery Saver Mode works can help you maximize your vehicle’s battery life and ensure a smooth driving experience. Conserving Power While Maintaining Functionality Battery Saver Mode is designed to conserve power by automatically adjusting certain vehicle settings when the battery levels are low. By reducing power consumption from non-essential systems, Battery Saver Mode ensures that vital components, such as the engine, remain powered and fully functional. Automatic Activation When Battery Levels Are Low Battery Saver Mode is activated automatically when the battery levels reach a critical point. This proactive feature prevents complete battery drain and potential breakdowns by prioritizing power delivery to essential systems. When Battery Saver Mode is engaged, it temporarily disables power-hungry components like interior lights, infotainment systems, and other non-essential features. Adjusting Settings To Optimize Battery Life To optimize battery life, adjustments can be made to the Dodge Journey’s settings. These settings allow you to customize Battery Saver Mode based on your specific preferences. By accessing the vehicle’s settings menu, you can adjust factors such as the threshold at which Battery Saver Mode is activated. This customization ensures that Battery Saver Mode aligns with your driving habits and battery maintenance needs. In conclusion, Battery Saver Mode in the Dodge Journey is a valuable feature that helps conserve power and extend battery life. By understanding how it works and making necessary adjustments, you can optimize your driving experience and minimize the risk of battery-related issues. Take advantage of this smart technology to ensure a reliable and efficient journey wherever you go. Benefits Of Using Battery Saver Mode When it comes to maximizing battery life and enhancing the performance of your Dodge Journey, the Battery Saver Mode is a feature that you should definitely take advantage of. This mode is designed to optimize your vehicle’s power usage by reducing battery drain during periods of low usage, optimizing system settings for power efficiency, and allocating system resources to critical tasks. In this article, we will explore the key benefits of using Battery Saver Mode in your Dodge Journey. Extending Battery Life Battery Saver Mode plays a crucial role in extending the lifespan of your Dodge Journey’s battery. By reducing battery drain during periods of low usage, this mode helps to minimize unnecessary power consumption and ensures that your battery lasts longer before needing a recharge or replacement. Reducing Battery Drain During Periods Of Low Usage One of the primary benefits of Battery Saver Mode is its ability to reduce battery drain during periods of inactivity. When your vehicle is parked and not in use, this mode automatically activates and lowers power usage to a minimum. This way, your battery is not being drained unnecessarily, allowing it to preserve energy and retain charge for longer periods of time. Optimizing System Settings For Power Efficiency Battery Saver Mode also optimizes system settings to ensure power efficiency in your Dodge Journey. This means that the mode adjusts various settings such as display brightness, power-saving options, and background processes to minimize power consumption. By doing so, it enhances the overall efficiency of your vehicle’s power usage, ultimately helping you save on fuel costs. Enhancing Performance In addition to extending battery life, Battery Saver Mode enhances the performance of your Dodge Journey. It achieves this by allocating system resources to critical tasks, ensuring that essential functions and processes receive sufficient power and priority. By minimizing background processes, this mode allows your vehicle to operate smoothly and efficiently without unnecessary strain on the battery. Allocating System Resources To Critical Tasks Battery Saver Mode intelligently allocates system resources to critical tasks, prioritizing their power consumption. This ensures that crucial functions, such as engine management, remain unaffected by power limitations and can operate optimally. By efficiently managing resource allocation, this mode helps maintain the performance and reliability of your Dodge Journey while preserving battery life. Overall, using Battery Saver Mode in your Dodge Journey offers numerous benefits, ranging from extending battery life to enhancing performance. With its ability to reduce battery drain during periods of low usage, optimize system settings for power efficiency, and allocate system resources to critical tasks, this mode is a valuable feature that can help you get the most out of your vehicle’s battery and ensure a smooth and efficient driving experience. Activating Battery Saver Mode On Your Dodge Journey Battery Saver Mode on your Dodge Journey helps conserve power to extend battery life. Activate it to optimize performance and avoid unexpected breakdowns. As a Dodge Journey owner, you’re probably aware of the importance of conserving battery power, especially during long drives or when your vehicle is parked for extended periods. Thankfully, Dodge has included a Battery Saver Mode feature in their vehicles, which helps optimize battery life. In this article, we’ll guide you step-by-step through the process of activating Battery Saver Mode on your Dodge Journey. Let’s get started! Accessing Battery
Boost Your Battery Life: Activate Battery Saver Mode on Your Dodge Journey Read More »