carinsiderhub.com

Car Brand

Hill Descent Control Fault Fix

Hill Descent Control Fault Fix: Uncover the Ultimate Solution

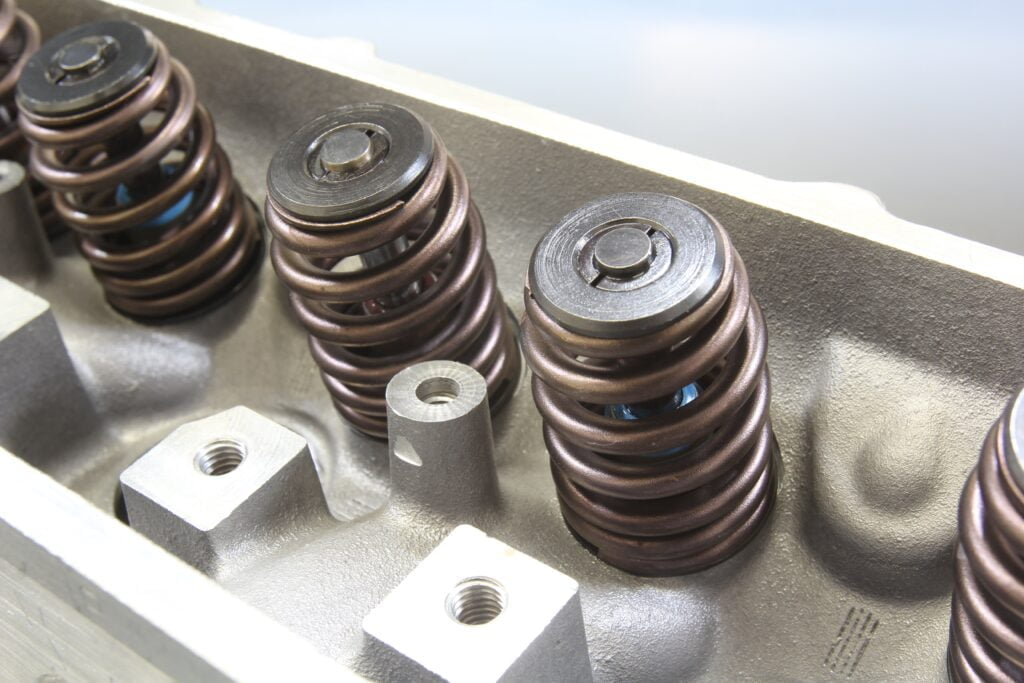
To fix a Hill Descent Control fault, follow these steps: plug in a diagnostic scanner to identify the issue, clear any error codes, and check the electrical connections. Additionally, inspect the sensors and replace any faulty components if necessary. Understanding Hill Descent Control (hdc) And Its Importance Hill Descent Control (HDC) is a game-changer when it comes to off-roading, providing drivers with enhanced control and safety while navigating steep downhill terrains. This innovative feature works by utilizing the vehicle’s braking system to maintain a controlled speed while descending, even on treacherous slopes. In this section, we will delve deeper into the concept of Hill Descent Control, explore how it works, and highlight its significance in off-roading adventures. What Is Hill Descent Control (hdc)? Hill Descent Control (HDC) is an advanced technology integrated into modern vehicles, designed specifically for off-road enthusiasts. It is a driver-assist feature that automatically regulates the vehicle’s speed when descending steep slopes. By activating HDC, drivers can focus on steering and maneuvering without having to constantly brake to maintain a safe speed. This feature is especially valuable when tackling challenging terrains where the risk of losing control is high. How Does Hill Descent Control (hdc) Work? Hill Descent Control (HDC) works by utilizing the vehicle’s anti-lock braking system (ABS) and traction control system (TCS) to ensure a smooth and controlled descent. When activated, HDC uses wheel sensors to monitor the rotation speed of each wheel. Based on the feedback received, the system automatically applies brake pressure to the appropriate wheels, ensuring that the vehicle maintains a steady speed without the need for constant driver intervention. This intelligent technology allows drivers to confidently navigate down steep hills while keeping their focus on the road and potential obstacles. The Significance Of Hill Descent Control (hdc) In Off-roading Hill Descent Control (HDC) plays a crucial role in off-roading pursuits, enhancing both safety and performance in challenging environments. Here are some key reasons why HDC is highly valued by off-road enthusiasts: Controlled descents: HDC ensures a consistent and controlled speed while descending steep slopes, preventing the vehicle from gaining excessive speed and losing control. Maintaining traction: By automatically braking each wheel, HDC prevents wheel lock-up and maintains traction, allowing the vehicle to maintain its grip on the terrain. Reduced driver fatigue: With HDC taking care of speed management, drivers can focus on other critical aspects, such as obstacle avoidance and route navigation, minimizing fatigue during challenging off-road journeys. Increased confidence: Hill Descent Control instills confidence in drivers, empowering them to explore adventurous terrains that would otherwise be daunting. This feature provides peace of mind and reassurance in potentially hazardous situations. In conclusion, Hill Descent Control (HDC) is an indispensable feature for off-road enthusiasts, offering enhanced control, safety, and confidence during downhill descents. By understanding how HDC works and appreciating its significance, drivers can leverage this technology to expand their off-road capabilities and elevate their off-roading experiences. Credit: www.nytimes.com Common Hill Descent Control Faults And Symptoms When it comes to tackling steep slopes and tricky terrains, your vehicle’s Hill Descent Control (HDC) system plays a crucial role in keeping you safe and in control. However, like any other mechanism, the HDC system can develop faults over time, leading to potential issues that may affect its performance. In this section, we will discuss the common faults and symptoms associated with Hill Descent Control, helping you identify and address these problems before they impact your off-roading experience. Identifying Common Faults In Hill Descent Control (hdc) If you suspect that your Hill Descent Control system is not functioning as it should, it is important to understand the common faults that can arise. Here are some of the issues you may encounter: Malfunctioning sensors: The HDC system relies on sensors to detect the vehicle’s speed, wheel slippage, and other crucial data. If any of these sensors are faulty or damaged, the HDC may not respond appropriately. Electrical problems: Like many advanced systems in modern vehicles, HDC relies on a complex network of electrical components. If there is a fault in the wiring, connectors, or control module, it can result in HDC failure. Software glitches: HDC is controlled by software that manages its operation. Occasionally, software bugs or glitches may cause the HDC system to malfunction or engage unexpectedly. Mechanical issues: The mechanical components of the HDC system, such as the actuator or brake calipers, can experience wear and tear over time. Any mechanical fault in these parts can affect the system’s performance. Warning Signs Of A Faulty Hill Descent Control (hdc) System Recognizing the warning signs of a faulty HDC system is essential to take timely action and prevent potential hazards. Here are some symptoms that may indicate a problem with your HDC: Malfunction indicator light (MIL): If the MIL illuminates on your vehicle’s dashboard, it could indicate a fault in the HDC system. Be sure to consult your vehicle’s owner manual to understand the specific meaning of the MIL. Inconsistent or unpredictable performance: If you notice that the HDC engages or disengages spontaneously, jerks, or fails to operate smoothly, it may be a sign of a fault in the system. Warning message: Some vehicles may display a warning message on the instrument cluster if the HDC system is not functioning correctly. Pay attention to these messages and seek professional assistance if necessary. Noise or unusual sensations: A faulty HDC system may produce strange noises or vibrations, indicating a problem with the mechanical components. Any unusual sensations should not be ignored. How Hill Descent Control (hdc) Faults Affect Vehicle Performance A faulty HDC system can have several negative impacts on your vehicle’s overall performance, especially when traversing challenging terrains. Here are some ways HDC faults can affect your vehicle: Compromised stability: HDC is designed to provide stability and control when descending steep slopes. If the system is not functioning correctly, you may experience reduced stability and an increased risk of accidents. Difficulty in braking: HDC uses the vehicle’s brakes to regulate speed while descending. A

Hill Descent Control Fault Fix: Uncover the Ultimate Solution Read More »

How to Fix Service Advancetrac Ford Fusion

How to Quickly Fix Service Advancetrac in Your Ford Fusion: Expert Solutions

To fix the Service Advancetrac issue in a Ford Fusion, start by checking the vehicle’s fuse for any possible damage and replace it if necessary. Then, disconnect the negative battery cable for approximately 15 minutes to reset the system. After reconnecting the battery, start the vehicle and see if the issue has been resolved. If not, it is recommended to have the vehicle scanned for trouble codes using a diagnostic tool and address any identified issues accordingly. Understanding Advancetrac And Common Issues Learn how to fix service Advancetrac issues in your Ford Fusion. Discover the common problems associated with Advancetrac and how to effectively resolve them for a smoother driving experience in your vehicle. Understanding Advancetrac and Common Issues When it comes to driving a Ford Fusion, one of the key safety features you’ll find is Advancetrac. Advancetrac is an electronic stability control system that helps to keep your vehicle stable and provide better traction on the road. This advanced system uses a combination of sensors and algorithms to detect and correct any potential instability or loss of traction. However, just like any other technology, Advancetrac can also experience certain issues that may need your attention. What is Advancetrac in Ford Fusion? Advancetrac is a dynamic stability control system developed by Ford Motor Company. This advanced technology provides drivers with enhanced safety and control while driving their Ford Fusion. With a combination of sensors and software, Advancetrac constantly monitors your vehicle’s stability and traction. It can detect any tendency of the vehicle to understeer or oversteer and intervene by applying brakes to specific wheels and reducing engine power, ensuring your vehicle stays on track. Common issues with Advancetrac in Ford Fusion 1. Warning lights and messages: One common issue you may come across with Advancetrac is the illumination of warning lights or on-screen messages on your dashboard. These lights or messages might indicate a problem with the Advancetrac system or may be a result of other connected systems such as the ABS or Traction Control. If you notice any warning lights or messages popping up, it’s important to get your vehicle checked by a certified mechanic to diagnose the issue accurately. 2. Sensor malfunctions: Another common issue can be sensor malfunctions, which can disrupt the proper functioning of the Advancetrac system. Sensors play a crucial role in detecting and maintaining stability and traction. If any of the sensors are damaged or malfunctioning, you may experience false warnings or the system may not perform optimally. In such cases, a thorough inspection and potential replacement of the faulty sensor(s) may be required to fix the issue. 3. Wheel speed sensor problems: Wheel speed sensors are critical components that gather data regarding the rotational speed of each wheel. These sensors provide vital information to the Advancetrac system. Any damage or malfunctioning of these sensors may lead to inaccurate readings or unpredictable behavior of Advancetrac. In such cases, a replacement of the wheel speed sensor(s) may be necessary to restore the proper functioning of Advancetrac. 4. ABS module issues: The Antilock Braking System (ABS) module works closely with the Advancetrac system to ensure optimal stability and control. If there are any issues with the ABS module, it can affect the Advancetrac system as well. Common symptoms of ABS module issues include an illuminated ABS warning light or unusual braking behavior. To fix this issue, a diagnostic scan and potential module replacement may be required. 5. Powertrain Control Module (PCM) faults: The Powertrain Control Module (PCM) is the brain of your vehicle’s engine and transmission system. In some cases, PCM faults or issues can indirectly affect the Advancetrac system. This may lead to reduced performance, error messages, or other abnormalities in Advancetrac. A professional diagnosis and potential reprogramming or replacement of the PCM may be necessary to address this issue. In conclusion, while Advancetrac in Ford Fusion is an innovative safety feature, it can still experience certain issues that need attention. Whether it’s warning lights, sensor malfunctions, wheel speed sensor problems, ABS module issues, or PCM faults, it’s crucial to have any irregularities diagnosed and resolved by a qualified technician. By ensuring the proper functioning of Advancetrac, you can continue enjoying a safe and stable driving experience in your Ford Fusion. Credit: www.walser.com Diagnosing Advancetrac Problems If you’re experiencing issues with Advancetrac on your Ford Fusion, diagnosing and fixing the service can be a straightforward process. By following the steps outlined in this guide, you’ll be able to identify the problem and find the necessary solutions. Keep your vehicle performing at its best with these expert tips. Identifying Advancetrac Warning Signs Before you can diagnose and fix Advancetrac issues in your Ford Fusion, it’s important to be able to identify the warning signs that indicate a problem with this advanced stability control system. Look out for the following signs: Dashboard warning light: The Advancetrac warning light, often shaped like a car with wavy tire tracks, is the most obvious sign that there may be an issue. Traction and stability problems: If you notice a loss of traction or experience instability while driving, especially during turns or on slippery roads, it could signal an Advancetrac malfunction. Strange sounds or sensations: Unusual noises or vibrations while driving, such as grinding or jerking, may also indicate a problem with the Advancetrac system in your Ford Fusion. Diagnostic Tools For Advancetrac Issues Once you’ve identified the warning signs, the next step is to diagnose the specific Advancetrac problem affecting your Ford Fusion. Luckily, there are a few diagnostic tools at your disposal: Scan tool: A scan tool is an essential device for diagnosing Advancetrac issues. It plugs into the OBD-II port of your Fusion and reads any stored trouble codes related to the stability control system. Diagnostic software: In addition to a scan tool, diagnostic software designed specifically for Advancetrac systems can provide more detailed information about the problem and potential solutions. Visual inspection: Sometimes, a visual inspection of the Advancetrac components can reveal obvious signs of damage

How to Quickly Fix Service Advancetrac in Your Ford Fusion: Expert Solutions Read More »

Ford 6.2 Firing Order

Maximize Performance: Ford 6.2 Firing Order Decoded!

The firing order for a Ford 6.2 engine is 1-3-7-2-6-5-4-8. The Ford 6.2 engine follows this specific firing order pattern when igniting its cylinders. The firing order of an engine plays a crucial role in the proper functioning of the engine. In the case of the Ford 6. 2 engine, the firing order is 1-3-7-2-6-5-4-8. Knowing the correct firing order is essential for timing the ignition and fuel injection, ensuring optimal performance and smooth operation of the engine. By following this firing order precisely, the engine’s cylinders will fire in the correct sequence, preventing misfires and maintaining the engine’s balance. Whether you are a Ford 6. 2 engine owner or a mechanic working on one, understanding the firing order is crucial for maintaining the engine’s efficiency. Understanding The Ford 6.2 Firing Order The Ford 6. 2 firing order is a key aspect to understand in order to ensure the proper functioning of the engine. By following the correct order of ignition for the cylinders, the engine can run smoothly and efficiently, resulting in optimal performance. Understanding the Ford 6.2 Firing Order In the world of automotive engineering, the firing order of an engine plays a crucial role in its overall performance. And when it comes to the Ford 6.2 engine, understanding the firing order is essential to ensure optimal power and efficiency. In this article, we will explore the importance of the firing order in engine performance and delve into the specifics of the Ford 6.2 firing order. So, let’s get started! Importance Of The Firing Order In Engine Performance The firing order of an engine refers to the sequence in which each cylinder ignites its fuel-air mixture. It may seem like a small detail, but the firing order has a significant impact on engine balance, power delivery, and efficiency. By firing the cylinders in a specific order, the engine can achieve smoother operation, reduced vibration, and improved overall performance. Here’s why the firing order is so crucial: Optimal Power Delivery: The firing order ensures that power is delivered evenly throughout the engine’s rotation. This helps maximize torque and horsepower output, resulting in a more powerful and responsive engine. Balanced Engine Operation: By following a specific firing order, the engine can achieve a balanced cylinder firing sequence. This reduces vibrations and prevents excessive strain on engine components, leading to improved longevity and durability. Fuel Efficiency: A well-designed firing order ensures efficient combustion of the fuel-air mixture, resulting in better fuel economy. This is achieved by minimizing overlap between intake and exhaust valves and optimizing combustion chamber dynamics. Ford 6.2 Firing Order The Ford 6.2 engine, commonly found in Ford trucks and SUVs, follows a specific firing order to deliver power and efficiency. The firing order for the Ford 6.2 engine is as follows: Cylinder Number Firing Order 1 1-5-4-2-6-3-7-8 2 1-5-4-2-6-3-7-8 3 1-5-4-2-6-3-7-8 4 1-5-4-2-6-3-7-8 5 1-5-4-2-6-3-7-8 6 1-5-4-2-6-3-7-8 7 1-5-4-2-6-3-7-8 8 1-5-4-2-6-3-7-8 By following this firing order sequence, each cylinder in the Ford 6.2 engine ignites in a precise and balanced manner, ensuring optimal engine performance. It’s important to adhere to the correct firing order when performing engine maintenance or installing new components to maintain the engine’s efficiency and reliability. In conclusion, the firing order of the Ford 6.2 engine is a critical factor in achieving optimal power, balance, and efficiency. By understanding and adhering to the specific firing order sequence, you can ensure the smooth operation and longevity of your Ford 6.2 engine. So, the next time you dive under the hood, remember the importance of the firing order in unlocking the full potential of your Ford 6.2 engine. Credit: m.youtube.com Deciphering The Ford 6.2 Firing Order Decoding the Ford 6. 2 firing order is crucial for optimal engine performance. Mastering the sequence ensures smooth combustion and power output. Understand the firing order to make the most of your Ford 6. 2 engine. The firing order of an engine plays a crucial role in its performance and balance. In the case of the Ford 6.2 engine, understanding its firing order can help you optimize its power output and ensure smooth operation. In this article, we will delve into the details of the Ford 6.2 firing order, explaining the sequence of spark plug firing and how it affects engine balance and power. Explaining The Sequence Of Spark Plug Firing The Ford 6.2 engine follows a specific firing order, which determines the sequence in which the spark plugs ignite the air-fuel mixture in each cylinder. The firing order for this engine is 1-7-3-2-6-5-4-8, which means that the spark plugs in cylinders 1, 7, 3, 2, 6, 5, 4, and 8, fire in that exact order. Understanding this sequence is essential for proper ignition timing and engine performance. Here is a breakdown of the spark plug firing sequence in the Ford 6.2 engine: Cylinder 1 fires first Cylinder 7 fires next Cylinder 3 fires after that Cylinder 2 comes next Cylinder 6 follows Cylinder 5 fires next Cylinder 4 comes after that Finally, cylinder 8 fires last Each cylinder fires in a precise order, ensuring optimal engine performance. This firing order is designed to distribute the combustion events evenly across the engine, minimizing vibrations and ensuring smooth operation. How The Firing Order Affects Engine Balance And Power The firing order of an engine greatly affects engine balance and power. By following a specific sequence, the Ford 6.2 engine is designed to achieve better balance and power output. When the combustion events are evenly distributed across the engine, it results in smoother operation and reduced vibrations. This balance is crucial for the longevity of the engine components as excessive vibrations can cause premature wear and tear. The firing order also affects the power output of the engine. By firing the cylinders in a specific sequence, the Ford 6.2 engine can optimize the power delivery. Each cylinder contributes to the overall engine power, and the firing order ensures that the power strokes are evenly distributed. This results in a more efficient and

Maximize Performance: Ford 6.2 Firing Order Decoded! Read More »

Citroen Relay Van Common Problems

Citroen Relay Van Common Problems: Troubleshooting Tips & Solutions

The common problems in a Citroen Relay Van include electrical issues and gearbox failures. These problems can be a source of frustration and inconvenience for van owners. The electrical issues may manifest as malfunctioning lights, audio system problems, or battery drainage. On the other hand, gearbox failures can affect the van’s performance and result in difficulties with shifting gears. It is essential for owners to be aware of these problems and take necessary steps to address them promptly. By understanding these common issues, van owners can maintain their vehicles in optimal condition and minimize potential breakdowns and repair costs. Battery And Electrical Issues When it comes to owning a Citroen Relay van, it’s essential to be aware of common battery and electrical issues that may arise. These problems can be a significant inconvenience and sometimes even lead to a breakdown. In this section, we will discuss the signs of battery failure as well as troubleshooting steps, along with common electrical problems and their solutions. Symptoms Of Battery Failure And Troubleshooting Steps If you notice any of the following signs, it may indicate that your Citroen Relay van’s battery is failing: The engine is slow to start Dim or flickering headlights Difficulty in powering electrical components such as radio or windows Frequent need to jump-start the vehicle When faced with battery issues, it’s crucial to take the following troubleshooting steps to determine the problem: Check battery terminals for corrosion or loose connections Test the battery voltage with a multimeter If the voltage is low, try jump-starting the van and letting the battery charge If the battery fails to hold a charge, it may need a replacement Consider checking the alternator to ensure it is charging the battery properly Common Electrical Problems And Solutions Electrical issues can also occur in Citroen Relay vans. While these problems can be frustrating, they often have simple solutions. Here are a few common electrical problems and their corresponding fixes: Electrical Problem Solution The van’s lights are not working properly Check and replace any blown fuses related to the lights. If the issue persists, have the wiring inspected for potential faults. Radio or audio system failure Ensure that the radio is properly connected and check the fuses for any damage. If necessary, consult a professional for further investigation. The van’s power windows are not functioning Check the fuse box for any blown fuses related to the power windows. Additionally, inspect the wiring and switches for any loose connections or faults. The van’s central locking system stops working Examine the fuse box and replace any faulty fuses associated with the central locking system. If the issue persists, consider having the electronic control unit (ECU) checked by a qualified technician. By addressing these common electrical problems with the appropriate solutions, you can ensure that your Citroen Relay van remains in optimal working condition. Engine Malfunctions Engine malfunctions are common issues that Citroen Relay van owners may encounter during the lifespan of their vehicle. These problems can be frustrating and inconvenient, potentially impacting the van’s performance and reliability. Understanding the common engine malfunctions in Citroen Relay vans is crucial for troubleshooting and finding appropriate solutions. In this section, we will discuss how to diagnose engine issues and provide potential remedies for these problems. Diagnosing Engine Issues In Citroen Relay Vans When faced with engine malfunctions in your Citroen Relay van, it is helpful to be aware of the common symptoms that indicate underlying problems. Here are some signs that may indicate an engine issue: Irregular or rough idling Difficulty starting the engine Excessive exhaust smoke Loss of power or acceleration Engine overheating Unusual noises or vibrations By paying attention to these warning signs, you can gain valuable information to diagnose the problem more accurately. Keep in mind that a professional mechanic may be necessary for a precise diagnosis. Troubleshooting Engine Problems And Potential Solutions Once you have identified the symptoms of an engine malfunction in your Citroen Relay van, you can attempt some troubleshooting on your own before seeking professional help. Here are a few potential solutions for common engine problems: Inspect and clean the air filter: A clogged or dirty air filter can restrict airflow to the engine, leading to performance issues. Regularly inspecting and cleaning or replacing the air filter can alleviate engine problems. Check the fuel system: Ensure the fuel system is free from clogs or blockages, and verify that the fuel injectors are functioning correctly. Inadequate fuel delivery can result in poor engine performance. Examine the ignition system: Faulty spark plugs or ignition coils can cause misfires, resulting in rough idling or decreased power. Inspect these components and replace them if necessary. Monitor coolant levels and radiator: Engine overheating can occur due to low coolant levels or problems with the radiator. Regularly check and replenish coolant levels and inspect the radiator for any leaks or damage. Address electrical issues: Faulty wiring or electrical connections can lead to various engine problems. Thoroughly examine the electrical system, including the battery, alternator, and wiring, and repair or replace any damaged components. While these troubleshooting steps may help resolve minor engine malfunctions, remember that complex issues may require professional assistance. If the problem persists or worsens after attempting these solutions, it is advisable to consult a qualified mechanic who specializes in Citroen Relay vans. Transmission And Gearbox Problems Transmission and gearbox problems are common in Citroen Relay vans, causing issues with shifting gears and overall performance. These problems can be costly to fix, so it’s important to address them as soon as they arise for smoother driving experience. In the realm of Citroen Relay vans, transmission and gearbox problems can be a cause for concern. Identifying these issues promptly is crucial in order to prevent further damage and ensure the smooth functioning of your vehicle. In this section, we will discuss how to identify and troubleshoot these common transmission and gearbox problems with your Citroen Relay van. So, let’s get started! Identifying Transmission And Gearbox Issues In Citroen Relay

Citroen Relay Van Common Problems: Troubleshooting Tips & Solutions Read More »

Chevy Silverado Touch Screen Not Working

Chevy Silverado Touch Screen Not Working: Quick Fixes and Troubleshooting Tips

The Chevy Silverado touch screen not working issue can be resolved by performing a factory reset or updating the system software. If these solutions do not resolve the problem, it may be necessary to consult a professional technician for further assistance. The touch screen on your Chevy Silverado can be a convenient and user-friendly interface for accessing various features and functions. However, encountering issues with the touch screen not working can be frustrating and inconvenient. We will explore some possible solutions to the Chevy Silverado touch screen not working problem. By following these simple steps, you may be able to resolve the issue and get your touch screen functioning properly once again. Let’s dive into some troubleshooting techniques that might help you fix this problem without any professional help. Common Causes Of Chevy Silverado Touch Screen Issues If you own a Chevy Silverado and are experiencing issues with your touch screen not working, it can be frustrating. A malfunctioning touch screen can affect your navigation system, entertainment features, and overall user experience. In this blog post, we will explore the common causes of Chevy Silverado touch screen issues, helping you identify the root cause of the problem and find the right solution. Outdated Software One possible reason for your Chevy Silverado touch screen not working is outdated software. Over time, software updates are released to improve functionality and address any bugs or glitches. If your touch screen is not responsive or behaving strangely, it is worth checking if you have the latest software version installed. Updating the software on your Chevy Silverado touch screen is simple. Here are the steps: Start by turning on your vehicle and ensuring that the touch screen is powered on. Go to the settings menu on the touch screen interface. Look for the software update option and select it. Follow the on-screen instructions to check for updates and install them if available. Loose Connections Another common cause of touch screen issues in Chevy Silverado is loose connections. The touch screen relies on a series of cables and connections to function properly. Over time, these connections can become loose due to vibrations or other factors, leading to a loss of touch screen functionality. To check for loose connections and potentially resolve the issue, follow these steps: Turn off your vehicle and power off the touch screen. Locate the touch screen’s wiring harness or connection cables behind the unit. Ensure that all cables are securely connected and not loose. If you find any loose connections, gently push them back into place until they are snug. Power on the touch screen and test if the issue has been resolved. Physical Damage In some cases, physical damage can be the reason behind your Chevy Silverado touch screen not working. Accidental impacts or exposure to extreme temperatures can cause internal components of the touch screen to malfunction or become unresponsive. If you suspect physical damage as the cause, it is recommended to take your vehicle to a professional technician who can assess the extent of the damage and perform any necessary repairs or replacements. Electrical Issues Electrical issues can also contribute to touch screen problems in Chevy Silverado. Problems with the vehicle’s electrical system, such as a blown fuse or a faulty wiring connection, can disrupt the power supply to the touch screen, resulting in non-functioning or erratic behavior. If you suspect electrical issues, it is advisable to consult a qualified mechanic or electrician who can diagnose and fix the problem. They will be able to identify any underlying electrical faults and make the necessary repairs to restore the touch screen functionality. Quick Fixes For Chevy Silverado Touch Screen Problems Experiencing issues with the touch screen in your Chevy Silverado can be frustrating, especially when you rely on it for various infotainment features. However, the good news is that there are several quick fixes you can try before seeking professional help. In this section, we will explore some common solutions to Chevy Silverado touch screen problems, helping you get your infotainment system back up and running smoothly. Restarting The Infotainment System One of the first steps you can take to resolve touch screen issues in your Chevy Silverado is to restart the infotainment system. This simple yet effective solution can often fix minor glitches that may be causing the touch screen to become unresponsive. Press and hold the power button located on the infotainment screen for about ten seconds. Wait for the screen to turn off and then release the power button. After a few moments, press the power button again to turn the system back on. Performing A Soft Reset If restarting the infotainment system doesn’t solve the touch screen problem, you can perform a soft reset. This process will clear the system’s temporary files and refresh its settings. To perform a soft reset on your Chevy Silverado: Press and hold the audio system’s power button and the “Menu” button simultaneously for ten seconds. Release the buttons when the screen goes dark or the Chevy logo appears. Wait for the infotainment system to reboot. Checking For Software Updates Software updates often include bug fixes and improvements, which can potentially resolve touch screen issues in your Chevy Silverado. Therefore, it’s crucial to regularly check for and install any available software updates. Go to the “Settings” menu on your Chevy Silverado’s infotainment system. Navigate to the “Software Updates” or “System Information” section. Click on “Check for Updates” and follow the on-screen instructions to download and install any available updates. Cleaning The Screen Over time, dirt, smudges, or dust buildup on the touch screen can interfere with its functionality. Cleaning the screen is a simple yet essential step to ensure optimal touch responsiveness. Turn off the infotainment system to avoid accidental inputs. Use a microfiber cloth or screen cleaning solution specifically designed for electronics. Gently wipe the screen in a circular motion, removing any fingerprints, dirt, or residue. Avoid using abrasive materials, such as paper towels or harsh chemicals, as they

Chevy Silverado Touch Screen Not Working: Quick Fixes and Troubleshooting Tips Read More »

How to Fix Battery Saver Active Chevy Impala

How to Fix Battery Saver Active on Chevy Impala: Ultimate Guide

To fix battery saver active in a Chevy Impala, check the battery connections for corrosion and ensure they are tight. Also, inspect the battery for any signs of damage such as leaks or cracks. Are you experiencing issues with the battery saver mode on your Chevy Impala? If so, it is crucial to identify and resolve the underlying problem to prevent further damage or inconvenience. One common issue that triggers the battery saver mode is loose or corroded battery connections. By checking the battery connections for any signs of corrosion and ensuring they are properly tightened, you can potentially fix the active battery saver problem. Additionally, it is essential to inspect the battery itself to ensure there are no leaks, cracks, or other damages that may be interfering with its functionality. Taking these troubleshooting steps can help you rectify the battery saver active issue in your Chevy Impala. What Is The Battery Saver Active Feature? The Battery Saver Active feature in Chevy Impala helps fix issues with battery drainage by automatically shutting down power to certain electrical systems when the engine is off. This feature helps extend the life of the battery and ensures that it has enough power to start the vehicle. What is the Battery Saver Active feature? The Battery Saver Active feature, found in Chevy Impala vehicles, is an innovative technology designed to optimize and preserve the battery life of your car. It is a valuable addition that comes in handy, especially during long periods of inactivity or when your vehicle is parked. Explanation And Purpose Of The Battery Saver Active Feature When your Chevy Impala is equipped with the Battery Saver Active feature, it automatically activates when certain conditions are met. This feature works intelligently to prevent any unnecessary drainage of your car’s battery, ensuring that it remains fully functional when you need it. The primary purpose of the Battery Saver Active feature is to protect your battery from being drained completely. When you leave your vehicle and forget to turn off certain systems, such as interior lights or the radio, the Battery Saver Active feature steps in to prevent energy depletion. It takes action by automatically turning off certain electrical functions that are not essential for the vehicle’s operation. The Battery Saver Active feature continuously monitors the battery’s voltage levels. If it detects that the voltage is dropping to a critical level, it will activate and take necessary measures to prevent further drain. This ensures that when you return to your vehicle, the battery remains charged enough to start the engine without any issues. Effects Of The Feature On Battery Life The Battery Saver Active feature plays a crucial role in prolonging the life of your car’s battery. By preventing excessive discharge, it reduces the likelihood of the battery becoming completely depleted. This, in turn, helps to maintain the overall health and longevity of the battery. When the Battery Saver Active feature engages, it ensures that only essential electrical systems in the vehicle remain operational. This conserves battery power while your car is parked and not in use. As a result, you can rely on your battery to deliver optimal performance when you need it the most, whether it’s starting the engine or powering other electrical components. It is important to note that although the Battery Saver Active feature helps to extend battery life, it is still essential to regularly check and maintain your battery’s health. Regular battery maintenance includes cleaning the battery terminals, checking for any signs of damage or corrosion, and ensuring proper charging. In conclusion, the Battery Saver Active feature in Chevy Impala vehicles is a valuable addition that aims to optimize battery life. By automatically monitoring and controlling voltage levels, it prevents unnecessary battery drain and helps to prolong the overall lifespan of the battery. It’s a small but powerful tool that ensures your vehicle is ready to go when you are. Common Signs Of Battery Saver Active Problems Some common signs of Battery Saver Active problems in a Chevy Impala include a low battery warning, dimmed interior lights, and a decrease in performance. To fix this issue, you can check the battery connections, replace the battery if necessary, and ensure that all electrical systems are functioning properly. If you own a Chevy Impala and are facing issues with the Battery Saver Active feature, it’s essential to understand the common signs that indicate a problem. By identifying these signs early on, you can take the necessary steps to fix the issue and ensure your car’s battery performs optimally. In this section, we’ll discuss three key signs to look out for: dimming headlights, electrical malfunctions, and a rapidly draining battery. Let’s explore each of these signs in detail. Dimming Headlights One of the telltale signs of Battery Saver Active problems is noticeable dimming of your car’s headlights. When the battery saver feature is functioning correctly, it is designed to automatically reduce power consumption to prevent the battery from draining excessively. However, if you observe that your headlights are consistently dimming or flickering, even when the car is running, it could indicate a malfunction with the battery saver system. Electrical Malfunctions Another common sign of Battery Saver Active issues is electrical malfunctions throughout your vehicle. This could manifest as problems with various electrical components, such as the radio, power windows, or interior lights. If you experience issues like these, where certain electrical features are not functioning as they should or behave erratically, it’s worth investigating the battery saver system as a potential culprit. Battery Draining Quickly A fully charged battery should provide ample power to run your Chevy Impala’s electrical systems for an extended period. However, if you notice that your battery is draining much faster than usual, it could be a sign of a problem with the Battery Saver Active feature. This could be due to a faulty sensor or a glitch in the system that is causing it to activate unnecessarily, leading to increased power drain. By being aware of

How to Fix Battery Saver Active on Chevy Impala: Ultimate Guide Read More »