carinsiderhub.com

Car Brand

Jeep Cherokee Push Button Start Not Working

Jeep Cherokee Push Button Start Not Working: Troubleshooting Tips To Get You Back on the Road Fast!

If your Jeep Cherokee push button start is not working, it could be due to a malfunctioning key fob or a dead battery in the key fob. Understanding The Push Button Start System One of the convenient features of the Jeep Cherokee is the push button start system, which allows you to start your vehicle with the simple press of a button. However, there may be times when this handy feature doesn’t work as expected. In this section, we will delve deeper into how the push button start system works, explore its key components, and provide an overview of some common issues that Jeep Cherokee owners may encounter. How Does The Push Button Start System Work? The push button start system is designed to provide a seamless and effortless start-up experience for drivers. Rather than using a traditional key, this system utilizes an electronic key fob equipped with a radio frequency identification (RFID) chip. When you enter the vehicle with the key fob in your possession, the car’s onboard computer system recognizes the presence of the key and allows you to start the engine. To start your Jeep Cherokee using the push button start system, follow these steps: Ensure that the electronic key fob is within the vehicle. Press the brake pedal firmly. While keeping the brake pedal pressed, press the push button start located in the center console. The engine will start, and you can release the push button start once the engine is running. Key Components Of The Push Button Start System The push button start system consists of several key components that work together to ensure a smooth start-up process: Component Description Electronic key fob Contains the RFID chip that communicates with the car’s computer system to authorize engine start-up. Push button start A physical button located in the center console that triggers the engine start-up sequence when pressed. Brake pedal sensor Detects the presence of pressure on the brake pedal, ensuring that the vehicle is in a safe starting condition. Ignition control module An electronic module that communicates with the key fob and initiates the engine start-up process. Overview Of Common Issues With The Push Button Start System While the push button start system is generally reliable, there are a few common issues that Jeep Cherokee owners may encounter: Key fob battery failure: If the battery in your electronic key fob is low or dead, it may prevent the push button start system from working properly. Consider replacing the battery if you experience any difficulties. Brake pedal sensor malfunction: If the brake pedal sensor fails to detect pressure, the push button start system may not engage. Have the sensor inspected and replaced if necessary. Ignition control module failure: A faulty ignition control module can disrupt communication between the key fob and the vehicle’s computer system, resulting in start-up problems. A professional diagnostic may be required to address this issue. By understanding how the push button start system works and being aware of its key components and potential issues, you can troubleshoot and resolve any problems that may arise with this convenient feature in your Jeep Cherokee. Troubleshooting Tips For Push Button Start Issues If you own a Jeep Cherokee with push button start, you may have encountered situations where the push button start system refuses to work. It can be frustrating and inconvenient, especially when you’re in a hurry. However, understanding some basic troubleshooting tips can help you resolve these issues quickly and get your vehicle back on the road without any hassle. Check The Battery Of Your Key Fob The first thing you should inspect when your push button start isn’t working is the battery in your key fob. A weak or dead battery can cause communication issues between the key fob and the vehicle’s push button start system. To check the battery, follow these steps: Locate the small slot or button on your key fob designed for battery replacement. Using a small flat-head screwdriver or similar tool, gently pry open the key fob. Take out the old battery and replace it with a new one, making sure the positive (+) and negative (-) sides are properly aligned. Close the key fob and verify if the push button start is functioning correctly. Inspect The Vehicle’s Battery If the battery in your key fob is not the problem, it’s essential to examine the vehicle’s battery. A weak or discharged battery may prevent the push button start system from working as expected. To test the vehicle’s battery, you can follow these steps: Open the hood of your Jeep Cherokee. Visually inspect the battery to ensure there are no visible signs of damage or corrosion. Check the battery voltage using a multimeter. A fully charged battery should have a voltage reading of around 12.6 volts. Jump-starting The Vehicle If your vehicle’s battery is weak or discharged, you can try jump-starting the car to overcome the push button start issue. Here’s how: Locate another vehicle with a functional battery to use for jump-starting. Connect the jumper cables to the positive (+) and negative (-) terminals of both batteries, following the proper sequence. Start the other vehicle and let it run for a few minutes. Attempt to start your Jeep Cherokee with the push button start while the other vehicle is still running. Check The Electrical Connections Faulty or loose electrical connections can also cause push button start issues in your Jeep Cherokee. To ensure all connections are secure, follow these steps: Switch off the ignition of your vehicle and disconnect the negative (-) terminal of the battery. Inspect all electrical connections related to the push button start system, including wires, plugs, and connectors. Tighten any loose connections and clean any corrosion or debris using a wire brush if necessary. Examine The Brake Pedal Sensor In some cases, a faulty brake pedal sensor can prevent the push button start from working. Follow these steps to examine the brake pedal sensor: Locate the brake pedal sensor positioned near the top


Jeep Cherokee Push Button Start Not Working: Troubleshooting Tips To Get You Back on the Road Fast! Read More »

Haval H2 Problems

Haval H2 Problems: The Complete Troubleshooting Guide

The Haval H2 has some common problems such as engine reliability issues and air conditioning failures. Despite its attractive design and competitive price point, these problems may pose a significant inconvenience to owners. We will discuss these common problems in more detail, providing insights and potential solutions for Haval H2 owners. By understanding these issues, owners can be better prepared and equipped to handle any potential problems that may arise with their Haval H2. Let’s dive into the details and discover what Haval H2 owners should be aware of when it comes to these common problems. Credit: www.carexpert.com.au Troubleshooting Guide For Haval H2 Owners Get the most out of your Haval H2 with this troubleshooting guide exclusively for owners. Solve common Haval H2 problems with easy-to-follow instructions and tips, ensuring a smooth driving experience. Introduction To Haval H2 And Its Troubleshooting Guide The Haval H2 SUV has gained significant popularity in the market for its sleek design, comfortable interior, and impressive features. However, like any vehicle, the Haval H2 can experience problems that may require troubleshooting. In this guide, we will explore some of the common issues that Haval H2 owners may encounter and provide step-by-step troubleshooting solutions for each problem. Whether you are dealing with engine misfires, electrical system problems, transmission and gearbox troubles, suspension and steering complications, or common safety concerns, this guide will help you diagnose and resolve these issues efficiently. Let’s dive in. Engine Issues Engine misfire: Causes and troubleshooting steps Experiencing an engine misfire in your Haval H2 can be frustrating, but understanding the potential causes and knowing how to troubleshoot the issue can help you get back on the road in no time. Some common causes of engine misfires in the Haval H2 include: Spark plug or ignition coil problems Fuel delivery issues Vacuum leaks Faulty sensors To troubleshoot an engine misfire, follow these steps: Inspect and replace any faulty spark plugs or ignition coils. Check the fuel delivery system for clogs or pressure problems. Inspect for any vacuum leaks and address them accordingly. Test and replace any faulty sensors contributing to the misfire. Overheating problems: How to identify and resolve them Overheating is a common issue that can potentially cause severe damage to your Haval H2’s engine if not addressed promptly. Here are some steps to identify and resolve overheating problems: Check the coolant levels in the radiator and top up if necessary. Inspect the radiator for any leaks or clogs. Ensure the radiator fan is functioning properly. Verify that the water pump is working effectively. Consider flushing the cooling system to eliminate any blockages or buildup. Poor acceleration: Possible reasons and solutions If you notice a decrease in acceleration performance in your Haval H2, there are several potential reasons to consider: Clogged fuel injectors Air intake restrictions Malfunctioning oxygen sensors Dirty or faulty mass airflow sensors To resolve poor acceleration issues, you can try the following troubleshooting steps: Clean or replace clogged fuel injectors. Inspect and remove any air intake restrictions. Test and replace malfunctioning oxygen sensors. Clean or replace dirty or faulty mass airflow sensors. Electrical System Problems Battery draining quickly: Common causes and solutions If you are frequently encountering a drained battery in your Haval H2, it is essential to identify the underlying causes to prevent future inconvenience. Some common causes of a quickly draining battery include: Parasitic battery drain Faulty alternator Corroded or loose battery connections Defective electrical components To resolve battery draining issues, consider the following solutions: Identify and eliminate any parasitic battery drains. Test and replace a faulty alternator if necessary. Clean and tighten corroded or loose battery connections. Inspect and replace any defective electrical components. Malfunctioning dashboard lights: Troubleshooting steps Malfunctioning dashboard lights can be both annoying and concerning. To troubleshoot this problem, follow these steps: Check the fuse box for any blown fuses related to the dashboard lights. Inspect and replace any faulty bulbs or LED modules. Ensure that the dashboard dimmer switch is set correctly. If the issue persists, consult a professional to diagnose any underlying electrical problems. Issues with power windows: Diagnosing and fixing the problem Experiencing problems with your Haval H2’s power windows can be frustrating. Here are some steps to diagnose and fix issues with power windows: Check the fuse box for any blown fuses related to the power windows. Inspect and lubricate the window tracks to ensure smooth operation. Test and replace any faulty window switches or motors. If the issue persists, consult a professional to diagnose any underlying electrical problems. Transmission And Gearbox Troubles Transmission slipping: Causes and potential solutions If you are experiencing transmission slipping in your Haval H2, it is crucial to address the problem promptly to prevent further damage. Potential causes of transmission slipping include: Low transmission fluid levels Worn out clutch plates Faulty solenoids Damaged torque converter To resolve transmission slipping issues, consider these potential solutions: Check and replenish low transmission fluid levels. Inspect and replace worn-out clutch plates. Test and replace faulty solenoids if necessary. Consider repairing or replacing a damaged torque converter. Gear shifting problems: How to diagnose and resolve them Gear shifting problems in your Haval H2 can significantly impact your driving experience. Here are some steps to diagnose and resolve gear shifting issues: Check the transmission fluid levels and ensure they are at the appropriate level. Inspect and replace any worn-out or damaged gear shift cables. Test and replace faulty clutch sensors or switches. If the problem persists, consult a professional to diagnose any underlying transmission problems. Clutch-related issues: Troubleshooting guide for Haval H2 owners If you are experiencing clutch-related issues in your Haval H2, it is crucial to address them promptly to maintain optimal driving performance. To troubleshoot clutch problems, consider the following steps: Check and adjust the clutch pedal free play according to manufacturer specifications. Inspect the clutch master cylinder for leaks or damage. Ensure the clutch slave cylinder is working correctly. If necessary, bleed the clutch hydraulic system to remove air bubbles. Suspension And Steering Complications Excessive

Haval H2 Problems: The Complete Troubleshooting Guide Read More »

Gwm P Series Problems

Gwm P Series Problems: Troubleshooting Guide for Common Issues

The GWM P Series has been reported to have certain problems. We will discuss these issues in detail and provide solutions to overcome them. Whether you are an owner or a potential buyer, understanding these problems is crucial for making an informed decision. From engine performance to electrical glitches, we will cover all the major concerns faced by P Series owners. By the end of this article, you will have a comprehensive understanding of the common problems associated with the GWM P Series and how to address them effectively. So, let’s delve into the world of GWM P Series problems and find the best solutions for a seamless driving experience. Credit: www.amazon.com Common Gwm P Series Issues Are you experiencing problems with your Gwm P Series? You’re not alone. Here, we highlight some of the most common issues that Gwm P Series owners encounter. From engine overheating to electrical malfunctions, we cover them all. One of the main problems reported by Gwm P Series owners is engine overheating. This issue can be caused by a variety of factors, including a faulty radiator, a malfunctioning thermostat, or low coolant levels. If you notice your engine temperature gauge showing higher than normal readings or steam coming from under the hood, it’s crucial to address the problem immediately to prevent further damage to your engine. Battery drain is another frequent issue faced by Gwm P Series owners. If you find that your battery is constantly running out of charge, it could be due to a faulty alternator or a parasitic draw in the electrical system. This can result in inconvenient situations where your vehicle won’t start, leaving you stranded. It’s important to have a professional technician inspect your battery and charging system to determine the root cause of the problem. Owners of Gwm P Series vehicles have reported transmission problems, ranging from rough shifting to complete transmission failure. These issues can be caused by various factors, such as worn-out clutch components, faulty solenoids, or low transmission fluid levels. If you experience delays in shifting gears, slipping gears, or unusual noises coming from your transmission, it’s crucial to have it inspected and repaired by a qualified mechanic to avoid further damage to your vehicle’s drivetrain. Another common issue that Gwm P Series owners often encounter is suspension noise. If you notice clunking sounds or rattles coming from your vehicle’s suspension while driving over bumps or uneven roads, it could indicate worn-out suspension components, such as bushings, struts, or ball joints. A thorough inspection of the suspension system is essential to identify the exact cause of the noise and prevent potential safety hazards. Gwm P Series owners have reported various electrical malfunctions, including issues with the infotainment system, power windows, or lighting. These problems can be caused by faulty wiring, blown fuses, or malfunctioning switches. If you experience any electrical issues in your Gwm P Series, it’s recommended to consult with a qualified technician to diagnose and repair the problem, ensuring the proper functioning of all electrical components in your vehicle. Engine Overheating Engine overheating is a common issue that many GWM P Series owners may encounter. It occurs when the engine becomes too hot, usually due to a malfunction or failure in the cooling system. Ignoring this problem can lead to serious damage to the engine and other components of the vehicle, so it’s important to address it promptly. In this section, we will explore the causes of engine overheating, signs to look out for, steps to troubleshoot the issue, and preventive measures to avoid future problems. Causes Of Engine Overheating Engine overheating can be caused by various factors, including: Coolant leakage: When there is a leak in the cooling system, such as a damaged hose or a faulty radiator, the coolant levels may drop, leading to insufficient cooling and resulting in engine overheating. Malfunctioning thermostat: The thermostat regulates the engine’s temperature by determining when to allow coolant flow. If it fails to open or close properly, it can disrupt the cooling system’s operation and result in overheating. Water pump failure: The water pump is responsible for circulating coolant throughout the engine. If the pump stops working correctly, the coolant won’t flow efficiently, leading to overheating. Blocked radiator: An accumulation of debris, dirt, or contaminants in the radiator can obstruct the airflow, preventing proper cooling and causing the engine to overheat. Signs And Symptoms It’s crucial to be aware of the signs and symptoms of engine overheating, which may include: Temperature gauge in the red zone Steam or smoke coming from the engine compartment Unusual smells, such as a sweet odor from coolant Engine running at a higher temperature than usual Loss of engine power or performance Warning lights on the dashboard, such as the coolant temperature warning light Steps To Troubleshoot Engine Overheating If you suspect that your GWM P Series is experiencing engine overheating, follow these steps to troubleshoot the issue: Turn off the engine and allow it to cool down. Never attempt to open the radiator cap while the engine is still hot. Check the coolant level and top it up if necessary. Ensure the coolant used is compatible with your vehicle’s specifications. Inspect the cooling system for any visible leaks, such as coolant dripping or pooling beneath the vehicle. Examine the radiator for any blockages, such as debris or dirt. Clean or replace the radiator if needed. Check the thermostat for proper functionality. If it’s faulty, consider replacing it. Inspect the water pump for any signs of damage or failure. If necessary, have it repaired or replaced. If the issue persists, it’s recommended to consult a professional mechanic or contact the GWM P Series service center for further assistance. Tips For Preventing Engine Overheating Prevention is key when it comes to engine overheating. Follow these tips to minimize the risk of encountering this problem: Regularly check the coolant levels and top up if needed. Inspect the cooling system for leaks and address them promptly. Clean the radiator and remove

Gwm P Series Problems: Troubleshooting Guide for Common Issues Read More »

Honda B17 Service

Honda B17 Service : Unleashing the Power

The Honda B17 service includes routine maintenance and repairs for optimal vehicle performance and longevity. The Honda B17 service is an essential part of maintaining the performance and longevity of your vehicle. Regular servicing ensures that your Honda B17 is running smoothly and efficiently, while also helping to identify and address any potential issues before they become major problems. From oil changes and filter replacements to brake inspections and tire rotations, the Honda B17 service covers all the necessary maintenance and repairs to keep your vehicle in top shape. By following the recommended service schedule, you can enjoy a reliable and efficient driving experience while also extending the lifespan of your Honda B17. Understanding The Honda B17 Engine And Its Power Potential When it comes to high-performance engines, Honda has always been a brand that stands out. And one of their notable engines is the Honda B17. In this article, we will delve into the details of the Honda B17 engine, exploring its power potential and the factors that contribute to its impressive performance. Overview Of The Honda B17 Engine The Honda B17 engine is a compact, yet powerful 1.7-liter engine that is commonly found in various Honda models, including the Civic. This engine is a part of Honda’s renowned B-series lineup, known for their reliability and performance. With its lightweight construction, VTEC technology, and efficient design, the Honda B17 engine offers a thrilling driving experience. Whether you’re navigating city streets or hitting the highway, this engine delivers smooth acceleration and responsive power. Exploring The Power Capabilities Of The Honda B17 The Honda B17 engine is capable of producing impressive power figures. While the exact power output varies depending on the specific model and tuning, this engine is known to generate around 125-130 horsepower. With its strong torque delivery and high revving capabilities, the Honda B17 engine offers a dynamic driving experience that excites both enthusiasts and everyday drivers alike. To put it into perspective, the Honda B17 engine has enough power to accelerate from 0 to 60 mph in under 8 seconds, making it a formidable competitor among its peers. Whether you’re looking for a reliable daily driver or a platform for aftermarket modifications, the Honda B17 engine provides a solid foundation. Factors That Contribute To The Engine’s Power Potential Engine Design: The Honda B17 engine boasts an efficient design that maximizes power output while maintaining fuel efficiency. Its lightweight construction reduces overall engine weight, improving the power-to-weight ratio. VTEC Technology: The Variable Valve Timing and Lift Electronic Control (VTEC) technology is a hallmark of Honda engines. It allows the engine to optimize performance by adjusting valve lift and timing to deliver an optimal balance of power and efficiency. Engine Management System: The Honda B17 engine is equipped with an advanced Engine Management System that continuously monitors the engine’s operating parameters. This system ensures precise fuel injection and ignition timing, further enhancing power output. Intake and Exhaust Systems: The intake and exhaust systems of the Honda B17 engine are designed to maximize airflow, resulting in improved combustion efficiency. This, in turn, contributes to increased power delivery. By incorporating these factors into the engine’s design, Honda has created a power-packed engine that offers a thrilling and reliable driving experience. Whether you’re a performance enthusiast seeking an exhilarating ride or a regular driver looking for a dependable engine, the Honda B17 engine delivers. Enhancing Performance With Honda B17 Service Enhancing the performance of your Honda B17 engine is crucial for maximizing its power and efficiency. Regular maintenance and service play a vital role in achieving this goal. By following a routine maintenance schedule, you can ensure that your engine performs optimally, maintaining its reliability and longevity. In this section, we will explore the importance of regular maintenance and service in enhancing the performance of your Honda B17 engine. Importance Of Regular Maintenance And Service Maintaining a regular maintenance schedule for your Honda B17 engine is essential for several reasons: Optimal Performance: Regular maintenance and service ensure that all the crucial components of your engine are functioning at their best. This includes oil and filter changes, spark plug replacements, and tuning adjustments. These routine tasks help prevent any potential issues from arising and keep your engine running smoothly. Reliability: By regularly servicing your Honda B17 engine, you can minimize the risk of unexpected breakdowns or malfunctions. Timely repairs and inspections help identify and address any minor issues before they turn into major problems. This proactive approach prevents sudden breakdowns and enhances the reliability of your engine. Fuel Efficiency: A well-maintained engine operates more efficiently, resulting in better fuel economy. Regular oil changes, clean air filters, and properly inflated tires contribute to optimized performance and overall fuel efficiency. This ensures that you get the most out of every drop of fuel, saving you money in the long run. Longevity and Resale Value: Regular maintenance and service not only prolong the life of your Honda B17 engine but also maintain its resale value. A well-maintained engine with a documented service history is more attractive to potential buyers and can fetch a higher price when it comes time to sell or trade your vehicle. Key Components To Focus On For Maximum Performance When it comes to enhancing the performance of your Honda B17 engine, there are several key components that deserve your attention: Air Intake System: The air intake system plays a crucial role in supplying fresh air to the engine. Upgrading to a cold air intake system can improve airflow, resulting in increased horsepower and torque. Exhaust System: Upgrading the exhaust system, including the headers and muffler, can enhance exhaust flow and improve engine performance. This modification can lead to a more aggressive sound and increased power output. Ignition System: Upgrading the ignition system, such as installing performance spark plugs and ignition coils, can improve combustion efficiency and overall engine performance. Fuel System: Upgrading the fuel injectors and fuel pump can provide a higher volume and improved atomization of fuel, resulting in better

Honda B17 Service : Unleashing the Power Read More »

Engine Power Reduced Chevy Equinox

Boost Your Engine Power: Chevy Equinox Engine Power Reduced Solutions

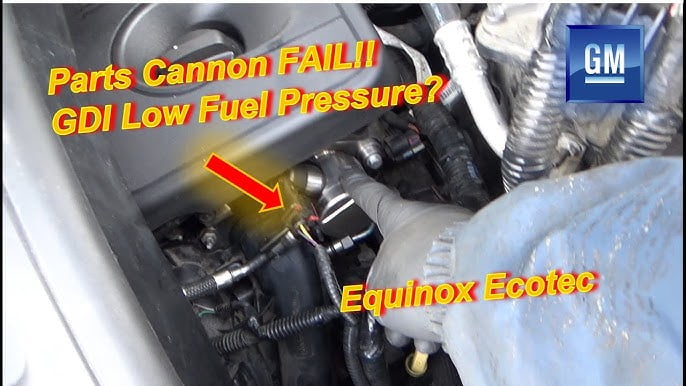
The “Engine Power Reduced” warning on a Chevy Equinox indicates a problem with the engine’s performance and requires immediate attention. This issue can be caused by a range of factors, such as a faulty sensor, spark plugs, or fuel pump problems. It is important to have the vehicle diagnosed and repaired by a qualified technician to avoid further damage and ensure optimal engine performance. Neglecting this warning could lead to serious engine issues and higher repair costs in the long run. Stay safe and get your Chevy Equinox checked by a professional if you encounter this problem. Common Causes For Reduced Engine Power In Chevy Equinox Common Causes for Reduced Engine Power in Chevy Equinox Experiencing a sudden loss of engine power in your Chevy Equinox is undoubtedly frustrating and potentially dangerous. Fortunately, there are several common causes that could be triggering this “Engine Power Reduced” warning in your vehicle. It’s important to diagnose the issue promptly to ensure your Equinox is back on the road performing at its best. In this article, we’ll explore some frequently encountered culprits responsible for reduced engine power in the Chevy Equinox. Let’s dive in! Faulty Mass Airflow Sensor One common cause behind the “Engine Power Reduced” warning in the Chevy Equinox is a faulty mass airflow sensor. This sensor is responsible for measuring the amount of air entering the engine and sending that information to the engine control unit (ECU). With a faulty sensor, the ECU may not receive accurate data, resulting in incorrect fuel injection and reduced engine power. Clogged Fuel Injectors Clogged fuel injectors can also be a culprit behind reduced engine power in the Chevy Equinox. Over time, fuel injectors can become clogged with deposits and impurities, affecting their spray pattern and the amount of fuel being delivered to the engine. This can lead to a lean or rich fuel mixture, causing engine power to be compromised. Regular maintenance, such as fuel injector cleaning, can help prevent this issue. Malfunctioning Throttle Body The throttle body plays a vital role in controlling the amount of air that enters the engine. If the throttle body malfunctions, it can disrupt the air-fuel mixture, leading to reduced engine power. Carbon buildup or electronic issues are common culprits behind throttle body malfunctions. Regular inspections and cleaning of the throttle body can help prevent this issue. Issues With The Oxygen Sensor The oxygen sensor in the Chevy Equinox monitors the level of oxygen in the exhaust gases and provides feedback to the ECU. This information is crucial for adjusting the air-fuel mixture. When the oxygen sensor malfunctions or becomes faulty, it can send inaccurate readings to the ECU, resulting in reduced engine power. Regular inspection and replacement of the oxygen sensor can help maintain optimal performance. Problems With The Fuel Pump The fuel pump is responsible for supplying fuel from the tank to the engine. If the fuel pump encounters issues, such as a clog, malfunction, or low fuel pressure, it may not deliver an adequate amount of fuel to the engine, causing reduced engine power in the Chevy Equinox. Regular maintenance and ensuring proper fuel quality can help prevent fuel pump problems. Diagnosing The Engine Power Issue Experiencing engine power issues in your Chevy Equinox can be frustrating and worrisome, but fear not! Diagnosing the problem can help you identify the underlying issue and find a solution. In this article, we will explore the steps you can take to diagnose the engine power issue in your Chevy Equinox. Understanding The On-board Diagnostic (obd) Codes When it comes to diagnosing engine power issues, the On-Board Diagnostic (OBD) system is your best friend. This system is designed to monitor and report any malfunctions occurring within your vehicle. It uses a series of fault codes, known as OBD codes, to indicate the specific problem. To access the OBD codes, you’ll need a scan tool. This tool connects to your Chevy Equinox’s diagnostic port and retrieves the codes stored in its memory. These codes can give you valuable insights into the issue at hand, making it easier to diagnose and resolve the engine power problem. Using A Scan Tool To Identify The Problem Using a scan tool is a crucial step in diagnosing the engine power issue. Once connected to your Chevy Equinox’s diagnostic port, the scan tool will retrieve and display the OBD codes. These codes will point you in the right direction, helping you narrow down the possible causes of the problem. Here are a few important points to keep in mind when using a scan tool: Read the codes: Carefully read and jot down all the OBD codes displayed by the scan tool. These alphanumeric codes provide valuable information about the issue at hand. Research the codes: Take the time to research each code to understand what it means. Online resources and automotive forums can provide insights into the possible causes and solutions for each specific code. Clear the codes: Once you have taken note of the OBD codes and researched them thoroughly, you can clear the codes using the scan tool. This step is essential as it allows you to monitor if the issue persists or if it was a temporary glitch in the system. Performing A Visual Inspection Of Key Components In addition to using a scan tool, performing a visual inspection of key components is another effective way to diagnose the engine power issue in your Chevy Equinox. This step allows you to physically assess various elements of your vehicle that may contribute to the problem. Air intake system: Ensure the air filter is clean and not clogged. Check for any loose connections or leaks within the system. Fuel system: Examine the fuel filter for any signs of clogging or damage. Inspect the fuel pump and lines for leaks or other issues. Ignition system: Check the ignition coils, spark plugs, and wires for any signs of wear or damage. Replace any faulty components. Exhaust system: Inspect the exhaust pipes and muffler for

Boost Your Engine Power: Chevy Equinox Engine Power Reduced Solutions Read More »

Cooling Performance of the Hybrid Battery is Low

Cooling Performance of Hybrid Battery: Boost it with These Power Tips!

The cooling performance of the hybrid battery is low, which can negatively impact its efficiency and overall performance. As a result, it is essential to address this issue to improve the battery’s cooling system, ensuring optimal functioning and longevity. Inadequate cooling can lead to increased temperatures, decreased power output, and potential damage to the battery cells. Implementing effective cooling mechanisms, such as improved airflow and advanced cooling systems, can help maintain the battery’s temperature within safe operating limits and enhance its overall performance. By prioritizing the cooling performance of hybrid batteries, users can maximize efficiency and prolong the lifespan of their hybrid vehicles. Credit: www.pcmag.com Importance Of Proper Cooling For Hybrid Batteries The low cooling performance of hybrid batteries emphasizes the importance of proper cooling to maintain their functionality and longevity. Proper cooling ensures that the batteries do not overheat, which can lead to reduced performance and potential damage. Significance Of Cooling In Maintaining Battery Efficiency Proper cooling is of paramount importance when it comes to hybrid batteries. These sophisticated power sources are designed to provide optimal performance and efficiency, and adequate cooling plays a vital role in achieving that goal. By maintaining the batteries at an ideal temperature, cooling systems help to ensure that the battery operates efficiently, which in turn maximizes the overall performance of the hybrid vehicle. To understand the significance of cooling in maintaining battery efficiency, we need to examine the impact of inadequate cooling on battery performance. Impact Of Inadequate Cooling On Battery Performance Inadequate cooling can have a detrimental impact on the performance of hybrid batteries. When the batteries operate at high temperatures, their capacity to store energy decreases significantly. This means that the battery may not be able to hold as much charge as intended, resulting in reduced electric driving range for the vehicle. Moreover, excessive heat can accelerate the degradation process of the battery, leading to a shorter lifespan and reduced overall performance. Thus, inadequate cooling not only compromises the efficiency of the battery but also affects the longevity of the hybrid system as a whole. The Relation Between Temperature And Battery Lifespan The temperature at which a battery operates is directly linked to its lifespan. High temperatures can drastically reduce the longevity of a hybrid battery. Research has shown that for every 10 degrees Celsius increase in temperature, the battery lifespan can be reduced by up to 50%. This is due to the accelerated chemical reactions within the battery, which lead to increased stress on the materials and components. By implementing proper cooling measures, such as active cooling systems or efficient airflow, the temperature of the battery can be maintained within an optimal range, ultimately prolonging its lifespan and ensuring its peak performance. Understanding Cooling Systems In Hybrid Batteries The hybrid battery’s cooling performance falls short, impacting its overall efficiency and longevity. Understanding the cooling systems in hybrid batteries is crucial for optimizing their performance and maintaining their health. When it comes to hybrid vehicles, one of the key components that require efficient cooling is the battery. The hybrid battery is responsible for storing and providing power to the electric motor, playing a crucial role in the overall performance of the vehicle. However, under certain conditions, the cooling performance of the hybrid battery can be compromised, leading to potential issues. In this article, we will explore the different aspects of cooling systems in hybrid batteries, including the essential components and their functions. Overview Of Cooling Systems Used In Hybrid Vehicles Hybrid vehicles are equipped with sophisticated cooling systems that help maintain optimal operating temperatures for the hybrid battery. These cooling systems are designed to dissipate the heat generated during charge and discharge cycles, ensuring a longer battery lifespan and improved performance. Let’s take a closer look at the various components that make up the cooling system. Different Components Of A Cooling System A cooling system in a hybrid vehicle comprises several components that work together to regulate the temperature of the hybrid battery. Understanding these components is crucial in diagnosing and resolving cooling performance issues. Here are the key components: Component Function Coolant The coolant acts as a heat transfer medium and circulates through the battery cooling system. It absorbs heat from the battery and carries it to the heat exchanger for dissipation. Radiator The radiator is responsible for cooling the coolant, which in turn cools down the battery. It dissipates the heat absorbed by the coolant and helps maintain the desired temperature. Fans Fans play a crucial role in the cooling system by enhancing airflow across the radiator. They ensure that the hot coolant releases its heat efficiently, preventing overheating of the battery. Heat exchanger The heat exchanger facilitates the transfer of heat between the coolant and the ambient environment. It ensures efficient dissipation of heat, maintaining the desired temperature for the hybrid battery. Conclusion In conclusion, understanding the cooling systems in hybrid batteries is vital to maintaining their performance and preventing potential issues. The coolant, radiator, fans, and heat exchanger all work together to ensure optimal temperature regulation for the battery. Regular maintenance and proper functioning of these components are essential for reliable cooling performance. By paying attention to the cooling system, hybrid vehicle owners can enjoy improved battery lifespan and overall vehicle performance. Factors Affecting Battery Cooling Performance The cooling performance of hybrid batteries is greatly influenced by various factors, leading to reduced efficiency. These factors include temperature, cooling system design, airflow restrictions, and battery chemistry. Addressing these issues is essential to enhance the overall cooling performance of hybrid batteries. Factors Affecting Battery Cooling Performance When it comes to hybrid vehicles, the cooling performance of the hybrid battery plays a crucial role in maintaining optimal efficiency. The battery cooling system aims to regulate the temperature of the battery pack to prevent overheating and ensure maximum performance and longevity. Various factors can influence the cooling performance of the hybrid battery, including ambient temperature, battery usage, and battery state of charge. H3: Ambient temperature and its effects on cooling

Cooling Performance of Hybrid Battery: Boost it with These Power Tips! Read More »