carinsiderhub.com

Car Battery

How to Reset Car Computer Without Disconnecting Battery

How to Reset Car Computer Without Disconnecting Battery: Complete Guide

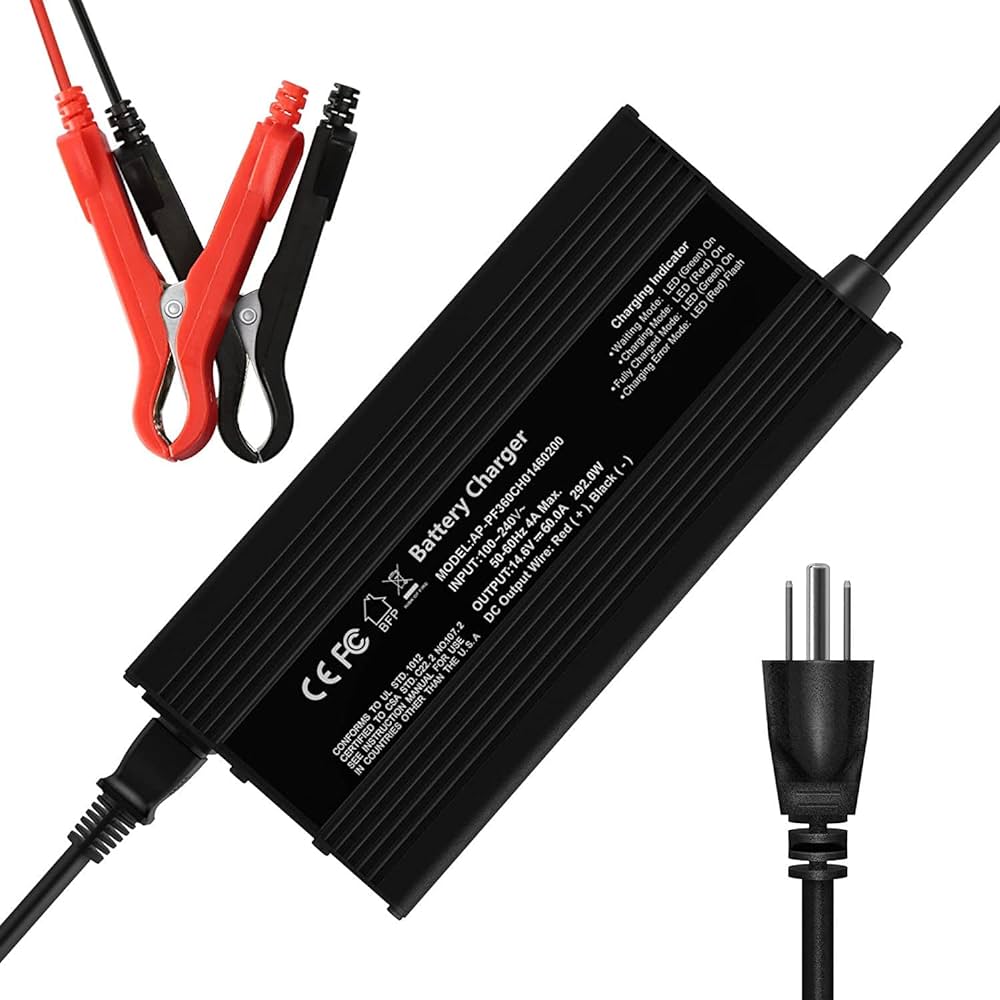
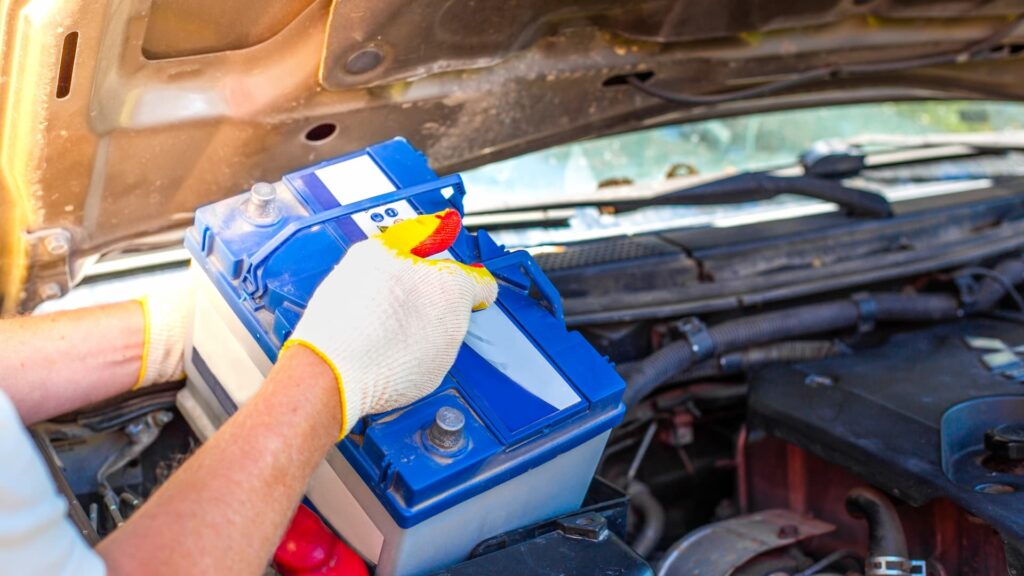
To reset a car computer without disconnecting the battery, you can remove the fuse cover and find the “Radio” and/or “Foot Lights” fuses. By pulling these fuses, you can reset the ECU/ECM without disconnecting the battery, allowing for a fresh start for the car’s computer system. Method 1: Using The Reset Button Resetting your car’s computer without disconnecting the battery is possible using Method 1: Using the Reset Button. By removing the rear wheels, bumper, fuel tank, and spare tire, you can access the hidden reset button above the left rear spring. No need to disconnect the battery or wait for an extended period. Explaining The Process Of Using The Reset Button To Reset The Car Computer: Resetting the car computer without disconnecting the battery is possible by using the reset button. This method offers a convenient way to clear the computer’s memory and resolve certain issues without the hassle of disconnecting the battery. The reset button is a hidden feature in your vehicle that allows you to reset the car computer with a simple press. Below, we will discuss the location of the reset button and provide step-by-step instructions on how to use it effectively. Location Of The Reset Button: To begin the reset process, you first need to locate the reset button in your car. The specific location of the reset button varies depending on the make and model of your vehicle. However, it is typically found in the fuse box area or the driver’s side kick panel. Consult your vehicle’s owner manual or do a quick online search to find the exact location of the reset button for your car. Step-by-step Instructions For Resetting Using The Reset Button: Turn off your vehicle and ensure that all the electrical components are switched off. Locate the reset button in your car. Refer to the owner manual or search online for the precise location specific to your vehicle. With the key or ignition in the “Off” position, press and hold the reset button. While holding the reset button, turn the key or ignition to the “On” position without starting the engine. Continue holding the reset button for approximately 10-15 seconds. Release the reset button after the specified time has elapsed. By following these simple steps, you can successfully reset your car computer using the reset button. The car computer will now restart, and any stored error codes or issues will be cleared. It is important to note that this method may not resolve all computer-related problems, and in some cases, professional assistance may be required. Overall, using the reset button is a quick and easy way to reset the car computer without disconnecting the battery. It can be a useful troubleshooting technique, especially for minor issues. However, always consult your vehicle’s manual or seek professional help if you are unsure about the process or if the problem persists. Method 2: Removing Specific Fuses To reset the car computer without disconnecting the battery, one method is to remove specific fuses. Locate the fuse box, remove the fuse cover, and then pull out the fuses associated with the ECU/ECM or other relevant components. This can help reset the car’s computer and resolve issues like a check engine light that won’t turn off. Resetting your car’s computer without disconnecting the battery is possible by removing specific fuses. This method allows you to reset the electronic control module (ECM) without the hassle of disconnecting and reconnecting the battery. Here’s how you can do it: Explaining The Process Of Resetting The Car Computer By Removing Specific Fuses The process of resetting the car computer by removing specific fuses involves accessing the fuse box and identifying the correct fuses to remove. By removing these fuses, you can reset the ECM and clear any stored error codes or malfunctions that may be affecting your vehicle’s performance. Identifying The Correct Fuses To Remove To identify the correct fuses to remove, you will need to consult your vehicle’s owner’s manual or look for a fuse diagram that is typically located on the fuse box cover. The fuse diagram will indicate which fuses correspond to the ECM or other components related to the computer system. Step-by-step Instructions For Resetting Using This Method Start by popping the hood and locating the fuse box. The fuse box is usually located near the engine bay. Remove the fuse box cover to gain access to the fuses. Refer to the fuse diagram to identify the specific fuses associated with the ECM or computer system. Using a pair of pliers, carefully remove the identified fuses by gently pulling them straight out. Leave the fuses removed for at least 10 minutes. This will ensure that any residual power in the system is fully drained, allowing for a complete reset. After the time has elapsed, reinsert the fuses back into their respective slots in the fuse box. Put the fuse box cover back on. Start your vehicle and check if the computer has successfully reset. This can be indicated by the absence of any error codes or malfunctions. By following these step-by-step instructions, you can reset your car’s computer without disconnecting the battery. This method provides a convenient way to clear any issues that may be affecting your vehicle’s performance, allowing you to get back on the road with confidence. Method 3: Resetting Through The Obd-ii Port When it comes to resetting your car’s computer without disconnecting the battery, another effective method is to use the OBD-II port. The OBD-II (On-Board Diagnostics) port is a standardized port found in most modern vehicles that allows you to communicate with the car’s computer system. This port provides access to various diagnostic and programming functions, including the ability to reset the car computer. Introduction To The Obd-ii Port And Its Functionality The OBD-II port is typically located under the dashboard on the driver’s side of the vehicle. It is a small, rectangular-shaped port with multiple pins. This port acts as a gateway to the car’s computer system, allowing you

How to Reset Car Computer Without Disconnecting Battery: Complete Guide Read More »

How Long Will Car Battery Last With Ignition On: Expert Insights

The car battery will last for many hours or even days with the ignition on. However, leaving the key in the ignition can drain the battery after about an hour, depending on the car model. Factors Affecting Car Battery Life With Ignition On When it comes to car batteries, one of the common concerns is how long they can last with the ignition on. The duration for which a car battery will last with the ignition turned on depends on various factors. Let’s explore the key factors that can affect the lifespan of a car battery when the ignition is on. Temperature Temperature plays a crucial role in determining the longevity of a car battery. Extreme temperatures, whether it’s scorching hot or freezing cold, can significantly impact the battery’s performance. In hot weather, the evaporation of battery fluid occurs faster, leading to reduced battery life. On the other hand, cold temperatures reduce the battery’s capacity to provide sufficient power. Therefore, it’s essential to consider the climate in which your vehicle operates as it can affect the overall life of the battery. Battery Age The age of the car battery is another critical factor that affects its lifespan. Over time, a battery naturally deteriorates and loses its ability to hold a charge. As the battery ages, it becomes more prone to drain quickly when the ignition is left on. It is recommended to replace your car battery every three to five years to ensure optimal performance and avoid unexpected breakdowns. Battery Capacity The capacity of the car battery plays a significant role in determining how long it can last with the ignition on. A battery with a higher capacity can provide more sustained power, allowing it to last longer. On the other hand, a battery with lower capacity will drain quicker, especially when the ignition is left on for an extended period. It’s important to choose a battery with adequate capacity based on the electrical demands of your vehicle. Electrical Load The electrical load on the battery can vary depending on the accessories and systems running in the vehicle. If you have multiple electronic devices, such as the radio, lights, or air conditioning, running simultaneously, it can increase the load on the battery. The higher the electrical load, the quicker the battery will drain with the ignition on. It’s crucial to be mindful of the electrical load you put on your car battery to ensure its longevity. In conclusion, several factors can impact the lifespan of a car battery when the ignition is on. Temperature, battery age, battery capacity, and electrical load are all crucial considerations. By being aware of these factors and taking appropriate measures, you can maximize the lifespan of your car battery and avoid unexpected breakdowns. Average Battery Life With Ignition On When it comes to the average battery life with the ignition on, there are several factors that can affect how long your car battery will last. Normal driving conditions and extreme weather conditions can both play a role in battery drain and reduce its lifespan. Let’s take a closer look at each of these scenarios. Normal Driving Conditions Under normal driving conditions, a car battery can usually last for several hours with the ignition on. The battery provides power to the electrical components of the vehicle, including the ignition system, lights, and radio. While the battery is designed to handle these power demands, it will still gradually drain over time. It’s important to note that the exact lifespan of a battery in this situation can vary depending on factors such as the age and condition of the battery, as well as the efficiency of the electrical components. However, it is generally recommended to avoid leaving the ignition on for extended periods of time to prevent unnecessary battery drain. Extreme Weather Conditions In extreme weather conditions, such as very hot or cold temperatures, the battery’s performance can be significantly affected. Cold weather, in particular, can cause the battery’s chemical reactions to slow down, reducing its ability to hold a charge and deliver power to the vehicle. In extremely cold conditions, the battery may even freeze, causing irreversible damage. On the other hand, extremely hot weather can accelerate the chemical reactions within the battery, leading to faster battery drain and a shortened lifespan. To ensure the longevity of your car battery in extreme weather conditions, it’s best to take proper precautions. This includes parking your vehicle in a climate-controlled garage or shaded area during hot weather and using a battery insulator or heater when the temperatures drop below freezing. Overall, the average battery life with the ignition on can range from a few hours to potentially a day or more, depending on the specific circumstances. It’s important to be mindful of battery drain and take appropriate measures to preserve its longevity. Regular maintenance, such as checking the battery’s voltage and ensuring all electrical components are functioning properly, can also help extend the life of your car battery. Tips To Extend Car Battery Life Regular maintenance and inspection, avoiding excessive electronics usage, and avoiding frequent short trips are all key factors in extending the life of your car battery. By implementing these tips, you can ensure that your battery lasts longer and avoid the inconvenience of a dead battery. Regular Maintenance And Inspection Performing regular maintenance and inspection on your car battery is crucial in ensuring its longevity. Here are some key maintenance practices to follow: Check the battery terminals for any corrosion buildup and clean them regularly. Inspect the battery casing for any cracks or damage and replace it if necessary. Ensure that the battery is securely fastened in its holder to prevent any vibrations or movement. Regularly check the battery’s water level and top it up if required, especially for non-sealed batteries. Avoid Excessive Electronics Usage Excessive usage of electronics in your car can put a strain on your battery and reduce its lifespan. Here are some ways to avoid excessive electronics usage: Avoid leaving your

How Long Will Car Battery Last With Ignition On: Expert Insights Read More »

How Often Does a Car Battery Need to Be Replaced

How Often Does a Car Battery Need to Be Replaced? Find Out Now!

A car battery should be replaced every four to five years, according to service experts. Factors such as driving habits and climate can affect the lifespan of a battery. It is essential to know when to replace your car battery to avoid unexpected breakdowns. In this guide, we will provide valuable information on how to determine if your MINI Cooper battery needs replacement. The average life of a car battery varies, but knowing the warning signs of a dying battery can help you make an informed decision. Some common indications include slow engine crank, clicking sound when turning the key, dim headlights, problems with electrical components, illuminated dashboard warning lights, and a swollen battery case. We will also discuss the cost of car batteries and where to find replacements. Stay informed and save yourself from the headache of a dying battery. Credit: www.jdpower.com Factors Affecting Car Battery Life The lifespan of a car battery typically ranges from four to five years, but it can vary based on various factors. Factors affecting car battery life include usage, weather conditions, maintenance, and overall battery quality. If you notice signs like slow engine crank, dim headlights, or dashboard warning lights, it may be time to replace your car battery. Understanding the factors that affect car battery life is essential for maintaining your vehicle’s electrical system and ensuring reliable performance. While service experts typically recommend replacing car batteries every four to five years, the real-world lifespan can vary depending on various factors. By considering these factors and implementing regular maintenance practices, you can prolong the life of your car battery and avoid unexpected breakdowns. Let’s explore these factors in more detail. Battery Life Estimate: 4 To 5 Years The general guideline for car battery replacement is around four to five years. This estimate takes into account typical usage patterns and industry standards. However, it’s important to note that this timeline can vary depending on the factors mentioned below. Regularly monitoring your battery’s age and health can help you determine when it’s time for a replacement and prevent unexpected failures. Real-world Battery Life Variations While the estimated lifespan of a car battery is four to five years, several factors can influence the actual duration before replacement becomes necessary. Below are some factors that play a crucial role in determining battery life: Driving Habits: Frequent short drives and not allowing the battery to fully charge can significantly reduce its lifespan. On the other hand, long-distance trips and regular highway driving can help maintain the battery’s health. Extreme Temperatures: High temperatures can accelerate chemical reactions within the battery and cause it to deteriorate faster. Similarly, extremely cold temperatures can reduce a battery’s available power, making it more susceptible to failure. Vehicle Usage: Vehicles equipped with power-hungry accessories like high-end audio systems or extensive electronics may put more strain on the battery, shortening its overall lifespan. Maintenance Practices: Regular battery maintenance, such as cleaning terminals, inspecting cables, and ensuring proper fluid levels, can help extend battery life. Neglecting maintenance can lead to corrosion and other issues that reduce battery performance. Quality of the Battery: The quality and brand of the battery itself can also impact its lifespan. Opting for reputable brands and high-quality batteries may provide longer-lasting performance. Importance Of Regular Maintenance Regular maintenance is crucial for ensuring optimal battery performance and maximizing its lifespan. By implementing the following practices, you can maintain your battery’s health: Check battery health regularly using a multimeter or with the assistance of a professional technician. This will help you identify any issues before they become severe. Clean battery terminals and connections regularly to prevent corrosion, which can impede electrical flow and reduce battery performance. Inspect cables for any signs of damage or wear and replace them if necessary to ensure proper electrical conductivity. Keep the battery clean and free from dirt and debris to prevent unnecessary strain and potential damage. Ensure the battery is properly maintained, including checking and maintaining proper fluid levels if applicable. By adhering to these maintenance practices, you can proactively identify and address any potential issues, ultimately prolonging the life of your car battery. Signs That Your Car Battery Needs Replacement Service experts estimate that car batteries should be replaced every four to five years. Signs that your car battery needs replacement include slow engine crank, clicking sound when turning the key, dim headlights, problems with electrical components, illuminated dashboard warning lights, and a swollen battery case. Take note of these warning signs to avoid any inconvenience on the road. Diminished Performance One of the signs that your car battery needs replacement is diminished performance. As your battery ages, it may not be able to hold a charge as effectively as it used to. You may notice that your car takes longer to start or that the engine cranks slowly. Diminished performance can also manifest in the form of dim headlights, as the battery struggles to provide enough power to illuminate them properly. Difficulty Starting The Car Difficulty starting the car is another clear indicator that your car battery is on its way out. If you find yourself having to turn the key multiple times for the engine to start, or if there is a clicking sound when you turn the key, it could be a sign that the battery is too weak to provide the necessary power. These issues can be particularly noticeable in cold weather when the battery’s performance tends to decrease. Frequent Need For Jump-starts If you frequently find yourself needing to jump-start your car, it is a strong indication that your battery needs replacement. Jump-starting provides a temporary boost, but if your battery consistently loses charge, it is likely nearing the end of its lifespan. Depending on external factors such as weather and driving conditions, you may need to jump-start your car more frequently as the battery wears out. Corrosion Or Leakage Another sign to watch out for is corrosion or leakage on your car battery. If you notice any build-up of white

How Often Does a Car Battery Need to Be Replaced? Find Out Now! Read More »

How to Fix Overcharged Battery

How to Fix Overcharged Battery: Expert Guide for Quick Solutions

To fix an overcharged battery, you can either replace it or repair it depending on the extent of the damage. Regular maintenance and following manufacturer guidelines are crucial for avoiding overcharging. Additionally, adding distilled water or replacing corroded components may be necessary to rectify the issue. Detecting symptoms of an overcharged battery such as reduced capacity and corrosion is essential for prompt action. Remember to always prioritize safety when dealing with batteries and seek professional assistance if needed. Overcharging a battery can lead to severe damage and potentially dangerous situations. Whether it’s a car battery or a laptop battery, overcharging can cause the internal components to mix and boil, resulting in battery melting or explosions. It is vital to understand how to fix an overcharged battery to minimize the risk of damage and ensure the efficient functioning of the device. This article will discuss various methods to rectify an overcharged battery, including replacement and repair options. We will also explore the symptoms of overcharging and the importance of regular maintenance to prevent battery damage. By following the recommended guidelines, you can effectively resolve the issues caused by an overcharged battery. Understanding Overcharged Batteries Understanding overcharged batteries and how to fix them is crucial for maintaining the longevity of your battery. Overcharging can cause the battery to melt, swell, or even explode, so it’s important to regularly check and adhere to manufacturer guidelines for battery maintenance. If the damage is extensive, it may be necessary to replace the battery and other components. What Happens When A Battery Is Overcharged? When a battery is overcharged, it can lead to several detrimental effects. Overcharging the battery causes the internal fluids, such as water and sulfuric acid, to mix and boil. This can result in the battery melting, swelling, or even exploding. The excessive heat generated from overcharging can damage the internal components of the battery, including the plates and electrolyte solution. Ultimately, overcharging reduces the battery’s lifespan and overall performance. Why Is It Important To Fix An Overcharged Battery? Fixing an overcharged battery is crucial for various reasons. Firstly, an overcharged battery can pose serious safety risks. The risk of the battery melting, swelling, or exploding increases, which can lead to injuries or damage to the surrounding environment. Secondly, an overcharged battery will have reduced capacity and performance. It may not hold a charge properly or provide sufficient power for the intended devices or vehicles. By fixing an overcharged battery, you can prevent further damage and extend its lifespan. This can save you from the inconvenience and expense of having to replace the battery entirely. Additionally, fixing an overcharged battery ensures optimal performance and reliability, allowing you to use it effectively without any issues or safety concerns. Checking And Rectifying An Overcharged Battery Rectifying an overcharged battery requires careful maintenance and adherence to manufacturer guidelines. It is important to check for symptoms such as battery swelling or damage and replace the battery if necessary. Regular maintenance and attention to the charging process can help prevent overcharging and prolong the battery’s lifespan. In order to maintain the proper functioning of your battery and prevent any potential damage, it is important to regularly check for overcharging and rectify the issue promptly. It can be tempting to overlook battery maintenance, but the consequences of an overcharged battery can be severe. By adhering to manufacturer guidelines and following proper maintenance procedures, you will not only ensure the longevity of your battery but also avoid any unexpected breakdowns or accidents. In this article, we will discuss the importance of regular maintenance and adherence to manufacturer guidelines, methods for checking an overcharged battery, and the steps for rectifying an overcharged battery. Importance Of Regular Maintenance And Adherence To Manufacturer Guidelines Regular maintenance checks and adherence to manufacturer guidelines are crucial for maintaining a healthy battery. Whether you have a lead-acid battery or a lithium-ion battery, overcharging can have severe consequences. Failure to follow recommended maintenance practices can result in the internal water and sulfuric acid mixing and boiling within the battery, leading to damage such as melting, swelling, or even exploding. By regularly inspecting the battery and following the manufacturer’s guidelines for charging, you can prevent these dangerous situations and ensure the optimal performance of your battery for years to come. Methods For Checking An Overcharged Battery Checking for an overcharged battery requires a few simple steps to determine whether there is an issue. Here are some methods you can use: Observe physical signs: Inspect the battery for any signs of swelling, melting, or leakage. These can indicate overcharging. Measure voltage: Use a multimeter to measure the voltage of the battery. If the voltage is significantly higher than the recommended range specified by the manufacturer, it may be overcharged. Check electrolyte levels: For lead-acid batteries, check the electrolyte levels. If the levels are abnormally high, it could be a sign of overcharging. Steps For Rectifying An Overcharged Battery If you have determined that your battery is indeed overcharged, it is important to take immediate action to rectify the issue. Here are the steps you can follow: Disconnect the battery: Safely disconnect the battery from any charging source or equipment. Allow the battery to cool down: Give the battery time to cool down and stabilize its temperature. Measure voltage again: After the battery has cooled down, measure the voltage once more. If it is still outside the recommended range, proceed to the next step. Drain excess charge: Depending on the battery type, you may need to discharge the excess charge by using a controlled discharging method recommended by the manufacturer. Recharge the battery correctly: Once the excess charge has been drained, recharge the battery following the manufacturer’s guidelines to ensure a proper charge without overcharging. Monitor battery performance: Keep an eye on the battery’s performance and regularly check its voltage levels to ensure it is being charged correctly and not overcharged. Replacing A Damaged Battery When it comes to fixing an overcharged battery, one possible solution is to replace

How to Fix Overcharged Battery: Expert Guide for Quick Solutions Read More »

How to Change Car Key Battery Nissan

How to Change Car Key Battery Nissan: A Step-by-Step Guide

To change the car key battery in a Nissan, first remove the hidden key from the back of the key fob. Then, use a small flathead screwdriver to pop open the key fob housing. Remove the old battery and replace it with a new one in the same position. Step 1: Removing The Key Fob Housing When it comes to changing the battery in your Nissan key fob, the first step is to remove the key fob housing. Follow these simple instructions to access the battery: Locate The Hidden Key Slot On The Back Of The Nissan Key Fob Flip over your Nissan key fob and look for a small, hidden key slot on the back. It can usually be found near the logo or on the edge of the fob. This key slot is used to open the key fob housing and access the battery. Use A Small Flathead Screwdriver To Carefully Pop Open The Key Fob Housing Once you have located the hidden key slot, take a small flathead screwdriver and insert it into the slot. Gently apply pressure and twist the screwdriver to pop open the key fob housing. Be cautious while doing this to avoid any damage to the key fob or the internal components. Once the key fob housing is open, you will have clear access to the battery. At this point, proceed to the next step to remove the old battery and replace it with a new one. Step 2: Removing The Old Battery To change the car key battery in your Nissan, start by removing the hidden key from the back of the key fob. Use a small flathead screwdriver to pop open the housing, then take out the old battery, noting its position. Finally, put the new battery in the same position and reassemble the key fob. Observe The Position Of The Old Battery Inside The Nissan Intelligent Key. When it’s time to change the battery of your Nissan car key, it’s important to first observe the position of the old battery inside the Nissan Intelligent Key. This will help ensure that you properly install the new battery in the same position, without any confusion or errors. Take a look at the old battery and note its orientation and position inside the key fob. By doing so, you will have a clear reference point to follow when inserting the new battery. Carefully Remove The Old Battery From The Key Fob. Once you have observed the position of the old battery, it’s time to carefully remove it from the key fob. To do this, follow these steps: Locate the small release latch on the key fob. Use a small flathead screwdriver or a similar tool to gently pry open the key fob housing. Inside the housing, you will find the old battery. Take note of its position once again. Carefully remove the old battery from its slot, making sure not to damage the key fob or the battery itself. By taking your time and being cautious, you can successfully remove the old battery without any issues. Remember to handle the battery with care, as it may still have some charge left and could cause harm if mishandled. Now that you have successfully removed the old battery, you’re ready to move on to the next step of replacing it with a fresh one. Step 3: Placing The New Battery To change the car key battery on a Nissan, start by removing the hidden key from the back of the key fob. Then, use a small flathead screwdriver to pop open the key fob housing. Remove the old battery, noting its position, and place the new battery in the same position. To successfully change the car key battery in your Nissan, follow these simple steps to ensure a smooth and hassle-free process: 1. Take the new battery and place it in the same position as the old one. Make sure the positive (+) and negative (-) ends are aligned correctly. This is crucial for the key fob to function properly. 2. To ensure the correct polarity, align the plus (+) and minus (-) symbols on the battery with the corresponding symbols in the key fob. Double-check to ensure that the battery is inserted securely and clicks into place. Remember, while this process may seem straightforward, it is essential to take your time and handle the battery with care. Incorrectly placing the battery can result in a malfunctioning key fob or damage to the internal components. By following these steps, you can easily replace the battery in your Nissan key fob, saving time and money on professional assistance. Now, you can enjoy uninterrupted access to your vehicle with a fully functional key fob. Changing the battery in your Nissan key fob is a quick and simple task that you can easily do at home. With proper maintenance and replacing the battery when needed, you can ensure the longevity of your key fob and hassle-free access to your Nissan vehicle. Credit: www.charlieclarknissanbrownsville.com Step 4: Closing The Key Fob Housing To change the car key battery for a Nissan, start by removing the hidden key from the back of the key fob. Use a small flathead screwdriver to pop open the key fob housing. Take out the old battery, making note of its position, and replace it with a new one in the same position. Close the key fob housing and you’re done! Find more detailed tutorials on YouTube. Carefully Align The Key Fob Housing And Snap It Back Into Place. Once you have successfully replaced the old battery with a new one, it’s time to close the key fob housing. This step is crucial to ensure that the battery is securely in place and the key fob functions properly. Begin by carefully aligning the key fob housing with the base of the key fob. Make sure that all the buttons on the housing are aligned with their respective slots on the base. Ensure A Secure And

How to Change Car Key Battery Nissan: A Step-by-Step Guide Read More »

Positive And Negative on Car Battery

Positive And Negative on Car Battery: Unveiling the Power Within

The positive terminal on a car battery is labeled with a plus sign, while the negative terminal is labeled with a minus sign. It is important to attach the red cable to the positive terminal and the black cable to the negative terminal. When it comes to car batteries, it is crucial to understand the positive and negative terminals for proper installation and maintenance. The positive terminal, often indicated with a plus sign or the label “POS,” is where the red cable should be attached. On the other hand, the negative terminal, marked with a minus sign or the label “NEG,” is where the black cable should be connected. By correctly identifying these terminals, you can ensure the efficient functioning and longevity of your car battery. We will explore the significance of positive and negative terminals on car batteries and provide essential information on their identification. Understanding Car Battery Terminals Understanding Car Battery Terminals When it comes to your car battery, it’s important to understand the positive and negative terminals. These terminals play a crucial role in the functioning of your vehicle’s electrical system. In this blog post, we will delve deeper into the world of car battery terminals and explain the significance of positive and negative terminals. The Positive Terminal And Its Labeling The positive terminal on a car battery is usually marked with a positive or plus sign. This terminal is also commonly colored red. You may also notice the symbol “POS” imprinted on the positive terminal, indicating its positive nature. The positive terminal is responsible for delivering power to the electrical components of your vehicle. The Negative Terminal And Its Labeling On the other hand, the negative terminal on a car battery is typically labeled with a negative or minus sign. This terminal is commonly colored black. You may also find the symbol “NEG” imprinted on the negative terminal, symbolizing its negative charge. The negative terminal serves as the grounding point for the electrical system of your vehicle. The Significance Of The Positive And Negative Terminals The positive and negative terminals of a car battery work together to ensure the proper functioning of your vehicle’s electrical system. The positive terminal delivers power from the battery to various electrical components such as the starter, alternator, and lights. The negative terminal acts as a return path for the electrical current, completing the circuit. This circuit allows electricity to flow through the different components of your vehicle, powering them up. It is crucial to properly connect the cables to the correct terminals when working with your car battery. To avoid any mishaps, always attach the red cable to the positive terminal and the black cable to the negative terminal. This proper connection ensures smooth and safe operation of your vehicle’s electrical system. In conclusion, understanding car battery terminals is essential for maintaining the electrical functionality of your vehicle. The positive terminal, marked with a positive sign, delivers power to various components, while the negative terminal, labeled with a negative sign, completes the circuit. Properly connecting the cables to the correct terminals is vital for the safe operation of your vehicle’s electrical system. Identifying Positive And Negative Terminals The positive terminal on a car battery is usually labeled with a plus sign or the word “positive,” while the negative terminal is labeled with a minus sign or the word “negative. ” The red cable should be connected to the positive terminal, and the black cable should be connected to the negative terminal. Stamps And Symbols Used To Mark The Terminals Car battery terminals are typically marked with stamps or symbols to indicate their polarity. The positive terminal is commonly marked with a ‘plus’ symbol (+) or the letters “POS,” while the negative terminal is marked with a minus symbol (-) or the letters “NEG.” These markings are conveniently placed on the battery to help identify the positive and negative terminals easily. Color Coding Of The Positive And Negative Cables In addition to the stamps or symbols, car battery cables are color-coded to further distinguish the positive and negative terminals. The positive cable is usually colored red, while the negative cable is colored black. This color coding system offers a visual aid in identifying the correct terminals when connecting or disconnecting the battery. Visual Inspection For Terminal Identification If the stamps or color coding on a car battery are not visible or have faded, a visual inspection can help in identifying the positive and negative terminals. Start by locating the positive terminal, which is typically slightly larger than the negative terminal. It may also have a plastic cover or cap attached to it for added protection. On the other hand, the negative terminal usually sits lower and has no additional attachments. During the visual inspection, it is essential to exercise caution. Ensure that you are working in a well-lit area, as it will allow for better visibility. Take your time to observe the battery and look for any signs of markings that indicate the positive or negative terminal. If necessary, you can use a flashlight or light source to help illuminate the area and make the identification process easier. In conclusion, identifying the positive and negative terminals on a car battery can be done through various methods. These include looking for stamps or symbols on the terminals, recognizing the color coding of the cables, and conducting a visual inspection for terminal identification. By adhering to these methods, you can confidently connect or disconnect the battery without any confusion or risk of causing electrical damage. Safety And Proper Connection The positive terminal on a car battery is usually marked with a plus sign (+) or the word “POS”, while the negative terminal is marked with a minus sign (-) or the word “NEG”. It is important to attach the red cable to the positive terminal and the black cable to the negative terminal when connecting the battery. Correctly Connecting The Red Cable To The Positive Terminal When it comes to car battery

Positive And Negative on Car Battery: Unveiling the Power Within Read More »