carinsiderhub.com

Car Battery

What Type of Acid is in a Car Battery

What Type of Acid is in a Car Battery: Unveiling the Dangers of Battery Acid

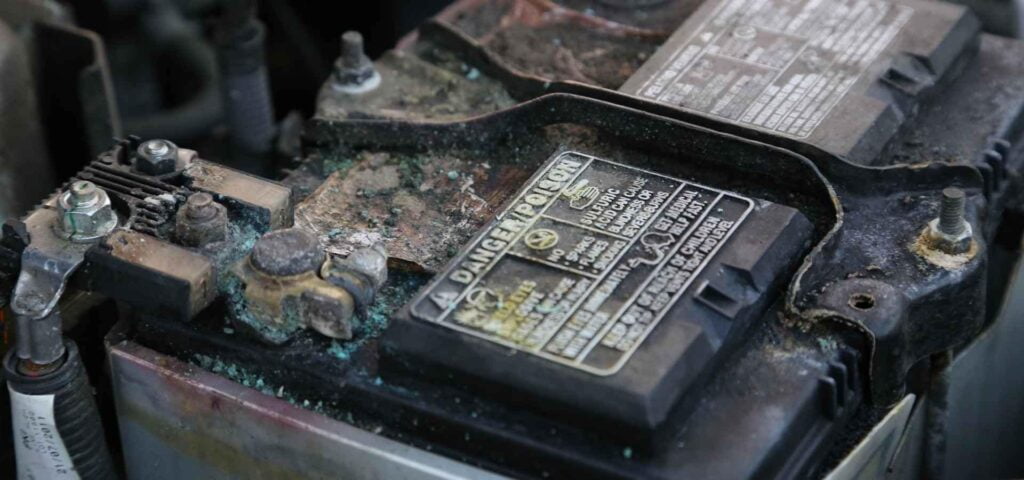
The acid in a car battery is sulfuric acid. It is highly corrosive and can cause permanent damage if it comes into contact with the eyes or is swallowed. It is important to handle car battery acid with caution to avoid any harm or accidents. Heading: Understanding Battery Acid In Car Batteries Car batteries contain sulfuric acid, which is highly corrosive and more harmful than other battery acids. Contact with the eyes can cause permanent blindness, and swallowing it can lead to internal organ damage or death. It is important to handle car battery acid with caution. Explanation Of The Composition And Importance Of Battery Acid Battery acid is a crucial component in car batteries as it serves as the electrolyte that facilitates the chemical reactions necessary for power generation. In particular, car batteries use sulfuric acid as their preferred acid due to its ability to conduct electricity efficiently. The sulfuric acid is typically diluted with water to form a solution, creating the electrolyte that allows the exchange of ions between the battery’s positive and negative terminals. The composition of battery acid in car batteries primarily consists of water and sulfuric acid, which is mixed in specific proportions to create the required concentration. This mixture is designed to provide optimal performance and longevity to the battery, allowing it to deliver a consistent and reliable source of electrical power to start the car’s engine and power its electrical systems. Introduction To The Dangers And Risks Associated With Battery Acid It’s essential to be aware of the dangers and risks associated with battery acid in car batteries. The sulfuric acid used in car batteries is highly corrosive, capable of causing severe burns to the skin and eyes upon contact. Additionally, inhaling the fumes released by battery acid can be harmful to your respiratory system. Direct contact with battery acid should be avoided at all costs, as it can lead to irreversible damage to the skin and eyes. If you accidentally come into contact with battery acid, it’s crucial to wash the affected area thoroughly with copious amounts of water and seek immediate medical attention. Furthermore, mishandling or improper disposal of car batteries can have detrimental effects on the environment. Battery acid cannot be disposed of in regular household waste as it poses a significant risk of contamination to soil and water sources, leading to pollution. Therefore, it is important to follow proper procedures for battery disposal or recycling to minimize environmental impact. Subheading: What Is Battery Acid And Its Components? In a car battery, the acid used is sulfuric acid, which is highly corrosive and can cause serious harm if it comes into contact with the skin or eyes. It’s important to handle it with caution and avoid any direct contact. Definition And Explanation Of Battery Acid Battery acid, also known as electrolyte, is a vital component of a car battery that plays a crucial role in its functionality. It is a mixture of sulfuric acid and water, creating a highly corrosive solution. The primary function of battery acid is to provide the necessary chemical reactions within the battery to generate and store electrical energy. Mentioning The Components Of Battery Acid The components of battery acid include sulfuric acid and water. Let’s take a closer look at each of these components and their importance: Sulfuric Acid: Sulfuric acid is the main ingredient in battery acid, constituting about 35% of the solution. It is a strong acid known for its powerful corrosive properties. Sulfuric acid helps to facilitate the electrochemical reactions inside the battery, allowing for the conversion of chemical energy into electrical energy. This reaction is what enables the battery to start the car’s engine and power its electrical systems. Water: Water makes up the remaining percentage of battery acid, typically around 65%. It mainly acts as a diluting agent for sulfuric acid, minimizing its intensity and making it safer to handle. Water also aids in creating a conductive medium for the movement of ions within the battery, enhancing the overall electrolytic process. It is important to handle battery acid with extreme caution, as it is highly corrosive and can cause severe damage to skin, eyes, and other surfaces. Always follow proper safety procedures and wear appropriate protective gear when dealing with battery acid. Table: Ph Values Of Some Chemicals Chemical pH Value Battery Acid (Sulfuric Acid) 1.0 Hydrochloric Acid 0.1 Vinegar (Acetic Acid) 2.4 Ammonia 11.0 As shown in the table above, battery acid (sulfuric acid) has a pH value of 1.0, indicating its highly acidic nature. Subheading: The Role Of Sulfuric Acid In Car Batteries Sulfuric acid is the type of acid found in a car battery. It is highly corrosive and can cause permanent damage if it comes into contact with the eyes or is swallowed. It is important to handle car battery acid with caution and avoid direct contact. Discussing The Specific Acid Used In Car Batteries, Which Is Sulfuric Acid When it comes to car batteries, one of the key components that plays a critical role in their functionality is sulfuric acid. Sulfuric acid is the specific type of acid used in car batteries, and it is responsible for several important functions within the battery. Highlighting The Reasons Why Sulfuric Acid Is Chosen For Car Batteries Sulfuric acid is chosen as the acid for car batteries due to a number of reasons. Let’s explore some of these reasons below: High electrical conductivity: Sulfuric acid is highly conductive, making it an ideal choice for facilitating the flow of electrons in a car battery. This property allows for efficient energy storage and discharge, enabling the battery to power various electrical components of the vehicle. Chemical stability: Sulfuric acid is a highly stable compound, which means it can withstand the demanding conditions that occur within a car battery. This stability ensures that the acid remains effective over a longer period of time, contributing to the longevity and reliability of the battery. Strong acid properties: Sulfuric acid is a strong

What Type of Acid is in a Car Battery: Unveiling the Dangers of Battery Acid Read More »

Why Does My Key Fob Not Work After Replacing Car Battery

Why Does My Key Fob Not Work After Replacing Car Battery? Troubleshooting Tips

If your key fob is not working after replacing your car battery, it may have been deprogrammed, often due to pressing buttons on the remote. Another possible reason is poor contact between the battery terminals and the terminals within the key fob. Additionally, wear and tear or damage to the key fob or wiring system can also cause the key fob to stop working. In some cases, the fuse for the control circuit or module of the keyless entry system may have blown, preventing the key fob from working. It may be necessary to reset the battery charging system monitoring system in your vehicle after replacing the battery. Credit: www.way.com Possible Causes For Key Fob Failure After Replacing Car Battery If your key fob isn’t working after replacing your car battery, there could be a few possible causes. One reason could be that the key fob has been deprogrammed, which can happen if buttons are pressed on the remote. Another possibility is that the contacts under the buttons have worn out or there is damage to the key fob or wiring system. Additionally, a bad battery in the key fob or a blown fuse could also be the reason for the failure. Before assuming the worst, it’s always a good idea to check these potential causes and try to reset the key fob if necessary. Water damage or physical trauma can cause a remote key fob to stop working. If your key fob has been exposed to water or has been physically damaged, it may need to be replaced by a mechanic or dealer. Water can seep into the sensitive electronic components of the key fob, disrupting its functionality. Similarly, physical trauma such as dropping or crushing the key fob can also damage its internal circuitry, resulting in a failure to work. Deprogramming, or the process of deleting all authorized keys from a vehicle’s onboard computer, can also cause a key fob to no longer function. This can happen if specific buttons on the key fob are accidentally pressed, triggering the deprogramming sequence. In such cases, the key fob will need to be reprogrammed by a professional in order to restore its functionality. The number one cause of a key fob not working after replacing the car battery is poor contact between the battery terminals and the terminals within the key fob. If there is insufficient contact or if the terminals are dirty or corroded, the key fob may not receive enough power to function properly. In such cases, removing the battery and cleaning the terminals with a dry cloth or alcohol can often resolve the issue. In some cases, the contacts under the buttons of the key fob can become worn out over time, resulting in a loss of functionality. Continuous use of the key fob can lead to the wearing down of these contacts, making it difficult for the buttons to establish a connection and send signals to the vehicle. If this is the case, replacing the key fob or getting the contacts repaired by a professional may be necessary. Water Damage Or Physical Trauma Have you recently replaced the battery in your car key fob only to find that it still doesn’t work? If so, the issue may not be with the battery itself, but rather with water damage or physical trauma that has affected your key fob. Understanding how these factors can cause key fob failure is essential in finding a solution to get your key fob working again. Explanation Of How Water Damage Or Physical Trauma Can Cause Key Fob Failure Water damage can wreak havoc on the delicate circuitry inside your key fob. If your key fob has been exposed to moisture, whether through a spilled drink or accidentally dropping it in water, it can cause short circuits and corrosion that prevent the key fob from functioning properly. Similarly, physical trauma such as dropping or banging the key fob can result in internal damage that disrupts its functionality. When water enters the key fob, it can corrode the electrical components, leading to a loss of connectivity and rendering the key fob inoperable. Physical trauma, on the other hand, can damage the internal circuitry, causing the key fob to malfunction. In both cases, the key fob may require replacement or repair to restore its functionality. Suggestions For Getting A Replacement Key Fob From A Mechanic Or Dealer If your key fob has suffered from water damage or physical trauma, getting a replacement key fob from a mechanic or dealer is often the best course of action. They have the expertise and tools to diagnose the issue and provide you with a suitable replacement. Here are the steps to follow: Contact your local mechanic or dealer: Reach out to a trusted mechanic or visit your car’s dealership to inquire about a replacement key fob. Provide necessary information: Be prepared to provide information about your vehicle, such as the make, model, and year, to ensure you receive the correct key fob. Get a quote: Request a quote for the replacement key fob, including any programming or installation fees that may apply. Schedule an appointment: Set up an appointment with the mechanic or dealer to have the replacement key fob programmed and installed, if necessary. Test the new key fob: Once the replacement key fob is installed, test it to ensure it is working properly. Following these steps will help you obtain a functioning key fob to regain control over your car’s keyless entry system. Remember, it’s important to address water damage or physical trauma promptly to prevent further damage and ensure the long-term functionality of your key fob. Deprogramming Of The Key Fob If your key fob stops working after replacing your car battery, it may have been deprogrammed. This can happen when buttons on the remote are pressed, causing the vehicle’s computer to delete all authorized keys. Resetting the key fob or getting a replacement may be necessary. Definition Of Deprogramming And How It Can

Why Does My Key Fob Not Work After Replacing Car Battery? Troubleshooting Tips Read More »

Which Terminal is Positive on a Car Battery

Which Terminal is Positive on a Car Battery? Find out the Right Way to Connect

The positive terminal on a car battery is usually red and has a plus (+) sign. When removing the old battery, remember to disconnect the cables from the negative terminal first, which is usually black and has a minus (-) sign. Following this order will prevent accidental sparks and electrical shorts. Heading 1: Understanding Car Battery Terminals When it comes to car batteries, understanding the terminals is crucial. The positive and negative terminals play a vital role in connecting the battery to the vehicle’s electrical system. Connecting the battery correctly ensures optimal performance and prevents potential damage. Let’s dive deeper into the explanation of the importance of understanding car battery terminals. Explanation Of The Importance Of Understanding Car Battery Terminals The correct connection of the battery terminals is essential to ensure the smooth functioning of your vehicle’s electrical system. Here’s why it’s crucial: Prevention of Damage: By connecting the positive and negative terminals correctly, you minimize the risk of damaging the battery or electrical components. Connecting the terminals improperly can lead to short circuits or electrical surges, potentially causing expensive repairs. Optimized Performance: When the positive and negative terminals are connected correctly, the electrical current flows in the intended direction, allowing the battery to deliver its maximum power. This optimized performance translates into more efficient starting, better fuel efficiency, and smoother operation of various electrical systems, such as lights, radio, and air conditioning. Jump-Starting Safely: In the event of a dead battery, jump-starting becomes necessary. By understanding the terminals, you can confidently connect the jumper cables to the correct terminals, reducing the risk of sparking or damaging the vehicles involved. Now that we’ve highlighted the significance of connecting the battery correctly, let’s discuss how to identify the positive and negative terminals. How To Identify Car Battery Positive And Negative Terminals Identifying the positive and negative terminals on a car battery is essential for safe and proper connection. Here’s how you can determine which terminal is which: Color Coding: Generally, the positive terminal is colored red, and the negative terminal is colored black. However, it’s essential to double-check the markings on the battery to ensure accuracy. Terminal Markings: The positive terminal is typically marked with a “+” symbol or the word “POS.” Conversely, the negative terminal is marked with a “-” symbol or the abbreviation “NEG.” These markings can be found on the top of the battery, near the terminals. Terminal Size: Another clue to identify the positive terminal is the size. In most cases, the positive terminal is slightly larger than the negative terminal. This size difference helps prevent accidental reverse connections. By considering these factors, you can confidently determine the positive and negative terminals on a car battery. Remember, always prioritize safety when working with car batteries. If you’re unsure or uncomfortable, it’s best to consult a professional. Credit: www.firestonecompleteautocare.com Heading 2: Identifying The Positive Terminal Which Terminal is Positive on a Car Battery When it comes to car batteries, it’s essential to correctly identify the positive terminal for various purposes such as jump-starting, battery replacement, or simply understanding how the electrical system of your vehicle works. In this section, we will explore the physical features of the positive terminal and how to visually recognize it through specific cues. Explanation Of The Physical Features Of The Positive Terminal The positive terminal of a car battery can be easily distinguished by its unique physical characteristics. Most often, the positive terminal is color-coded red and displays a plus (+) sign. Additionally, it is typically larger in size compared to the negative terminal. These distinguishing features make it easier to differentiate between the positive and negative terminals, ensuring the correct connection of cables and components. How To Recognize The Positive Terminal Through Visual Cues There are a few visual cues that can help you identify the positive terminal on a car battery: The positive terminal is usually labeled with a plus (+) sign or the word “POS.” In most cases, the positive terminal is color-coded red. It may also have red wires or a red cap/ring around it. Compared to the negative terminal, the positive terminal is often larger in size. By recognizing these physical features and visual cues, you can confidently locate the positive terminal on your car battery for various electrical tasks. Heading 3: Different Terminology For Positive Terminal When it comes to identifying which terminal is positive on a car battery, you can look for the red terminal, which is usually marked with a plus (+) sign. The positive terminal is larger than the negative terminal and is connected to components like the starter motor and alternator. Explanation Of Alternative Labels For The Positive Terminal When it comes to car batteries, understanding the different terminology used for the positive terminal is essential. While the positive terminal is typically labeled with a plus (+) sign, there are alternative labels that can also indicate the positive terminal. Here are some of the common symbols and labels: Symbol/Label Description + The plus symbol (+) is universally recognized as the indication of the positive terminal. It is often found on the positive terminal itself. POS Some car batteries may have the label “POS” stamped on the positive terminal, which is short for positive. P Another alternative label for the positive terminal is the letter “P.” This label can also be used to indicate the positive connection. It’s important to note that regardless of the label used, the positive terminal will always be associated with the red cable or a red cap. This visual cue is particularly helpful when identifying the positive terminal. Heading 4: Connecting The Battery When connecting a car battery, it is important to follow the proper sequence to ensure a safe and successful connection. Here’s a step-by-step guide: Start by identifying the positive and negative terminals on the battery. The positive terminal is usually marked with a plus sign (+), while the negative terminal is marked with a minus sign (-). Next, ensure that the car engine is turned

Which Terminal is Positive on a Car Battery? Find out the Right Way to Connect Read More »

How to Change Car Key Battery Toyota

How to Change Car Key Battery Toyota: Easy DIY Steps

To change the car key battery on a Toyota, fit a small screwdriver into the slot where the key fits and gently open the fob. Remove the green circuit board and replace the battery. Step 1: Opening The Key Fob To change the car key battery for a Toyota, first, fit a small screwdriver into the slot that the key fits into and open the fob. Then, gently remove the green circuit board to access the battery. Replace the battery and be careful not to damage any components. To change the car key battery in your Toyota, the first step is to open the key fob. This can be done easily by following a few simple steps: Fit a small screwdriver or flat object into the slot that the key fits into. This slot is typically located at the top or bottom of the key fob. Gently apply pressure and pop open the key fob without causing any damage to the components inside. It’s important to be careful while opening the key fob to avoid any unnecessary damage. Once the key fob is open, you can proceed to the next step of changing the battery. Step 2: Removing The Circuit Board To change the car key battery in a Toyota, use a small screwdriver to open the fob and remove the green circuit board. Be careful not to damage the components. Replace the battery and reassemble the key fob. For detailed instructions, search “How to Change Car Key Battery Toyota” on Google. To change the car key battery in your Toyota, you’ll need to remove the circuit board from the key fob. This step is crucial in accessing the battery and replacing it. Here’s how you can do it: Prepare the key fob: Fit a small screwdriver or a flat object, such as a coin, into the little slot that the key fits into. Apply gentle pressure to pop open the fob and reveal the circuit board inside. Handle with care: Once you have the key fob open, you’ll need to remove the green circuit board. It’s important to handle it gently to avoid damaging any of the components. Take your time and be cautious while doing this step. Note: Some Toyota models may have slight variations in the process. Please consult your owner’s manual for specific instructions tailored to your vehicle. Once you have safely removed the circuit board, you’ll be able to access the battery and proceed to the next steps of replacing it. This DIY process saves you time and money, allowing you to easily change the battery without the need for any specialist skills. Remember, when handling the circuit board, be gentle and avoid putting unnecessary pressure or force on the components. This will ensure that you don’t accidentally cause any damage. Step 3: Replacing The Battery To change the car key battery in a Toyota, begin by inserting a flat object into the slot on the key fob to open it. Gently remove the green circuit board and replace the battery. Make sure not to damage any components during the process. Consult The Manual To Determine The Battery Size Required Before replacing the battery in your Toyota car key, it’s essential to consult the manual to determine the battery size required. Different Toyota models may require different battery sizes, so it’s crucial to verify the correct one to ensure a successful replacement. Once you have identified the appropriate battery size, you can proceed with the replacement process. Remember to always use caution when handling delicate electronic components. Take Note Of How The Battery Is Placed In The Case Before removing the old battery from your Toyota car key, it’s essential to take note of how it is placed in the case. This way, you can ensure that the new battery is inserted correctly, eliminating any potential issues with the key functioning after the replacement. Observe the battery’s orientation and the position of any connectors or tabs. You may find it helpful to take a picture or make a simple diagram to reference during the replacement process. Replace The Old Battery With A New One Now that you have consulted the manual for the required battery size and taken note of how the old battery is placed in the case, you can proceed with replacing it. Follow these steps: Using a small screwdriver or another flat object, like a coin, locate the little slot that the key fits into on the key fob. Gently insert the screwdriver or flat object into the slot and apply slight pressure to pop open the key fob. Take care not to damage any components while opening the key fob. Locate the green circuit board inside the key fob and carefully remove it. Take out the old battery and dispose of it properly. Take the new battery of the correct size and insert it into the key fob, following the orientation and placement you noted earlier. Ensure the battery is securely in place. Place the circuit board back into the key fob, aligning it properly. Snap the key fob case shut by pressing the two halves together firmly. Once you have completed these steps, your Toyota car key will have a fresh battery, ensuring optimal performance. Note: It’s always a good idea to test the key fob to ensure the battery replacement was successful. If the key fob doesn’t work as expected, double-check the battery orientation and placement. Credit: www.amazon.com Step 4: Closing The Key Fob To change the car key battery for a Toyota, first, use a small screwdriver to pop open the key fob. Gently remove the green circuit board and replace the battery. Now that you have replaced the battery in your Toyota key fob, it’s time to close it back up. Follow these steps to ensure that your key fob is securely closed and ready to use: Place the circuit board back into the key fob case: Take the circuit board and carefully insert it back

How to Change Car Key Battery Toyota: Easy DIY Steps Read More »

How to Change Car Key Battery Honda: Easy Steps for Replacement

To change the car key battery for a Honda, first, press and slide the button to release the metal key, then slide the key out. Use the key or a small flathead screwdriver to pry out the battery and replace it with a fresh one. It’s a simple task that can be done quickly and inexpensively at home, without requiring any specialized skills. Just make sure to get the right battery size for your Honda key fob. If the key fob battery dies, it won’t be able to broadcast the signal the ignition system needs, and you won’t be able to start your car. However, you can easily reprogram your Honda key fob after changing the battery. 2. Understanding The Honda Key Fob And Battery Replacement Learn how to easily change the battery in your Honda car key fob with our step-by-step guide. No need to visit a dealership or spend a lot of money – you can do it yourself at home. Watch our video tutorial or read our instructions for a hassle-free battery replacement. When it comes to your Honda key fob, understanding how it works and the importance of its battery replacement is crucial. The key fob system in a Honda is designed to provide convenience and security by allowing you to remotely lock, unlock, and start your vehicle. To ensure smooth functionality, it is essential to familiarize yourself with the key fob and its battery replacement process. Overview Of The Honda Key Fob System The Honda key fob system consists of a small handheld device that uses radio frequency signals to communicate with your vehicle. The key fob houses buttons that correspond to various features, such as locking and unlocking the doors, opening the trunk, and activating the panic alarm. Each button press sends a unique code to your Honda, triggering the desired action. Introduction To The Key Fob Battery And Its Role In order to power the key fob’s radio frequency transmitter and maintain its functionality, a small lithium battery is used. The key fob battery ensures that the signals are transmitted effectively and allows you to control your vehicle remotely without any glitches. Over time, the battery’s power will diminish, leading to decreased signal strength and potential malfunction of the key fob system. Regularly checking and replacing the car key battery is crucial to ensure continuous functionality of the key fob system. A dead key fob battery can prevent the transmission of signals, rendering your key fob useless. By replacing the battery when necessary, you can avoid any inconvenience or potential security risks associated with a malfunctioning key fob system. Significance Of Replacing The Car Key Battery When Necessary Replacing the car key battery when necessary is essential for a smooth and hassle-free experience with your Honda key fob. By keeping a fresh battery in your key fob, you can ensure optimal signal transmission, allowing you to lock, unlock, and start your vehicle without any issues. Additionally, a properly functioning key fob system enhances the security of your Honda, providing peace of mind. Moreover, replacing the car key battery is a relatively simple and cost-effective task that can be done at home. With the right battery and a few easy steps, you can avoid the need for professional assistance and save both time and money. Credit: www.smarthondadesmoines.com 3. Step-by-step Guide To Changing The Car Key Battery Changing the car key battery for your Honda is a simple and cost-effective task that you can do yourself. By following this step-by-step guide, you’ll be able to replace the battery in your Honda key fob with ease. Let’s get started! Step 1: Accessing The Honda Key Fob To begin, locate the Honda key fob that requires the battery replacement. Hold the key fob in your hand and identify the button or switch that releases the metal key. Press or slide this button to release the key, and then gently slide the key out. Set the metal key aside, as it is not directly related to the battery replacement process. Step 2: Removal Of The Metal Key With the metal key removed, you can now focus on the key fob itself. Take a small flathead screwdriver or a similarly sized tool and carefully insert it into the small seam or slot on the side of the key fob. Gently pry the key fob open, being cautious not to use excessive force. Slowly work your way around the edges of the key fob to release the two halves, effectively opening the key fob to reveal the internal components. Step 3: Locating The Battery Compartment Within the key fob, you should now be able to see the battery compartment. This compartment is a small cavity that holds the battery securely in place. Take a moment to visually locate the battery compartment before proceeding to the next step. Step 4: Opening The Battery Compartment To open the battery compartment, you may need to use a small flathead screwdriver or your fingernail to gently pry it open. Insert the screwdriver or use your nail to carefully lift the plastic cover that secures the battery compartment closed. Once the cover is lifted, set it aside in a safe location. Step 5: Removing The Old Battery Now that the battery compartment is open, you can remove the old battery. Take note of the battery’s position and orientation. Carefully use your fingers or non-metallic tweezers to lift the old battery out of the compartment. Dispose of the old battery responsibly and avoid any contact with your skin, as batteries may contain harmful substances. Step 6: Inserting The New Battery With the old battery removed, it’s time to insert the new one. Take the new battery and ensure that it matches the specifications of the old battery. Place the new battery into the battery compartment, aligning it properly with the designated slots or markings. Gently press the battery down to ensure a secure fit. Step 7: Testing The Key Fob Functionality Before reassembling the key

How to Change Car Key Battery Honda: Easy Steps for Replacement Read More »

How Many Watt Hours in a Car Battery

How Many Watt Hours in a Car Battery: Exploring the Power Potential

A car battery typically has an average watt-hour rating, determined by the combination of its voltage and the ampere-hours it can deliver. Understanding the concept of amperes and voltage is important to calculate the watt-hours in a car battery. Car batteries come in different types, each with its own watt-hour capacity. When it comes to determining the wattage of a car battery, you need to consider the voltage and the ampere-hours it can deliver. Car batteries typically have an average watt-hour rating, which is calculated by multiplying the voltage and the ampere-hours. Understanding the terminology associated with batteries, such as amperes, voltage, and watt-hours, is crucial when dealing with car batteries and their capacity. Different types of car batteries have different watt-hour capacities, allowing for various power needs. Understanding The Basics: Amperes And Voltage When it comes to determining the number of watt-hours in a car battery, it is essential to have a clear understanding of the concepts of amperes and voltage. These two factors play a crucial role in calculating the energy capacity of a battery. Definition Of Amperes And Voltage In Relation To Car Batteries Amperes, often referred to as amps, are the measure of electric current flowing through a circuit. It indicates the rate at which electricity is flowing. Amps determine the strength of the electrical current, and a higher amp rating signifies a greater flow of electrons. Voltage, on the other hand, represents the force or pressure that pushes the electricity through the circuit. It is measured in volts and determines the potential energy of the electricity. The higher the voltage, the more power is available to perform work within a circuit. Importance Of Understanding These Concepts To Determine Watt-hours Understanding the concepts of amperes and voltage is crucial in calculating watt-hours in a car battery. Watt-hours, measured in watt-hours (Wh), represent the total amount of energy a battery can deliver over a specific period of time. To determine the watt-hours, one needs to multiply the voltage (V) and the amp-hours (Ah) of the battery. The amp-hours represent the amount of current a battery can provide over time. By multiplying the voltage and the amp-hours, you can calculate the total energy capacity of the battery in watt-hours. Variable Symbol Formula Watt-hours Wh Volts (V) x Amp-hours (Ah) By understanding the relationship between amperes, voltage, and watt-hours, you can accurately determine the energy capacity of a car battery. This information is vital when considering the power requirements for various car accessories, such as audio systems or portable devices. The Average Wattage Of A Car Battery The average car battery has a certain watt-hour capacity, which is determined by the amperes and voltage. It’s important to understand these concepts to calculate the watt hours in a car battery accurately. Exploring The Typical Wattage Of A Car Battery When it comes to understanding the average wattage of a car battery, it’s important to first grasp the basic concepts of amperes and voltage. These two factors play a crucial role in determining the overall wattage output of a car battery. Factors That Can Affect The Wattage Output Battery Type: Different types of car batteries have varying wattage outputs. For example, a standard lead-acid battery typically has an average wattage of around 600-700 watts, while a deep cycle battery can have a higher wattage output due to its ability to handle continuous power discharge. 2. State of Charge: The state of charge of a car battery, which indicates its level of remaining charge, can also impact the wattage output. A fully charged battery will have a higher wattage output compared to a partially charged one. 3. Battery Age: The age of a car battery can affect its overall wattage output. As the battery gets older, its capacity to deliver power may decrease, resulting in a lower wattage output. 4. Temperature: The temperature can also have an impact on the wattage output of a car battery. Extreme temperatures, both hot and cold, can reduce the battery’s efficiency and therefore its wattage output. 5. Accessories and Electrical Load: The number and type of accessories connected to the car battery can also affect its wattage output. An increased electrical load from devices such as headlights, radios, and air conditioning can put a strain on the battery and reduce its overall wattage output. It’s important to note that these factors are not exhaustive and may vary depending on the specific car battery and its usage. By understanding the typical wattage of a car battery and the factors that can affect it, you can make informed decisions about your vehicle’s power needs. Calculating Watt-hours In A Car Battery Calculating watt-hours in a car battery requires understanding amperes and voltage. With various battery types available, it’s crucial to know the average wattage before use. Understanding the watt-hour capacity of a car battery is crucial when it comes to determining its energy storage capabilities. By knowing the watt-hours, you can estimate how long a car battery will last or how many electronic devices it can power. Step-by-step Process To Determine The Watt-hour Capacity Of A Car Battery Identify the Amp-Hour rating: Locate the Amp-Hour (Ah) rating on the car battery. This information is usually printed on the battery itself, or you can refer to the manufacturer’s specifications. Find the Voltage: Note down the voltage rating of the car battery. Most car batteries operate at 12 volts, but it’s essential to confirm this information as it can vary depending on the battery type. Multiply Amp-Hours by Voltage: Multiply the Amp-Hour rating with the voltage to calculate watt-hours. The formula is: Watt-Hours = Amp-Hours × Voltage. For example, let’s assume you have a car battery with an Amp-Hour rating of 50 Ah and a voltage of 12 volts. To determine the watt-hour capacity, you would use the following calculation: Watt-Hours = 50 Ah × 12 volts = 600 watt-hours Example Calculations For Better Understanding Here are a few examples of watt-hour calculations for different car batteries: Car Battery Amp-Hour

How Many Watt Hours in a Car Battery: Exploring the Power Potential Read More »